Important Travel Guide for First Time in Paris

Paris! It’s one of my favorite cities in the world and a place that I instantly fell in love with. My husband and I visited Paris this summer and I feel like it’ll take me a lifetime to see it completely. I am a city girl so naturally I love all the crowd, chaos, buzz and liveliness. And if that’s what you like too, you’re going to love Paris. I’ve heard many unpopular opinions about this city being a dirty place, people being rude, scams with tourists etc. Honestly, none of this bothered me because there’s just so much more to love about this city. And if you follow all the tips that this Paris travel guide mentions, none of that should bother you as well. Besides, after seeing all its glitz and glam in the Netflix show – Emily in Paris, I sure didn’t want to miss a chance to witness all that myself.

Planning a trip with Paris Travel Guide

Understandably, planning a trip to this beautiful city is hard. There’s a lot to prepare in terms of getting a travel visa, booking the best hotel and flight, planning the best itinerary, making all bookings in advance, researching the best cafes and so on. I had so many questions on all of these and did a lot of research. I mostly started planning by reading through some amazing travel blogs where I found not just the itineraries but also a lot of helpful tips. Some of the these Paris travel guides are what helped me plan effortlessly.

So, I wanted to share an important Paris Travel Guide here for you all to plan your perfect itinerary. Below is the list of all questions that could come to you as you plan and I have tried my best to answer them based on my experience.

Do you need a travel visa? If yes, what does the process look like?

My husband and I live in the US and we’re currently on the H-1B work visa. So, we needed a Schengen visa to travel to Paris. This visa allows you to enter the Schengen area, which includes 27 European countries. So, ideally you can apply for a visa through the consulate of any one of these 27 countries and as long as you get your Schengen visa approved you can travel to any of these countries.

We decided to apply for our visa through the French consulate on the VFS global website. From what I have heard, the French consulate is the easiest to go through and you may even end up getting the visa for a longer duration than usual (3-6 months) if you’re lucky. The visa type we applied for is called the short stay visa which is typically for anyone that will be staying in France for 3 months or less. The process entails completing and submitting a brief form with all your details on the website and then booking a biometric appointment at your nearest VFS center. After your appointment, it shouldn’t take more than 3 weeks for you to get your passport back.

Keep in mind

Keep in mind that you need a valid proof of your travel reservations (flights, hotels, advance bookings, modes of payment etc.) when filling up the application as you won’t be able to book your visa appointment without that. So plan everything accordingly and make sure that you have all the bookings in place when applying for the visa. Upon our research, we learnt that many people make dummy bookings for the application process, which they then cancel once their visa is approved.

You could try that option if you’re not sure of your travel plans and need more time but we didn’t go through that. Since we were sure of our trip and we planned ahead of time, we knew we’d get the visa in time to keep our reservations. Also, we made refundable bookings wherever possible so that we could cancel or postpone in case our visa got delayed. 

But if you’re booking last minute and are not sure if your visa will come through in time, dummy reservations might be a good idea.

Another important tip with Paris Travel Guide-

Be sure to plan your travel such that you end up spending more nights in the country that you’re applying through. This is relevant if you’re visiting multiple countries in the same trip. We had plans to visit France and Switzerland and our itinerary was 10 days (and 9 nights) long. Since we were applying through the French embassy, we booked 5 nights in France and 4 nights in Switzerland. It’s important to book more nights and not confuse that with days as the consulate counts by the total number of nights you spend and not the number of days.

How many days is sufficient in Paris?

I don’t think there’s a right answer to this question. I had the same question on my mind because it was my first time in Paris and I didn’t want to miss a thing. But this city is massive and it has so much to offer that even a week may not be sufficient. However, if you don’t have that kind of time, then 4-5 days should be enough to cover all the tourist spots and soak in the vibe of the city. We planned for 5 days and were able to cover pretty much all the big spots. 

What is the best time to visit?

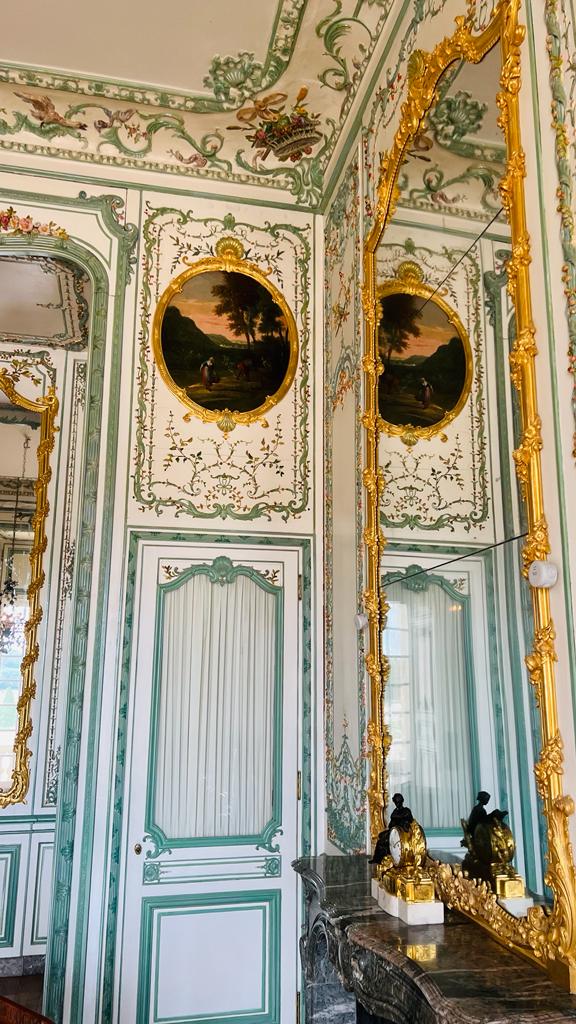
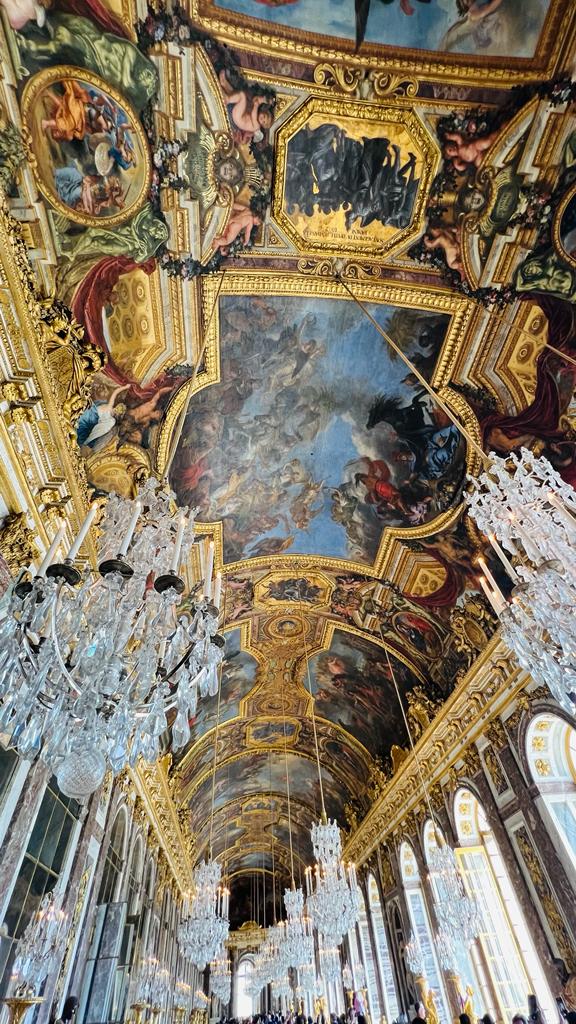
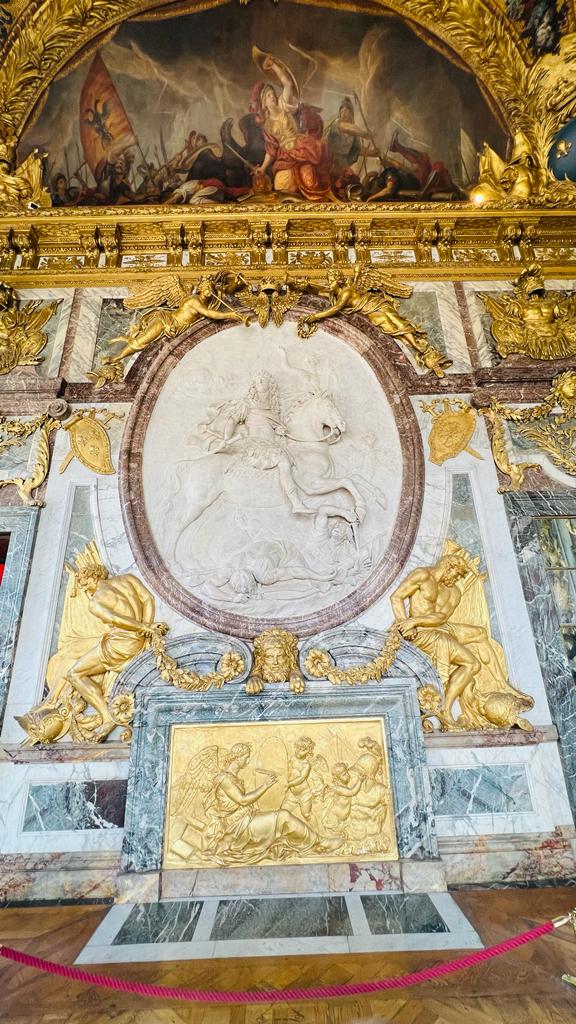
Undoubtedly, Spring and Summer are the best time to visit. The winter season has its own charm but you’re going to have more fun and will be able to enjoy more attractions if you plan in summer. We went in July and the weather was perfect. It wasn’t uncomfortably hot and was pleasant enough for us to be out all day. Also, if you have Palace of Versailles on your list, then I suggest going in summer because the Palace hosts multiple shows such as the musical fountain show that are open in the summer months. Also, the gardens in the palace are in full bloom in summer.

Read my blog here on an important guide for visiting the Palace of Versailles. You’d also have more fun doing the river cruise on the Seine river if you plan in the summertime.

However, this does come with the disadvantage that it’s very crowded in summer . So you may end up waiting in long lines to access the museums and other tourist spots. It might be a good idea to hit these spots early in the morning if you want to beat the crowd. But just something worth considering!

Where to stay in Paris?

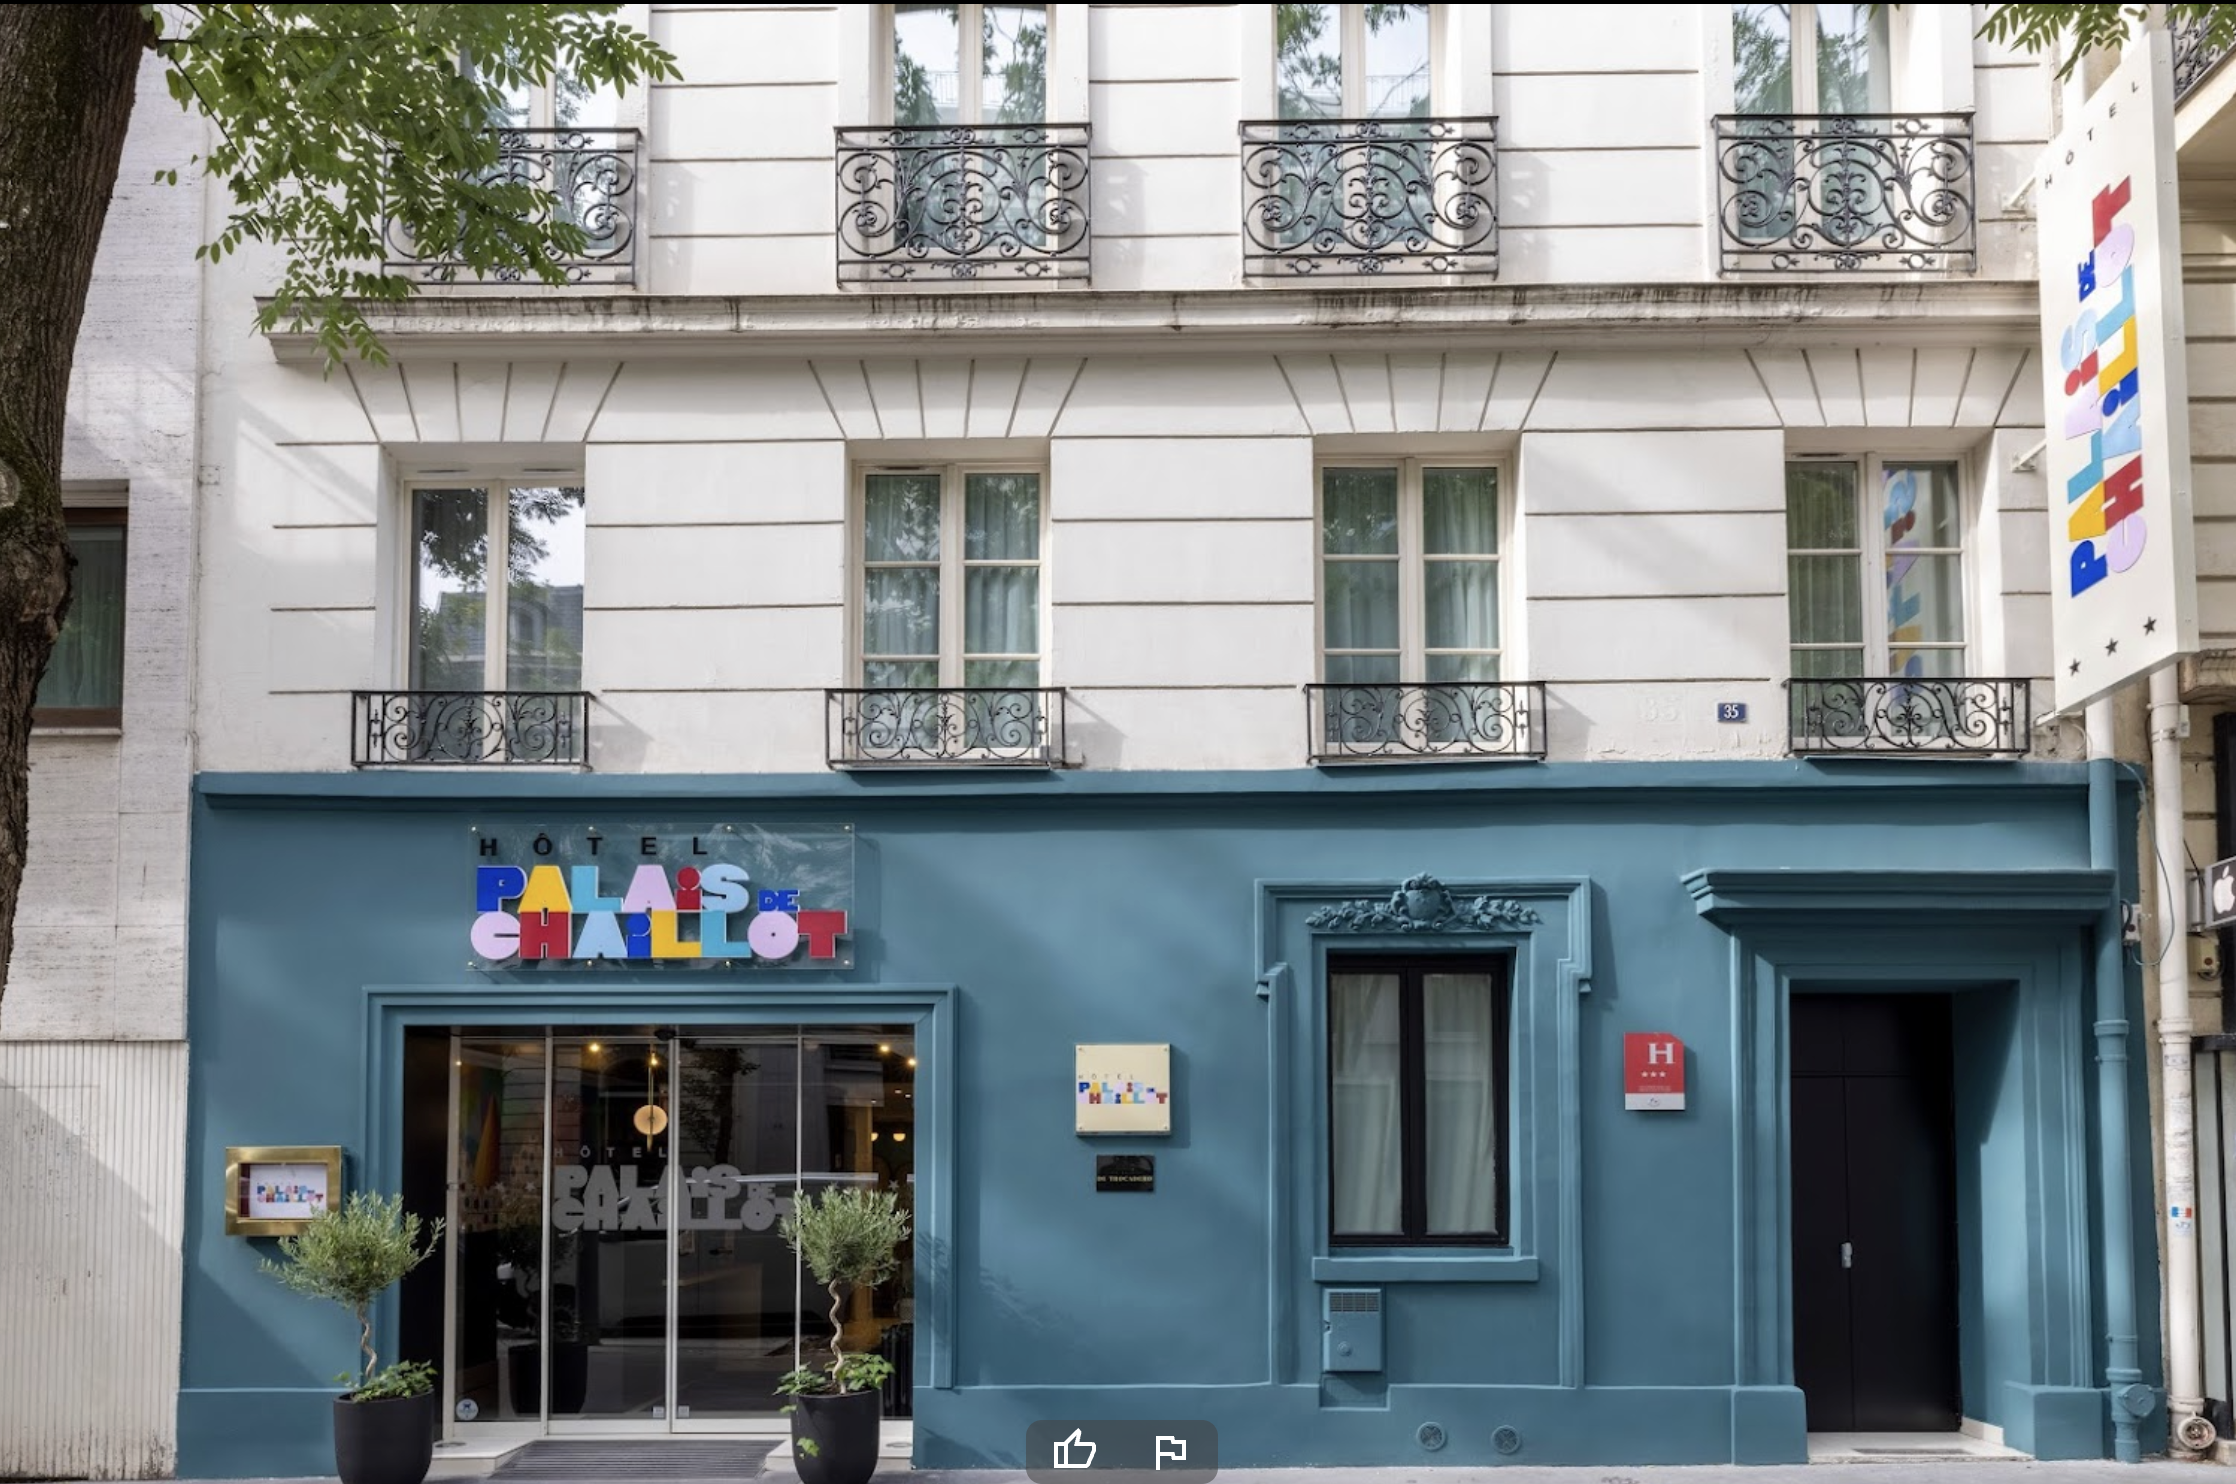
The hotel we stayed in was a 7-8 minute walk and a 3-4 minute drive from the Eiffel Tower. This is because we knew that we’d be spending more of our time doing things around that area. Our hotel was also just 3-4 minutes walk from the Paris Metro. So if your itinerary includes attractions like the Eiffel Tower, Arc de Triomphe, River cruise, Riverwalk etc. it’s advisable to stay within a central neighborhood that’s walkable from most of these places. Also, if you will be using the Paris Metro more often, then definitely look for a place that’s at a walking distance to at least one of the stations.

Heads up, though, that most of the hotel rooms in Paris are tiny. Even if you pay more to get a better hotel, chances are that your room is still going to be smaller than usual. So be prepared for that and plan your luggage accordingly so that you don’t run out of space to store it.

Here’s where we stayed and while it was a small hotel like many others, it was pretty affordable considering the central location it was in. You can find many other good hotel options in other Paris Travel Guide on the internet.

Hotel travel guide for Paris

What to pack?

Depending on the season you go in, you can check the weather and plan your outfits. We went in the summer so I packed mostly summer dresses, coord sets, blazer sets and skirts. I tried to carry more neutral tones as I wanted to dress like the Parisians do. And you can read my blog here on all the outfits I took on this trip with me. However, there are a few things that you should definitely pack no matter what time of the year you go. First on that list are a few comfortable pairs of shoes and sandals. No matter how you decide to commute, you will still be walking a lot in and around so make sure you always have comfortable shoes on. 

Second, pack umbrellas and rain jackets (or trench coats if you’d prefer that). The rain in Paris is quite unpredictable and we got a rainy evening too when we were here in the summer. And believe me, having an umbrella and a raincoat was a life saver for us. Next, carry some local currency, printouts of all your museum tickets and your ID proof. Other than that, carry a power bank as you’ll be out all day long so you’ll need it. A good tripod stand and camera if you need. And definitely, a power adapter because Paris uses plug types C and E so if you’re going from US, Canada or UK then you’ll need an adapter.

What advance bookings to make?

Given that all major attractions in Paris are busy all through the year, it’s highly recommended to make advance bookings way ahead of your trip. And that’s especially important if you’re going to go in the peak summer or spring months. So below are a few of my recommendations for making advance bookings, 

  • Buy the Paris Museum Pass here well ahead of time if you’re going to visit many of the main attractions like the Louvre museum, Notre Dam, Arc de Triomphe, Sainte Chapelle Cathedral, and more. This pass covers almost all of the locations, so it could be much more cost-effective. You can calculate the total entry fees for all the attractions you plan to visit and see if the pass is a cheaper option. If it is, go ahead and purchase it. I booked this pass through the Get Your Paris Travel Guide website. Additionally, this pass includes an optional river cruise, which is highly recommended.
  • Book your place for the Louvre Museum here and Sainte Chapelle Cathedral here after purchasing the entry tickets. Although these attractions are included in the museum pass if you choose to get one, the pass does not guarantee entry. Depending on how crowded these places are when you visit, they may not allow you to enter. Therefore, it is important to reserve a time slot for both of these places after you have bought your entry tickets or pass. While it is not necessary to reserve a slot for other attractions, it is specifically required for these two sites.
  • Book your access to the Eiffel Tower here well in advance of your trip. You have two ticket options – one for access to the second floor only and another for access to the summit. According to some blogs I read, the views are much better from the second floor and visibility becomes limited as you go up to the summit. Therefore, we opted for the second floor access and it was definitely worth it. We booked our tickets from Get Your Paris Travel Guide.
  • Get your tickets for the Paris Opera House here early because this museum can get very busy. The Paris museum pass does not include entry to this museum, so you’ll need to book separately. I recommend booking well in advance, as it’s a popular tourist spot and tickets sell out quickly. We made our reservation through their official website.
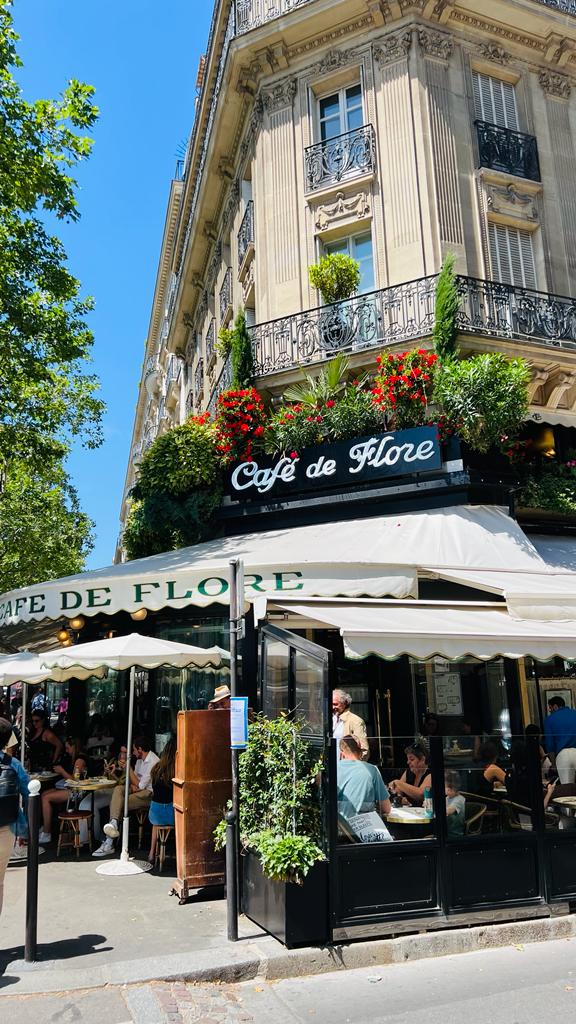
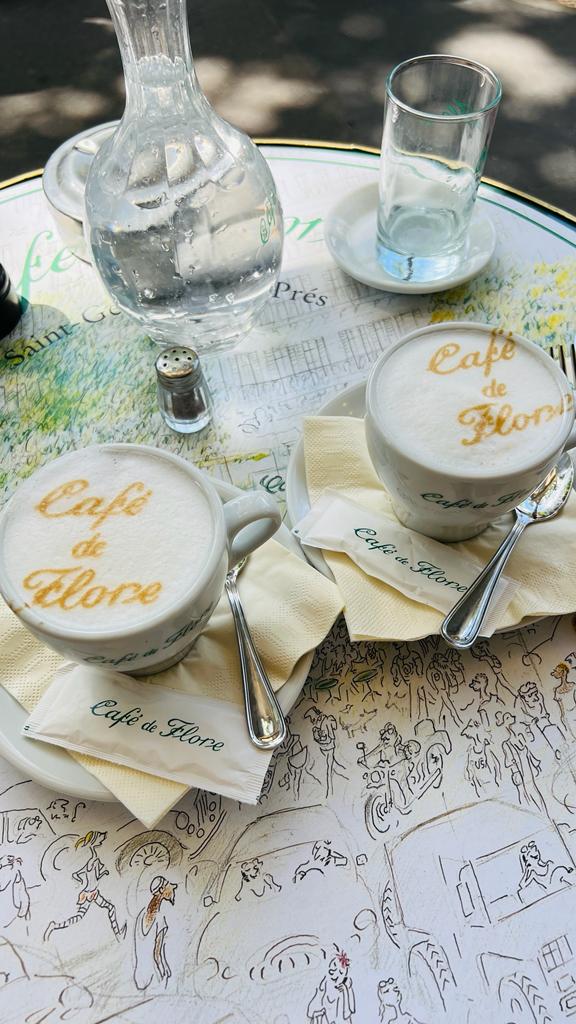
  • Book a table ahead of time if you plan to visit popular restaurants. We made a reservation in advance for a busy place called Cafe De Flore because we know it’s always crowded.
  • Book your photoshoot and prepare in advance if you want to have one.

How to get around the city?

Paris is a city that is best to explore by walking. So, it is important to choose a hotel that is close to all the main attractions. This way, you will get a real experience and also see the city from a local point of view. However, if you need to go to places that are not reachable by foot, the second best option is the Paris metro. It’s a good idea to purchase a metro card well in advance. The metro is the quickest, most affordable, and convenient way to travel around the city.

What are some must-sees to not miss?

  • Eiffel Tower
  • Arc de Triomphe
  • Notre Dam
  • Sainte-Chapelle 
  • Sacre Coeur
  • Montmartre
  • Covered passages
  • Paris Opera
  • Galeries Lafayette mall and its  rooftop
  • Palace of Versailles
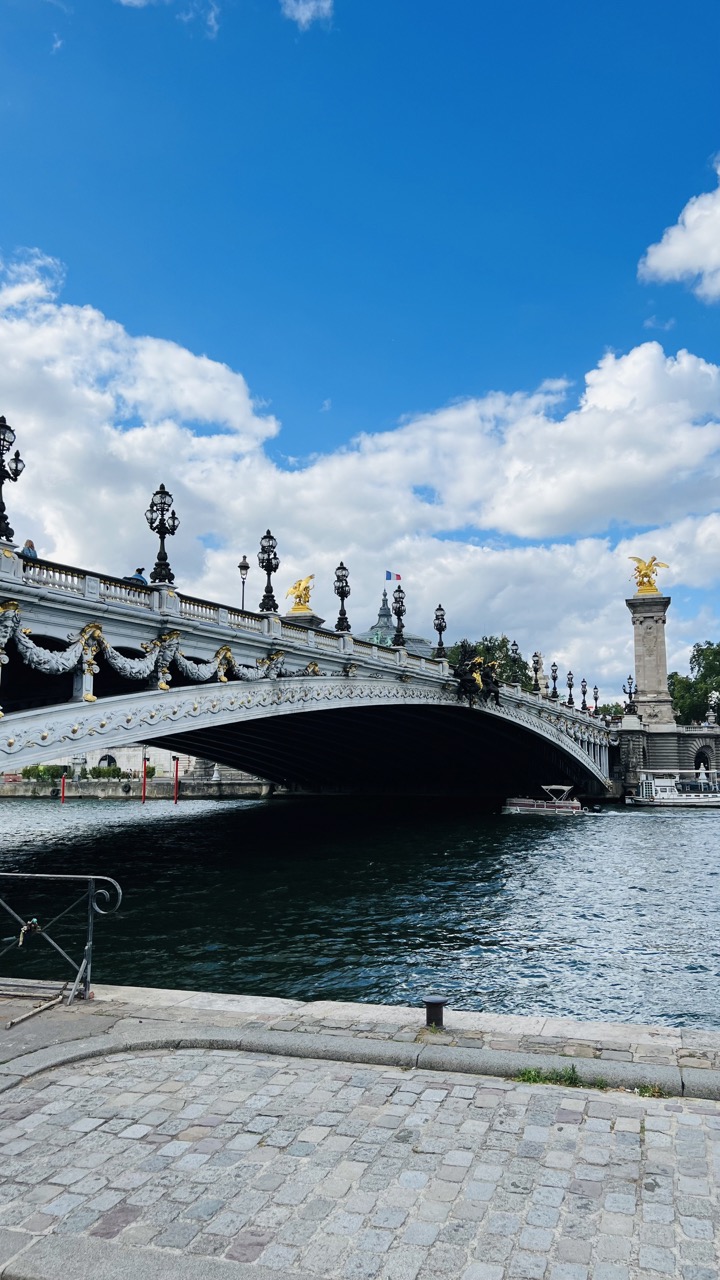
  • Pont Alexandre III bridge
  • Louvre museum

What are some must try cafes and restaurants?

While there’s no dearth of great cafes and restaurants in Paris, there’s some that topped my list based on their experience and food. So here’s my top 4 recommendations,

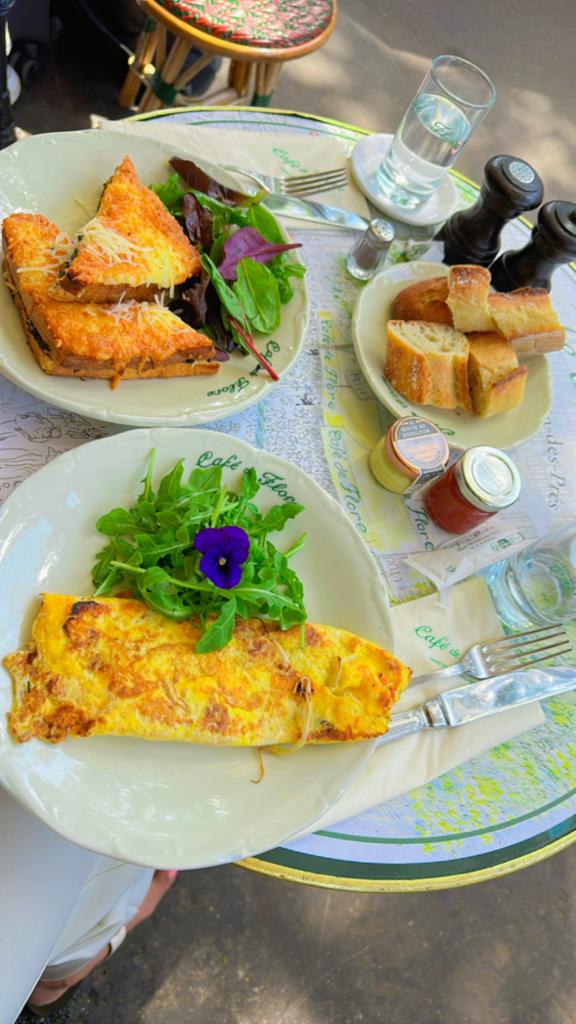
  • Cafe de Flore – This café is one of the most well-known and oldest cafes in Paris, and is visited by many people every day. Without a doubt, their food and coffee are worth trying. And if you’re visiting Paris, you should definitely go there. Because it is so famous, it is recommended to make a reservation in advance, as they usually have long waiting times for walk-ins.
  • Kimochi is a Japanese restaurant that serves both burgers and sushi. It is located in a historic area of Paris known for its covered passageways. The restaurant is highly recommended and worth a visit. During our first visit, we tried a sushi burger and it was delicious. They also offer a wide selection of sushi dishes. If you are a sushi lover like me, you should definitely give this place a try.
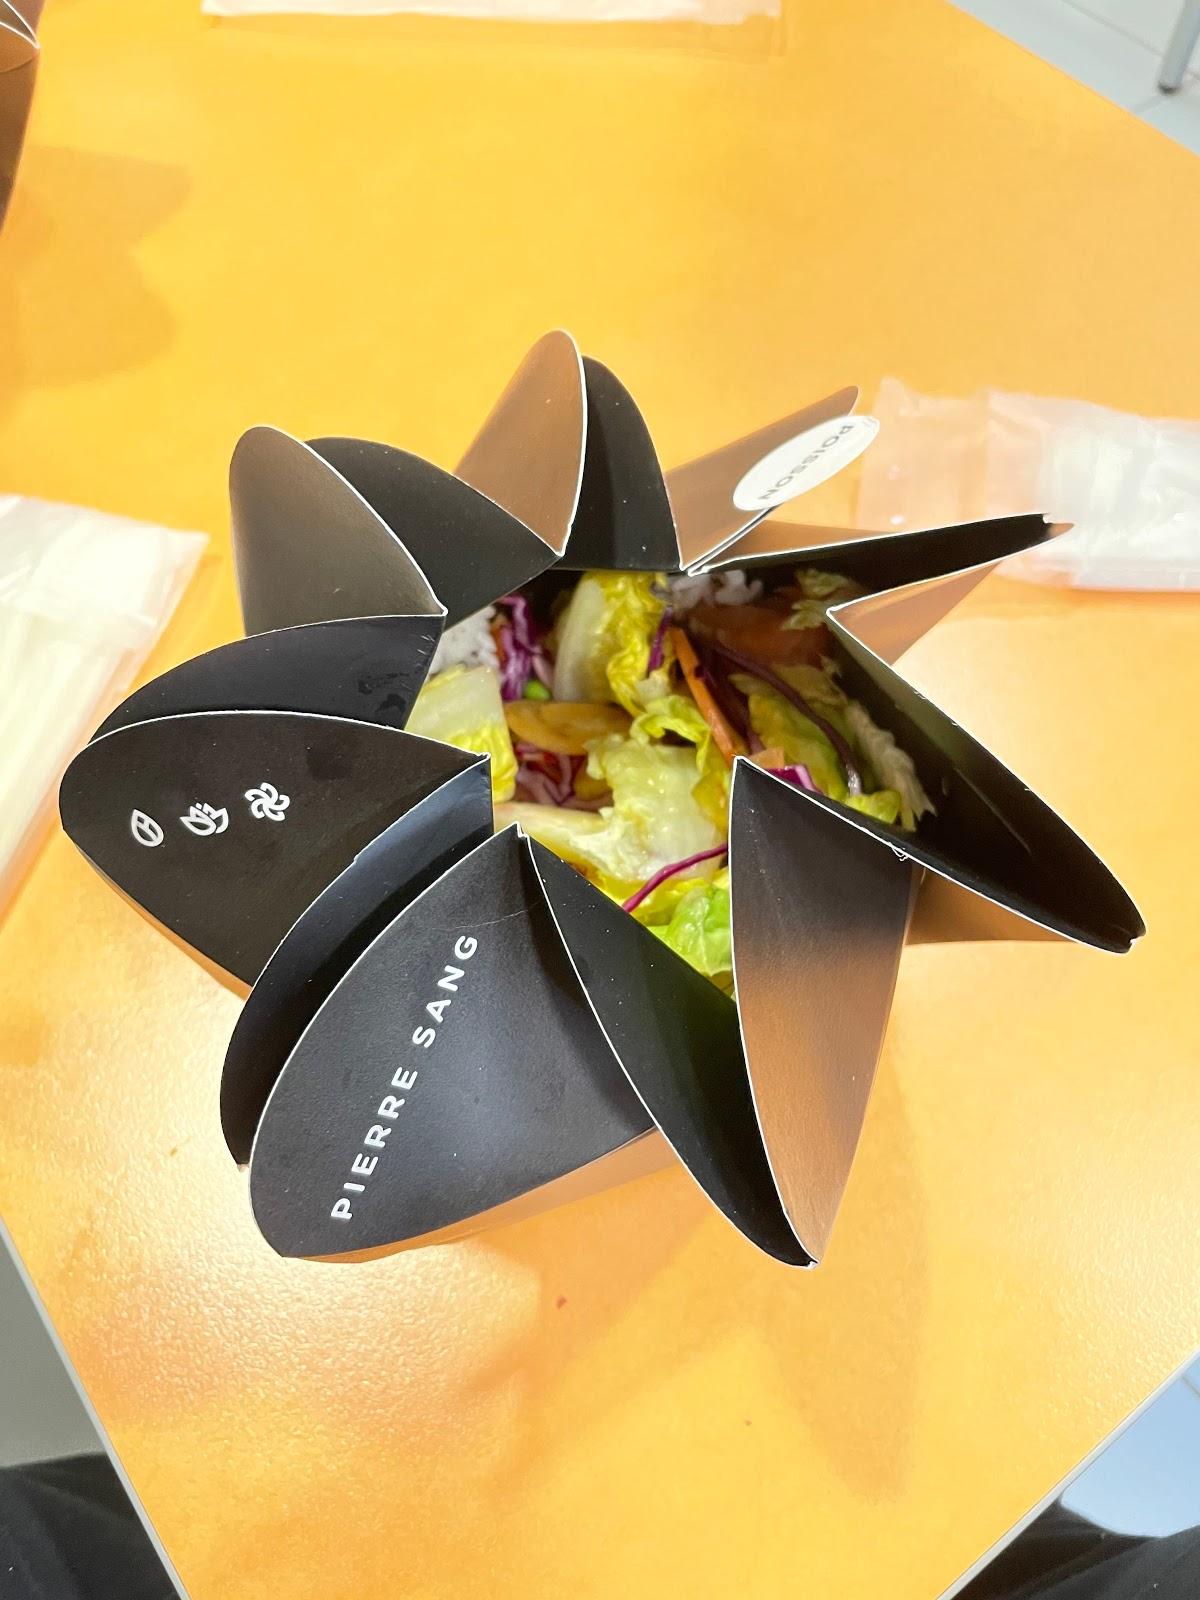
  • Pierre Sang Express – This is in the Galeries Lafayette mall and has a very unique menu and packaging. We tried their veggie curry bowl and it was so good. It’s made of healthy ingredients so if you’re bored of eating French food, this will be a breath of fresh air and will also be easy on your tummy.
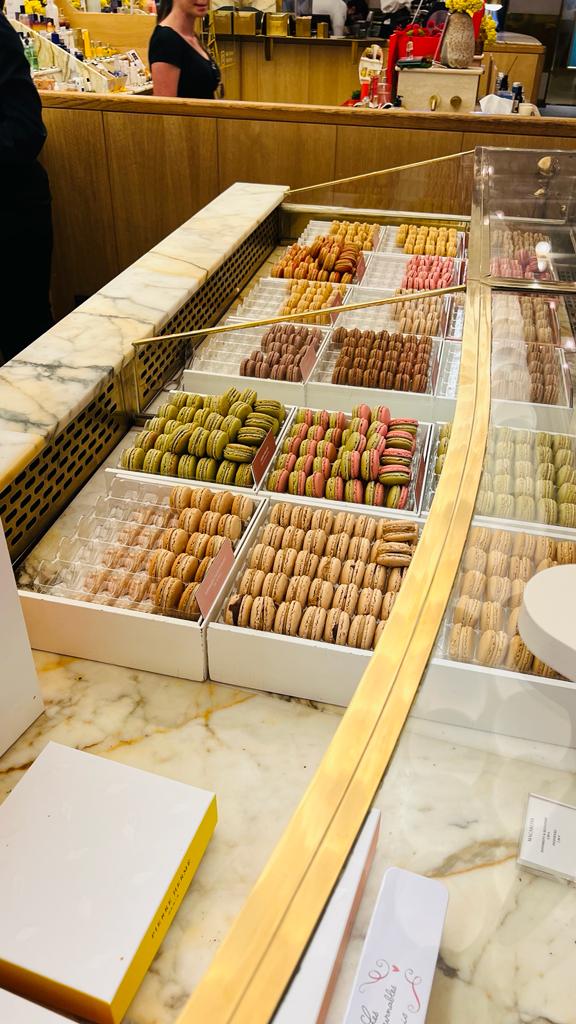
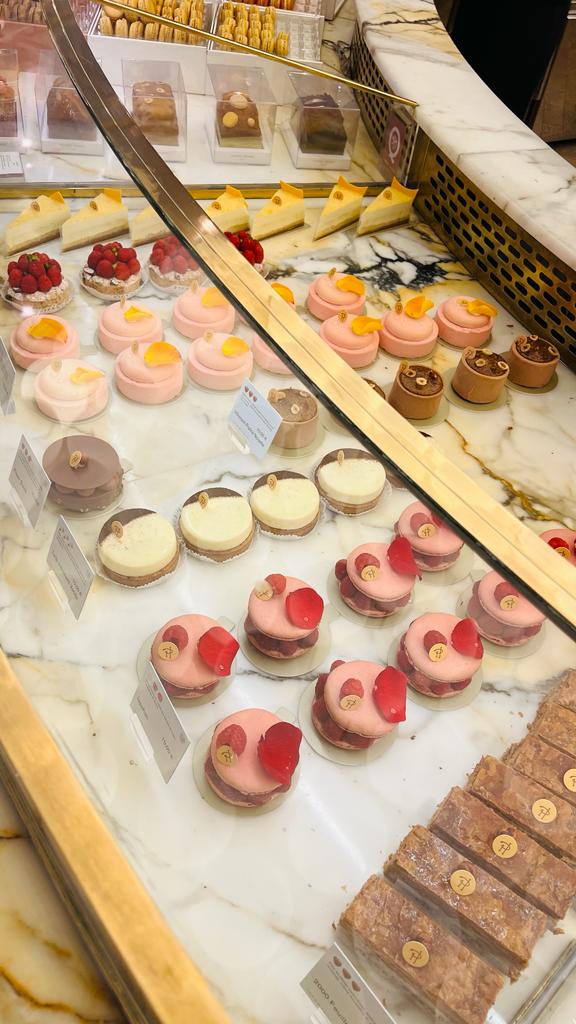
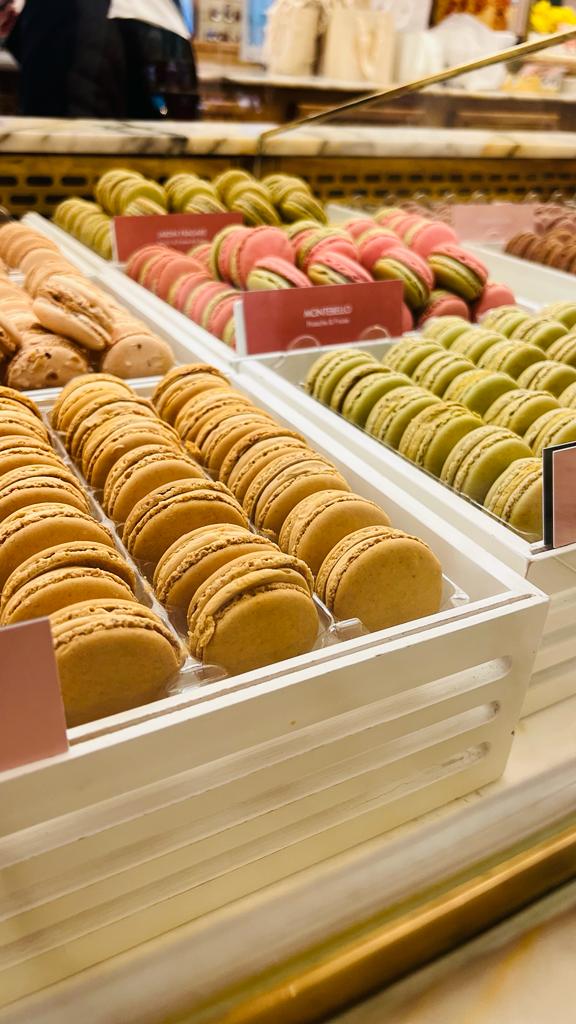
  • Pierre Herme at Champs-Elysees – This place is known for its macarons and we tried four different flavors – Chocolate, Vanilla, Pistachio Strawberry and Rose. These are some of their best selling flavors. It has a few other locations as well and is a must try.

Is there a tip culture in Paris?

Yes, you can tip at the restaurants, but it’s usually not expected. Typically a standard rate is 5-10% at all cafes and restaurants. But if the service is exceptional and you’re feeling generous, you can tip more. You can also tip your taxi drivers around the same range. So, it’s much less than what you’d do in the US but the tip culture does exist. 

How to avoid being scammed?

This is from our personal experience which was very unpleasant. There was a group of about 8-10 locals that tried to scam us and they forcefully wrapped some kind of string around our wrists. They said it was a sign of respect to their culture and that we shouldn’t resist. And once they were done, they asked for money! This trick is also what they use to rob you of your personal belongings by distracting you. So be very careful to not entertain any such thing and try to avoid the paths where you sense something like this happening. This happens in mostly the major tourist attractions like the Eiffel Tower so be very careful when in these places.

Also, if someone asks you to sign some kind of a petition, just refuse politely. Other than that, be careful to always put your belongings in a tightly locked bag and don’t carry your wallet and phone in your hands when visiting largely frequented tourist spots. Upon my research, I did come across a few other Paris travel guide that highlighted similar experiences.

Is there more to explore in France beyond Paris?

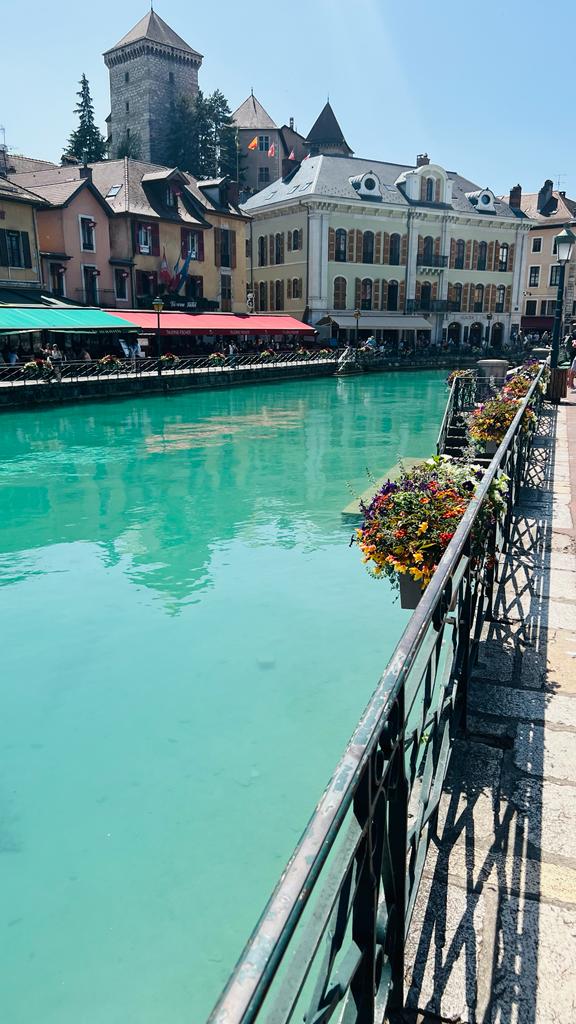
There absolutely is! There are countless chateaus, beautiful old towns, and a wealth of countryside beauty that you shouldn’t miss if you have more time. We spent one day in a small and beautiful city called Annecy. This was recommended by many of our friends so we decided to take some time out. And we’re so glad we did. With gorgeous turquoise blue water, lush green parks, tall and stunning mountains, a cute town vibe, and a variety of water activities to choose from, this city has something for everyone and you could easily spend a day here.

And that’s a wrap! I hope this Paris travel guide will be helpful to you in planning your next trip to Paris. Let me know your thoughts in the comments below!

Continue Reading

Palace of Versailles: A helpful travel guide

The Palace of Versailles. Its grandeur and charm has made it one of the most visited attractions in France. Once home to the Kings and Queens of France, this palace offers a lot of rich insight into the French history. The palace depicts the life of King Louis XVI and how under his rule, it became a place of extravagance. So there shouldn’t be a question on your mind of whether this should be a part of your itinerary. I have to say that it’s totally worth a visit.

So first things first, where is The Palace of Versailles? The Palace is about a 30-40 minutes drive from the city of Paris in the town of Versailles (which, btw, is a beautiful town!).

Here’s a helpful guide based on my personal experience on how to have the best time here,

HOW TO GET HERE? 

The fastest, cheapest and easiest way to get here is to take a train. There’s a direct train (line C) that runs from the city of Paris to the Versailles Chateau Rive Gauche station which is where you’ll have to get down. The train runs from many stations and we took it from the Eiffel tower because that was the closest to our hotel.

An important tip if you do end up taking the train – The Paris Metro Pass will not be sufficient for this ride as that pass works only within Paris so you’ll need to buy separate tickets for this journey.

You could also take a taxi or uber but you may end up getting stuck in traffic, depending on the time of the day and will end up paying more.

WHAT IS THE BEST TIME TO VISIT? 

Since the Palace of Versailles is adorned by lush, beautiful and magnificent gardens, it’s best to visit in summer when the gardens are in full bloom. Another reason for visiting in summer is that the chateau hosts special events and one of the best events that happens in summer is the musical fountain show. The musical fountain show runs from April through October and only happens on certain days of the week. This is when the magnificent fountains in the gardens are turned on for a display and it’s a spectacle to not be missed. The palace also hosts night fountain shows from June through September where the colorful and dramatic lighting effects offer a stunning visual.

Check the schedule of all shows here.

An important note if you have the Paris Museum Pass – This pass covers entry into the palace and access to most parts of the palace, but it doesn’t cover access to the fountain shows. So, you’ll need to buy separate tickets from here if you plan to attend the show. And be sure to check the dates that the show runs on.

WHAT IS THE ENTRY TIME? 

The Palace is open all days of the week except Monday, from 9 AM to 6 PM. The gardens open at 8 AM whereas the Estate of Trianon opens at 10 AM daily. The Palace is open year round.

Keep in mind, though, that the last entry to the palace is at 5 PM. So, you can hang out in the palace after 6 PM but you need to make sure you get in before 5 PM. On the days when there’s a fountain show, the gardens open at 8 PM for the show and are open until 11:30 PM.

If you’re going to be staying a few days in Paris and plan to do museums, I would advise on getting a Paris Museum Pass from here. This pass covers pretty much all the major attractions in and around Paris (including Palace of Versailles), so its very economical. You could choose between the 2, 4 or 6 day option and also add river cruise as an add on if you’d like to do that.

HOW LONG DOES IT TAKE? 

The full tour of the Palace shouldn’t take you more than 3-4 hours. They provide maps of the entire estate at the entry point. The map comes with a few red dots marked on it for important sections to not miss. But if you want to plan ahead and mark the sections you want to hit first, here’s an interactive map on their site that you can refer to.

WHAT TO CARRY?

If you’re planning to go on a summer day, then definitely carry water, a hat and sunglasses with you. The palace is huge and can take a while to tour so pack some snacks if you think you’ll get hungry. Most restaurants inside the palace close by 6 PM so be sure to get your dinner packed before that or make sure to bring something with you if you plan to stay back for the fountain shows in the night. It also gets colder in the evenings, even on summer days, so be sure to bring a jacket.

HOW TO DRESS? 

You can wear anything comfortable that you can go around in for a couple of hours. Be sure to check the weather before your trip to dress accordingly. Since there’s a lot of walking involved, be sure to wear comfortable shoes. On some paths in the gardens, you’ll be walking over cobblestones so comfortable shoes or sandals will be important. Read my complete blog here to see what I wore to the Palace of Versailles.

WHAT ARE SOME MUST SEES? 

There’s a lot of things to explore in and outside the Palace but if you’re short on time or don’t want to tour the whole estate, below is a list of absolute must sees that you need to cover,

  • King’s State Apartments
  • Hall of Mirrors
  • King’s private apartments
  • Queen’s apartments 
  • Gallery of Great Battles
  • Royal Serenade show (takes place under the gold of the hall of mirrors)
  • Fountain shows

WHERE TO EAT? 

As I mentioned, most restaurants in the palace close by 6 PM so make sure to go before that. There are a few restaurants on the property and a good place for some nice coffee and snacks is Grand Cafe D’Orleans. However, if you have more time then the old town of Versailles also has a lot of great options and is worth checking out.

Other than all this, just have fun and soak in all the royalty and charm that this Palace has to offer.

If there’s something I missed, feel free to add in the comments below. Hope this guide to The Palace of Versailles was helpful!

Continue Reading

A remarkable 5-day Mexico itinerary

Have you watched the series Narcos: Mexico on Netflix? Well, that’s how I got more familiar with this North American country and it certainly tainted my perception. Back then, I used to relate it with everything I saw in this series. Fast forward to the present day, I just can’t stop reminiscing about our recent vacation here. 

My husband and I spent 5 days in Mexico in April of this year and just fell in love with this country. It’s enormous and endlessly captivating. If you really wanted to soak in the different things it has to offer, you could go for 1-2 weeks. Even that may not be enough depending on what you want to do. But we could only afford 5 days in Mexico, given our busy work schedules. But those 5 days were just so incredible that we didn’t realize how quickly it all got over.

Anyway, enough about that. Here’s our 5-day itinerary covering all the nitty-gritties to help you plan your travel. We split our trip between Cancun and Tulum and spent the first 3 days in Cancun.

Day 1: Reach Cancun and check in at the resort

The first question in my mind when planning the trip was where to stay. Having heard our friends’ experiences and read in a few blogs, we decided that staying in the hotel zone would be the safest and most convenient option. This is the safest zone in Cancun for tourists, plus it’s closer to all the nightclubs and flea markets that you’ll most likely end up visiting. So we stayed at the Grand Fiesta Americana Coral Beach Resort and man, oh man, we just loved it. The property is stunning and they have everything you can possibly imagine for a vacation. They have 3 outdoor pools, all big enough. There’s plenty of restaurants and cute cafes for food and alcohol. The beach has private access, and is just a few steps away from the resort. They have events every other evening for the hotel guests.

We stayed in an ocean front room and couldn’t have asked for anything better. Day 1 was all about relaxing in our resort and soaking in the incredible views of the bay. During the day, we indulged ourselves in food and drinks, followed by pool therapy and a nice evening walk around the beach. We hung out at the beach for sunset and it was just so surreal. On our first night in the resort, they had live music so we just stayed back and decided to enjoy the whole vibe.

Day 2: Day trip to Chichen Itza and Valladoid

This was one of the most awaited days of our trip, because who doesn’t want to check out a wonder of the world? There’s many ways of getting to Chichen Itza from Cancun. Easiest is renting a car and driving there on your own. That gives you the freedom and flexibility to follow your own plan. However, since it was our first time in Mexico and we didn’t know our way around, we decided to just go with a guided group tour

The upside of taking a guided group tour is that you get to have fun with the group while exploring and learning the rich history of the place. Since the group tour also includes stops to other famous places on the route such as the Cenotes and the city of Valladolid, you get to cover a lot in one day. However, the downside is that it takes longer when picking up and dropping off everyone. An important tip – Make sure to check the itinerary and read the reviews. We booked ours through Viator and while there’s a lot of tour companies that you could book through this website, just be sure to check their ratings and go with a good one. We paid $118 for 2 people and our tour covered stops at the Cenote Maya Park and the town of Valladolid.

There’s a separate blog on my website that serves as a helpful guide to Chichen Itza. It includes tips on how to plan, what to carry and what to expect on the day of so be sure to give it a read.

I’d 100% recommend adding this to your itinerary because it’s completely worth it. We later also stopped at the Cenote, which is one of the most popular activities in Mexico. There’s so many Cenotes here and they have a very religious significance to them. We loved the Cenote where we stopped because the water was turquoise and so calm. I would definitely recommend adding this as well to your itinerary. 

Final stop for the day was the cute town of Valladolid. We walked through the Main Square Parque Francisco Canton and were lucky enough to witness the traditional Mayan dancers showing off Jarana, a traditional dance in the Yucatan.

We then headed back to our resort as we had our reservation for Coco Bongo. This nightclub is, hands down, my best nightclub ever. You can make an online reservation ahead of time or just go in there and buy your tickets. It’s usually best to go between 9-9:30pm because they have shows that keep running between 9pm to 12am so you don’t want to miss them. Even if you’re not a party person, you should definitely make your way to this club because this is one experience you wouldn’t want to miss.

 Day 3: Day trip to Cozumel Island and Playa del Carmen

Day 3 started early for us as we had a day trip booked to the beautiful island of Cozumel. There are many ways of getting to this island and we opted to go through the ferry. There’s two ferry companies – Ultramar and Winjet that run daily ferries from Playa del Carmen to this island. These ferries run every two hours so there’s many flexible time options to choose from. We booked through Ultramar and opted for first class seats. We booked the ferry for 10am since we also had to account for the time in getting from Cancun to Playa. We took a taxi from our resort in Cancun and reached Playa in about two hours to take the ferry from the ferry terminal.

It’s roughly a 30 minute ride from Playa terminal to the island, and is pretty smooth for the most part. But if you have sea sickness, then I’d recommend carrying medicine for motion sickness. Getting around the island is easy if you rent a car, bike or a scooter. We booked a scooter from a rental company at the ferry terminal at Playa and then picked it up at the island. They also provided a map so that made our navigation much easier. 

We spent about 4-5 hours on this island and did a lot of driving around the island. There’s a lot of water sports like scuba diving, surfing and snorkeling that you could choose from if you decide to spend good time here. There’s many famous beach clubs here that provide rentals for water sports for an entry fee. We decided to skip the water sports and rather spend time exploring the island, shopping, spending time at the beaches and taking lots of pictures. Read my blog here to learn more about things to do, what to carry and how to plan your day trip to Cozumel.

On our way back from Cozumel, we decided to spend some time in Playa del Carmen before making our way back to our resort in Cancun. There’s a very lively area around the ferry terminal that you won’t be able to miss. We were lucky enough to catch a dance performance by some locals just by the famous Parque Fundadores. We then also walked around the area through the beautiful market. Quinta Avenida is also a must-see street in Playa del Carmen. It is a lively and colorful 5 km long pedestrian street, lined with stores, souvenirs, cafes and restaurants.

 Day 4: Head to Tulum

After relaxing and enjoying our time in Cancun, we decided to spend the next two days in Tulum. Tulum has been on my list since the longest because of its vibe. It has so much to offer, whether it’s the coastal nature, or the jungle vibe, or the amazing food, or the rich nightlife. Oh, and not to mention, those beautiful boutique resorts that’ll transport you into a completely different world. 

We left from Cancun in the morning after breakfast and reached Tulum in about two hours. We checked into our beautiful boutique resort called Naay and settled in. After a short rest, we then got ready and headed out to explore the town. 

One important tip – If you’re wondering how to move around Tulum, then you might want to consider renting a bike, scooter or car. We rented a scooter instead of a car because I had read in some of the blogs that the tourist places in Tulum mostly have narrow roads so there’s high chances of being clogged up in traffic or having difficulty finding parking. And since most of the spots on our itinerary were within a 10-15 minute drive, we decided that a scooter would be our best bet.

The first stop we hit was the Mayan ruins. What was great about this place was its location i.e. right next to the beach. So after spending some time exploring the beautiful ruins, we also got to hang out at the beach for a bit. Keep in mind, though, that the weather is warm and there’s not much shade so make sure you’re prepared accordingly. Or try going in the evening, a little before sunset so that you can also catch a good sunset.

We then ended our day by spending time at the Tulum downtown. We drove through the beautiful street arts. One of the famous streets in Tulum to see street arts is Calle Sol Oriente. You can start from the far end of Sol Ote, where it meets the Coba road and then make your way down this street. After a quick drive through this street and soaking in all the beautiful art, we then made our way downtown. Let me warn you that Tulum downtown is not like the usual downtown, which you’d expect to be a bit more upscale. It’s definitely lively in terms of the crowd and nightlife, but it has a very local feel to it. We parked and explored the downtown on foot. We walked around 1-2 blocks and stopped at some local stores for shopping. We then grabbed a quick bite and made our way back to our resort.

Day 5: Explore Tulum beach strip

Our last day in Mexico was all about exploring the beach strip. We wanted to start our day with a nice breakfast with a view of the ocean so I made a booking at the Papaya Playa Project Beach Club. There’s many beautiful beach clubs to choose from and all boast incredible views. I chose this one because it had great reviews and I loved the whole vibe of this resort. We sat down here for a scrumptious breakfast and drinks.

The next part of our trip was more sightseeing and touristy stuff. So we made our way to the famous Ahau Tulum Sculpture Park. There’s a parking lot right across so you can safely park there while you’re here. This park has an entrance fee and that can get you access to one of the most Instagrammable spots here. After spending a while here and taking lots of pictures (yes, lots!!), we decided to take a stroll along the beach strip. On the way, we stopped at a few boutiques for some shopping and stumbled upon this really cute boutique called Isuju. This boutique has amazing collection of clothes and accessories so if you’re a fashion junkie like me, you’ll love it here. Here’s there instagram page to give you a sense of what I mean.

Anyway, after some walking and shopping, we got hungry and decided to stop at the Raw Love Cafe. I’d read so much about this cafe and their extensive plant-based menu that I just couldn’t miss this. And undoubtedly, they lived up to my expectations. Their menu had such unique items to choose from and everything we ordered was so delicious and fresh. I’d highly recommend making a stop here for a meal.

We then head back after lunch to get some rest. The warm weather didn’t really help so we wanted to escape the heat and instead spend some time in the pool of our resort. And thats exactly what we did. We headed out again in the evening, a little before the sunset for dinner and to explore the nightlife that I had heard about so much.

If its your first time in Tulum, my top 5 recommendations for restaurants/bars you need to try in Tulum are,

You don’t have to do all of them and you could choose depending on their menu, prices and the whole vibe. We tried Funky Geisha and loved their food and drinks. As I mentioned before, Tulum has a great nightlife scene and every club here is so full of life that you’ll just not want to end the night. So set aside one evening to just soak in the nightlife and have a fun night.

Just writing about all this brings back fond memories from this trip. So you can only imagine what it would have been like saying goodbye. However, I am glad to have ended this trip on such good note and glad to have brought back all the memories and experiences. 

Hope you enjoyed this itinerary! Let me know in the comments below.

For some helpful travel guides to the famous tourist spots in Mexico, refer to the below links,

  • Travel Guide for Chichen Itza – Here
  • Travel Guide for Cozumel Island – Here
  • Mexico travel guide for first time travelers – Here
Continue Reading

You need to know these tips if you’re planning to visit Chichen Itza

How does it feel to check things off your bucket list? I’ll tell you how I felt when we recently visited one of the seven wonders of the world – Chichen Itza. The feeling was so rewarding and I was completely awestruck. You know how they say that it’s one thing to see something in pictures but it’s a totally different experience seeing it in person. That’s how I felt when I stood in front of this famous Mayan pyramid and tried to absorb its overwhelming beauty. Chichen Itza had been on my bucket list for a while now and earlier this year when my husband and I decided to make a trip to Mexico, we made sure to include this as part of our itinerary.

We dedicated an entire day to make a trip to this wonder. But since this was the most awaited part of our trip, we made sure to research and plan this day as impeccably as possible. I read a couple of blogs online to ensure that we knew what it takes to visit and all the things we should keep in mind before going here. Believe me, this was a worthwhile effort on our part because had we not known all these small details, we might not have made the most of this experience.

So here I am again, sharing all the helpful tips with you so that it can help you make the most out of your trip. Even if you’re not planning to visit Chichen Itza, some of these tips are still general enough for you to know before planning any trip.

Go there early

The gates open at 8AM and they’re open until 5PM local time. Since most of the crowd starts flocking in during the day, its a good idea to get there before noon to make the most of your time here with less crowd. That’ll also help you avoid the deadly heat in the peak summer months. If not early, then try going in the late afternoon, mostly after 2PM which is when we went.

Visit Chichen Itza

Take a guided tour for Chichen Itza

We booked a guided group tour that picked us up from our hotel in the morning. This tour also covered two more stops i.e. Cenote and Valladolid. And the guide we got was a local Mayan resident so we got a wealth of information and learned so much about the history of this beautiful place. Also, since we went in a group tour, it was fun to explore things as part of the group.

Visit Chichen Itza with a guided tour

Explore all the spots

Apart from the Chichen Itza pyramid itself, there’s many other spots here that have a lot of historical significance and stories of their own. Some such spots worth covering are The Great Ball Court, The Skull Platform, The Temple of the Warriors and The Observatory. Our guide took us around all these spots and also narrated to us all the history and significance of these. It was so enlightening and fascinating to learn about the Mayan culture and their way of life.

The Platform of the Skulls

Carry sunglasses, hat and water

Chichen Itza has very warm weather for most of the year and there’s very little shade. There’s literally just a few trees here and there that will save you from the merciless heat. So be sure to carry sunglasses, sunscreen, a hat and a water bottle. In addition to this, make sure to wear comfortable clothes and sandals as you’ll have to walk around quite a bit. I chose to wear a flowy white maxi as it was very comfortable for me.

Pack a swimsuit

There’s many Cenotes around the Chichen Itza area that you’ll want to check out. The heat will also make you want to take that dip so be sure to pack a swimsuit.

Don’t bring your camera tripods

Camera tripods are not allowed so don’t carry them with you here. Professional photography and drones are also not allowed here.

Carry your passport for a stamp

Did you know that you can get a Chichen Itza stamp on your passport? Pretty cool, right? Sadly, we didn’t take our passports with us because none of the blogs I read mentioned this important tip so I am giving you a heads up that do not forget to take your passport with you. You wouldn’t want to miss this chance to collect a stamp for life. 

Carry pesos

It’s easier to use pesos here and that’s what’s easily accepted here. Try to avoid using credit cards and have pesos handy with you. You’ll also need them to tip your guide if you hired one.

Carry snacks and drinks

There’s a few shops at the entrance that sell light refreshments, ice creams and snacks. But once you’re inside and touring around, there’s no place to buy all this stuff from. So make sure to carry whatever you think you’ll need for food and drinks. Its going to take you at least 2 hours to finish the tour so plan accordingly.

That’s it! As long as you follow all this, you’re on to a great tour. I promise that a visit to Chichen Itza will be worth all your time and worth all that heat in your face that’ll make you want to leave. So be sure to have lots of fun and take lots of pictures!

For other places to explore in Mexico, refer to the below links,

  • 5-day Itinerary for Mexico – Here
  • Travel Guide for Cozumel Island – Here
  • Mexico travel guide for first time travelers – Here

Continue Reading

A fun travel guide to Cozumel Island

We recently made a trip to Mexico to get away from the dull and gloomy weather in Atlanta and get a change of scenery. Like every trip, we prepared a full-fledged itinerary for this trip but didn’t realize that there’s this beautiful island tucked away from the city of Cancun that should have been on our list. It wasn’t until a friend of mine suggested adding this to our itinerary that I started looking up and planning a day trip to Cozumel island. And oh, how I would have regretted not having this be a part of our trip!

So first things first, where is this island? Cozumel island is about a 2-hour drive from Cancun city and is close to the town of Playa del Carmen in Mexico. This island is completely safe for tourists and has a great vibe. It’s a small yet power-packed island with tons of things to do.

Here’s a helpful travel guide for Cozumel island based on my personal experience on how to have the best time here,

Is it worth going to the Cozumel island?

Absolutely yes! Its a small island so you won’t need more than a few hours here so its definitely worth a day trip. There’s a range of activities to do here such as snorkeling, scuba diving, swimming etc. if you’re into water sports. Even if not, you can relax at a nice beach club or just stroll around the island to enjoy the beauty. Either way, you will have a great time here.

Is it worth going to the island?

Yes, its very safe on the island. Its a small island with not much crowd and there’s always police presence. Many people here are tourists so you won’t feel out of place or unsafe.

How to reach the island?

There’s multiple options to get here. Cozumel has its own airport in case you plan on taking a flight. However, a ferry is another great option if you’re living around the area. We spent most of our time in Cancun and decided to make a day trip to this island so we took a cab to Playa del Carmen, which is where you can catch the ferry from. It’s a two-hour drive from Cancun to Playa so if you’re going to be taking this route, plan accordingly to get there in time for your ferry.

How to get the ferry?

There’s mainly two ferry companies that operate from Playa to Cozumel – Winjet and Ultramar. Their schedules are flexible and they run every two hours so you can book according to your plan. Since we planned on making a day trip, we reserved a 10am ferry because that gave us enough time to reach the ferry terminal in Playa from Cancun. The pricing is also flexible and there’s more than one option to choose from. We wanted the best experience so we booked a first class ticket which gave us access to the best and most comfortable seats in the ferry. The entire ride is about 30 minutes.

How to get around the island?

Renting a car, scooter or bike is your best bet if you want to explore the island on your own terms. There’s a lot of tour companies that run group tours as well but if you want to do it at your own speed and according to your own plan, renting a vehicle is the best option. We rented the scooter from the ferry terminal at Playa. One important tip – There’s many renting companies at the ferry terminal in Playa so take your time to explore them all and get quotes from everyone before you settle for one. We made the mistake of going for the first rental company that approached us, only to find out later that there were other cheaper  and better options we could have picked. Also, don’t forget to pick the map of the island from the rental company.

Can you bike on the island?

Yes, bicycle rentals are also available on the island through the day. But if you’re going in warm weather and are not used to biking much, I’d suggest not going with this option. That’s because it will be difficult to bicycle during the heat of the day and you can get exhausted easily.

What to carry?

If you’re planning to do water sports, then make sure to carry all the water equipment, water shoes, towel, beach mat etc. unless you plan to head to a beach club that rents out all this. Also carry sunglasses, hat, water bottles, sunscreen and bug spray because its usually quite hot during the day. Carry a scarf if you’re going to be renting a bike or scooter as it can be dusty and carry a rain jacket as the weather can be unpredictable. Also carry motion sickness medicine if you get sea sick easily. There’s plenty of food options on the island so you don’t have to worry about carrying food but you could carry light snacks.

How to pay on the island?

Carry cash in both pesos and dollars. Try to have more pesos to avoid overpaying due to exchange rates. Try to avoid using credit cards, unless in big hotels and restaurants. If you know you’re going to be shopping and eating at local places, carry as much pesos as possible.

What to do in Cozumel island?

There’s a lot of things to explore on this island and you can pick from the many options here. If you want to spend time doing water sports, then you can opt for scuba diving, surfing, snorkeling etc. There’s many beach clubs that offer snorkeling rentals and cabanas at an entry price. Buccanos is one of them so you could try hitting this beach club.

Best beaches and beach clubs to explore?

There’s many beach clubs to check out and all of them are great options. But two of my top recommendations will be – Mr. Sanchos Beach Club and Tortugas Beach Club. Both of these have amazing drinks and a great vibe. In terms of beaches, there’s many public beaches that you could try like Sunset Beach, Playa Palancar and Paradise Beach.

Other places to explore?

We started by just driving around the Cozumel island without a pin on the map because we really wanted to get a good feel of it. We did that for the first 30-60 minutes and trust me, it felt so good. Everything on this island is so beautiful so we just didn’t want to stop. Eventually, we made our way to the spots we had on our itinerary like the Benito Juarez Park and the art streets. We also stopped at the Cozumel sign as you can see below to get a picture. Apparently, this is one of the most Instagrammable spots on the island. Well, I can see why!

Whenever you plan a visit, remember that you’re on a vacation. So take it easy, sit back and relax at a nice beach club and sip on your cocktail. Have lots of fun and enjoy the Caribbean.

Hope this guide was helpful!

For other places to explore in Mexico, refer to the below links,

  • 5-day Itinerary for Mexico – Here
  • Travel Guide for Chichen Itza – Here
  • Mexico travel guide for first time travelers – Here

Continue Reading

Oahu: Best 5-day itinerary on a budget

Ahh – Hawaii!!! A place I fell in love with instantly and how could I not? It just mesmerized me with its beauty and brought a sense of serenity that no other place has offered so far.

Oahu is truly a paradise for all those that love adventure and nature. It is known for its beautiful landscapes, pristine beaches, hip streets and pineapples. I have visited three Hawaiian islands so far (Maui, Kauai and Oahu) and I have to say that Oahu is my favorite because it has so much to offer. This island is also home to Hawaii’s capital city, Honolulu.

Although we were here for 5 days, you could plan for longer because there’s just so much to do that I promise you won’t get bored. So here’s a curated Oahu itinerary for all those planning a getaway to this paradise soon. Also, you don’t have to follow this itinerary to the tee and you can always change around any of the days as you see fit. I will also try to do my best to link the costs associated with all these experiences to help you plan better.

An important question before we get into the itinerary is – How to get around the island? Because we had a lot planned and we wanted to cover all the key spots on the island in our 5-day trip, we rented a car for the entire length of our trip and driving around the island was fairly easy. The island is pretty spread out so I am sure you’d want an easy way to get around so having a rental car will be a lifesaver.

Now, here goes the itinerary and I hope you find it useful as you plan your trip.

Day 1: Pearl Harbor, Ho’omaluhia Botanical Garden and Byodo-in temple 

9:00 AM – Breakfast at Arvo Cafe || $40 for two people

We started our day with a yummy and fulfilling breakfast at the Arvo cafe. Their loaded avocado toast and Nutella toast are something you cannot miss and their coffees are delicious.

11:00 AM – Pearl Harbor || Free entrance

We then made our way to Pearl Harbor, which is a symbolic tourist attraction on this island. There is no entrance fee to tour the garden and the museum but if you want to visit the Ford island then you need one. We did not book a tour guide and did a self guided tour but if you really want an organized and educational experience, then booking a tour is a good idea.

3:00 PM – Byodo-In Temple || $5 per person

We then stopped for lunch at Build Your Ramen and headed to The Byodo-In Temple. I have always been fascinated by Buddhist temples as I find a different sense of peace and calmness here. And since it was on our way to the Ho’omaluhia Botanical Garden, we decided to stop here first because this temple closes at 4:30 pm on weekdays. So be sure to plan accordingly. As you enter this temple, you’ll see beautiful manicured gardens and a lovely pond in the center. The entry fee is only $5 per person so it’s worth a try.

4:30 PM – Ho’omaluhia Botanical Garden || Free entrance

Our final stop for the day was the famous Ho’omaluhia Botanical Garden. Our drive into the garden was magical, as we passed through lots of flora and fauna. It’s lush and huge. Also, makes a perfect spot for your Instagram pictures. There’s also a beautiful lake and a few lookout points to not miss.

8:00 PM – Dinner at Tane Vegan Izakaya || $50 for two people

We then headed back into the town and our dinner reservation was at Tane Vegan Izakaya. We chose this place not just because we’re vegetarian, but also because they have an extensive and a very unique vegan menu that you will absolutely not regret trying. I know, I know! You’re going to say who eats vegetarian food on a vacation when you have all the fresh and amazing seafood to try? Well, trust me and go here. You will thank me later!

Day 2: Diamond Head Hike and Waikiki Beach

If you ask me the best way to explore the natural landscape of a place, I’d say it’s hiking. And if the idea of climbing a Hawaiian volcanic crater sounds exciting to you, then you have to hike the Diamond Head Trail. Nothing will be able to beat the panoramic view of the island that you’ll get once you reach the summit so do me a favor and add this to your itinerary.

9:00 AM – Breakfast at Hau Tree || $60-$70 for two people

We started our day with breakfast at the Hau Tree restaurant. The reason I chose this place was because it was very close to the Diamond Head Trailhead and had amazing views of the ocean. The food was delicious and their service was fast. We tried the Spinach Benedict and Lemon Ricotta Pancakes and both were great.

Breakfast at Hau Tree Restarurant

11:00 AM – Diamond Head Trail || $10 for parking inside the crater

We then went straight to the Diamond Head Trailhead and started our hike. The hike is a combination of rocky and uneven paths, narrow trails and tunnels. It can easily take up 2-3 hours but once you get to the top, the panoramic views of the island are breathtaking. Once we got back to the start of the trailhead after finishing our hike, we grabbed coconut water from a street vendor which was much needed after all that heat and sweat.

3:00 PM – Lunch at Da Cove Health Bar and Cafe || $30-$40 for two people

We then took a pit stop for lunch at Da Cove Health Bar and Café to grab a healthy bite.

4:00 PM – Waikiki beach

Post lunch, we headed to the Waikiki beach to catch the sunset. 

Day 3: Hanauma Bay, Makapu’u Tide Pools & Blowhole, Lanai Lookout and China Wall

8:00 AM – Breakfast at Eggs ‘n Things || $30-$40 for two people

Day 3 started with breakfast at Eggs ‘n Things where we tried the Acai Fresh Fruit Waffle and Veggie Omelet.

9:30 AM – Hanauma Bay || $25 per person

Our first stop from there was Hanauma Bay. An important tip for visiting Hanauma Bay is that you need to reserve your spot here as soon as the reservation opens for the day you’re planning to visit. This is because this place is a very famous tourist attraction so it gets booked pretty fast. One blog I read when I was planning this visit said that the tickets usually get sold out within the first 10-15 minutes of opening. The reservation slots open at 7AM local time so mark it on your calendar and set a reminder to not miss it. We booked it through here.

We snorkeled in the beautiful waters at the Bay and the experience was so surreal. Although we have experienced better marine life and coral reefs at other islands, this one was definitely worth an experience. An important thing to note if you’re planning to snorkel is that this place does not rent equipment so make sure you carry all your gear.

1:00 PM – Makapu’u Tide Pools & Blowhole || Free entrance

After spending around 3-4 hours here, we made our way to the Makapu’u Tide Pools & Blowhole. While we had a few spots marked on the way that we wanted to stop at, we didn’t restrict ourselves to just those few. There were many lookout points along the drive so we stopped at pretty much every point as we didn’t want to miss the stunning views that each point offered.

We also visited the Makapu‘u Point Lighthouse, Halona Blowhole lookout and beach cove, Lanai lookout and China walls. If you don’t have that much time, you can just visit the Makapu’u Tide Pools & Blowhole and skip the Halona blowout as you will pretty much get the same experience.

7:00 PM – Dinner at Chef Chai || $80-$100 for two people

Finally, our day came to an end with a delicious meal at Chef Chai. One thing my husband and I loved about Oahu is that there’s plenty of great restaurants with extensive and unique menus for vegan and vegetarian food. So we mostly tried the vegan places every day for dinner and we loved them all.

Day 4: Kualoa Ranch, Kahuku Point, Shark’s cove and Old Town Haleiwa

9:00 AM – Kualoa Ranch ATV Tour || $150 per person

During our entire trip, this was the day I was looking forward to the most. Being a die-hard Jurassic fan, I was quite excited to witness the real location where this iconic movie series was filmed. We did what most tourists do, that is drive an ATV through the ranch. Ours was a 2-hour ATV Raptor experience and it took us through the scenic valleys. The ranch is vast and we drove through trails, mud and streams. We also stopped to see the bunkers and the cages that were used in the movie. I simply cannot explain in words how incredible the whole experience was. If you’re planning to visit this ranch, I would recommend driving an ATV as that’s the best experience you can get.

And an important tip when you plan this – Carry headscarves and sunglasses or you will end up getting dust all over your face and in your eyes. Read my blog on Hawaii outfit ideas to get some outfit inspiration.

2:00 PM – Kahuku Point and Shark’s Cove || Free entrance

By the time we got back, it was lunch time so we stopped at the nearby Kahuku farms and they had some decent lunch options. We then made our way to Kahuku point and Shark’s cove.

4:00 PM – Old Town of Haleiwa

Our last stop for the day was the beautiful and quaint Old Town of Haleiwa. This town had a very historic and laid back vibe, and the ambience was very country style. This town is pretty small and there’s just one street that you can actually check out. We leisurely strolled through the street and stopped at the Nalu health bar and café for some beet juice which was quite refreshing given the heat during the day.

8:00 PM – Dinner at TBD by Vikram Garg || $60-$80 for two people

Our final destination was dinner at TBD by Vikram Garg. This place has a fancy ambience and that makes it a perfect spot for a romantic dinner date. I was also amazed at their extensive menu. Their craft cocktails were so good and just the right level of alcohol. And the food menu was so intricate and everything was quite fresh. It was just the right way to end our exhausting and fun filled day.

Day 5: Polynesian Cultural Center

9:00 AM – Kualoa Ranch ATV Tour || $120 per person for islands access and Ha:Breath of Life show

We didn’t plan a whole lot for our last day on this island since we wanted to keep it light and not tire ourselves before the trip back home. So we started our day with the amazing Kona coffee because we loved it so much. We then made our way to the Polynesian Cultural Center to learn more about the history of the island and the culture. This place absolutely has to be on your Oahu itinerary. One important tip when planning a visit here is that try to go as early as you can. This cultural center is massive and it features 6 villages to explore so you will need plenty of time here.

I don’t think I can pick the best village because all of them were so unique in their own ways and had a lot of great cultural experiences to offer. Each village also hosts some of their cultural activities that you can take part in. So we spent a great deal of time exploring each village and interacting with the locals. We ended our day here with the incredible “Ha: Breath of Life” show. It’s one of the most popular shows and we had a great experience.

I hope this helped you plan your Oahu itinerary and gave you some more clarity on what you want to do. Let me know your thoughts in the comments below!

Continue Reading

Our ultimate 5-day itinerary for Jamaica on a budget

Beautiful white sand beaches, turquoise blue water, gigantic waterfalls, delicious food, vibrant culture and friendly locals – if that’s your idea of a perfect vacation then Jamaica has to be on your bucket list! And you’ve landed at just the right place to help you plan the best itinerary for Jamaica.

Our first trip of 2023 couldn’t have started on a better note. Every January, my husband and I do our anniversary trip and this year was no different. If I am being honest, I did have my reservations about Jamaica, but little did I know that I was in for a retreat. Now that I look back at our trip, I have to say that this tiny but mighty island has an immense lot to offer in terms of food, culture and natural beauty. You can literally spend weeks here and never get bored or run out of exciting things to do.

Before I jump into the itinerary, there’s a few important questions that would be helpful to answer.

How to get to Jamaica?

The most common ways of getting here are through air or sea, depending on where you’re coming from. If you’re going to be flying in, there are three international airports on the island,

  • Montego Bay – MBJ – Donald Sangster International
  • Kingston – KIN – Norman Manley International
  • Ocho Rios – OCJ – Ian Fleming International

Montego Bay is the largest and has the most flight options. And if you’ll be heading to Negril once you land, then Montego Bay will be the nearest airport.

How to get around the island?

This will depend on your itinerary and length of stay. If you’re going to be staying for 5 or more days and have multiple different places on your list, then renting a car would be a good idea. It will give you more flexibility. You may have heard of how aggressively people drive in Jamaica. But don’t let that scare you off because its not as bad as it sounds. As long as you follow the rules and drive responsibly, you should be fine.

What is the best time to visit?

Jamaica has a tropical climate so it naturally gets very hot and humid during the peak summer months. Between June and November, temperatures can really soar, making it difficult to visit. So, the best time to visit is between November through March. We went in mid January and the weather was great. It was warm but not uncomfortably hot.

What to pack?

Since you’re going to a tropical place, there’s certainly a few must haves that should be part of your packing list. Here’s a few of my recommendations,

How many days are enough for Jamaica?

This depends on a few factors such as where you’re flying in from, what your budget is like, what kind of activities you’re planning on etc.

If you’re flying in from North America, then you’re lucking to be saving some time in travel. And in that case, a week or less should work fine. We flew in from the US so we planned our trip for 5 days. I have to say, though, that in 5 days we were only able to cover the west part of the island i.e. Negril and Montego Bay. We were not able to cover the east side, including the capital city Kingston. So if you’re planning on covering that as well, then plan for a week or longer.

How much is a trip to Jamaica for 5 days?

Our total trip cost per person for a 5-day trip was around $2,000. Below is the breakdown of the average cost and please note that this is as of January 2022 so it could vary depending on when you plan to travel and where you’re traveling from. Because we flew in and out of Atlanta in the US, which is fairly closer to the island, our flights were cheaper. So keep that in mind when you read through this breakdown.

Flight from US to Jamaica – $300

Car rental for 5 days with insurance – $300

Resort in Negril for 3 nights – $1100

Airbnb in Montego Bay for 2 nights – $230

Food for 5 days – $400

Excursions – $200

We split our vacation between Negril and Montego Bay so I am sharing this 5-day Jamaica itinerary to help you get the most out of this Caribbean paradise. I’ll do my best to also share the costs of the different excursions to help you plan better.

Day 1: Explore the resort at Negril

We landed at the Montego Bay airport, picked up a rental car and drove 2-hours to reach Negril. We booked our car through Island Car Rentals and our experience with them was good. If this is your first time visiting Jamaica, then Negril has to be on your Jamaica itinerary.

One of the amazing things about Jamaica is its affordability. If you’re looking for an all-inclusive resort tucked away on the edge of the ocean, you have many options to choose from. We stayed at the Tensing Pen Resort in Negril and loved everything about the property. They have multiple different room types to choose from and we booked the Garden room.

Day 1 was all about exploring our beautiful resort. So, here are some things we did on the first day,

12:00 PM – Spa at the resort

After our long and leisurely breakfast at the resort with incredible views of the ocean, we decided to go to a spa at the resort.

2:00 PM – Lunch ($120 for two people)

We then had lunch at the Zest Restaurant which was a 5-minute drive from our resort. We ordered two cocktails, two appetizers and one entree and total cost was $120.

5:00 PM – Explored the Seven Mile Beach

After lunch, we hung out at the Seven Mile beach for a while and came back to our resort.

7:00 PM – Dinner at the resort ($80 for two people)

We relaxed by the pool in the evening and decided to have dinner at the resort. I have to say that I was really impressed by the food and the cocktails there. We had a traditional Jamaican meal at The Lodge Restaurant which included Vegetable Fritters, Fried Plantains, Pumpkin and Okra Stew, Jamaican Peas and Beans.

Day 2: Blue Hole Mineral Springs and Rick’s Cafe

9:00 AM – Breakfast at Miss Lily’s ($40 for two people)

Day 2 was quite adventurous and we started with a lovely breakfast by the beach at Miss Lily’s. I am so glad we tried this place out as they have such cute ambience, a perfect location and yummy food. Their beetroot juice was so fresh and just a perfect start to the day. We ordered two juices and two entrees and the total cost was only $40 which was pretty affordable.

11:00 AM – Head to Blue Hole Mineral Springs ($20 entrance fee per person + tip as you want)

After breakfast, we drove to the Blue Hole Mineral Springs. Since we had the rental car, we decided to drive on our own but if you’re not super comfortable driving around the island or are a bit skeptical about going alone I would highly recommend booking a tour. Honestly, it’s not a very smooth drive towards the last 30 minutes of the journey, and the roads get narrower and rockier. I would say the trip was worth it because we have never swum in a mineral water hole before and the water was beautiful.

It’s essentially a swimming hole which is 35 feet deep and there’s a rope swing that can get you down into the hole. If you don’t know how to swim or are scared like me, they also have ladders that can take you down into the hole. And the staff is super friendly and helpful.  We realized that this place is still not very popular as there were not many tourists when we went, but if you have never been to a mineral springs before this needs to be on your Jamaica itinerary.

2:00 PM – Lunch at Rick’s Cafe ($60 for two people)

After our little adventure at the Blue hole springs, we made our way back to Negril and our first stop was the Rick’s Cafe. This cafe doesn’t need an introduction because it’s known for its cliff jumping antics so you’ll be able to see professional divers jumping from the edge of super tall cliffs. The cafe also hosts pool parties on some days so I would recommend checking the calendar of events on their website and planning accordingly.

7:00 PM – Dinner at Rockhouse Restaurant ($100 for two people)

After our stop at the Rick’s cafe, we made our way to dinner at the Rockhouse Restaurant. Not to mention, this place has a great atmosphere and is a good stop for catching the sunset while devouring their delicious food.

Day 3: Mayfield Falls and Montego Bay 

9:00 AM – Mayfield Falls ($40 for a tour guide)

Next morning, we left early after breakfast for Montego Bay. We made a pit stop at Mayfield Falls which was a bit of a detour but we really wanted to check it out as we’d read some great reviews online. We got a tour guide who took us through the falls, narrated the history of the island and took some great pictures for us. This was our very first experience of walking through a waterfall and it was amazing. The entrance is free but you can pay the tour guide if you hire one. We paid around $40 as tip to our guide since he was really good and made our experience amazing. The entire experience took about 3-4 hours.

1:00 PM – Head to Montego Bay ($230 for 2 nights in airbnb)

Since this part took almost half of our day, we were already a bit exhausted so we drove straight to our airbnb at Montego Bay, checked in and took some rest. I would highly recommend this airbnb to anyone who is looking for a budget stay in Montego Bay. This apartment is well situated in a gated community which is very clean and new. The apartment itself was stunning and very clean. We really loved staying here.

7:00 PM – Dinner and drinks at Pier 1 ($50 for two people)

In the evening, we headed out to Pier 1. As the name suggests, it’s a restaurant at the pier that has such a fun vibe. If you want to explore Jamaica’s nightlife, this is the place to be. We got here around 9pm, had dinner and then stayed back until 2am. The five reasons I’d recommend you to check this place out are its location, cocktail menu, crowd, music and safety. So I would highly suggest adding this as part of your Jamaica itinerary.

Day 4: Dunn’s River Falls and Luminous Lagoon Tour

10:00 AM – Dunn’s River Falls ($25 entrance fee per person)

Day 4 was all about exploring the beauty of Montego Bay. The two things we had planned for the day were Dunn’s River Falls and Luminous Lagoon Tour.

Since there are many cruise ship tours that stop at the Dunn’s River Falls, this place can get very crowded so it’s recommended to call ahead to ask when is the best time to visit.

These Falls are massive and they start at the beach, which is where people typically start climbing the falls from. They are tiered and there are two options for the path – the dry path along the side of the waterfall and the wet path which is what we took. The wet path was a great experience for us as it had several natural pool areas and some spots felt literally like we were in a jacuzzi. But the wet climb can be very slippery so I’d recommend wearing robust water shoes.

7:00 PM – Luminous Lagoon Tour ($25 per person)

After this incredible experience, we made a pit stop for lunch and then headed to our Luminous Lagoon tour which we booked through here. Jamaica’s luminous lagoon is one of the four in the world that provides an amazing bioluminescence experience. They say that it’s the largest and brightest in the world. We took a boat ride from the Glistening Waters Restaurant at around 7pm and it was a 20 minute ride to the lagoon. The boat is then stopped for a few minutes and you can get into the water and swim with the bioluminescent organisms for an experience of a lifetime.

Day 5: Hip Strip and Crafts Market

9:00 AM – Explore Hip Strip

Day 5 was our last day in this land of paradise and we spent it mostly at The Hip Strip. We did some shopping to take back some souvenirs and we also brought back the famous Blue Mountain Coffee. We also spent some time at the Montego Bay crafts market where you can find a lot of interesting handmade stuff.

3:00 PM – Flight back home

Saying goodbye to this beautiful island was quite hard after having spent so much great time here but it was sufficient to give me a hankering to return.

Hope you find this Jamaica itinerary helpful!

Here’s another post for my top 5 restaurant recommendations in Jamaica so don’t forget to check it out.

Continue Reading