The Palace of Versailles. Its grandeur and charm has made it one of the most visited attractions in France. Once home to the Kings and Queens of France, this palace offers a lot of rich insight into the French history. The palace depicts the life of King Louis XVI and how under his rule, it became a place of extravagance. So there shouldn’t be a question on your mind of whether this should be a part of your itinerary. I have to say that it’s totally worth a visit.
Outside the PalaceRoyal Chapel
So first things first, where is The Palace of Versailles? The Palace is about a 30-40 minutes drive from the city of Paris in the town of Versailles (which, btw, is a beautiful town!).
Here’s a helpful guide based on my personal experience on how to have the best time here,
HOW TO GET HERE?
The fastest, cheapest and easiest way to get here is to take a train. There’s a direct train (line C) that runs from the city of Paris to the Versailles Chateau Rive Gauche station which is where you’ll have to get down. The train runs from many stations and we took it from the Eiffel tower because that was the closest to our hotel.
An important tip if you do end up taking the train – The Paris Metro Pass will not be sufficient for this ride as that pass works only within Paris so you’ll need to buy separate tickets for this journey.
You could also take a taxi or uber but you may end up getting stuck in traffic, depending on the time of the day and will end up paying more.
WHAT IS THE BEST TIME TO VISIT?
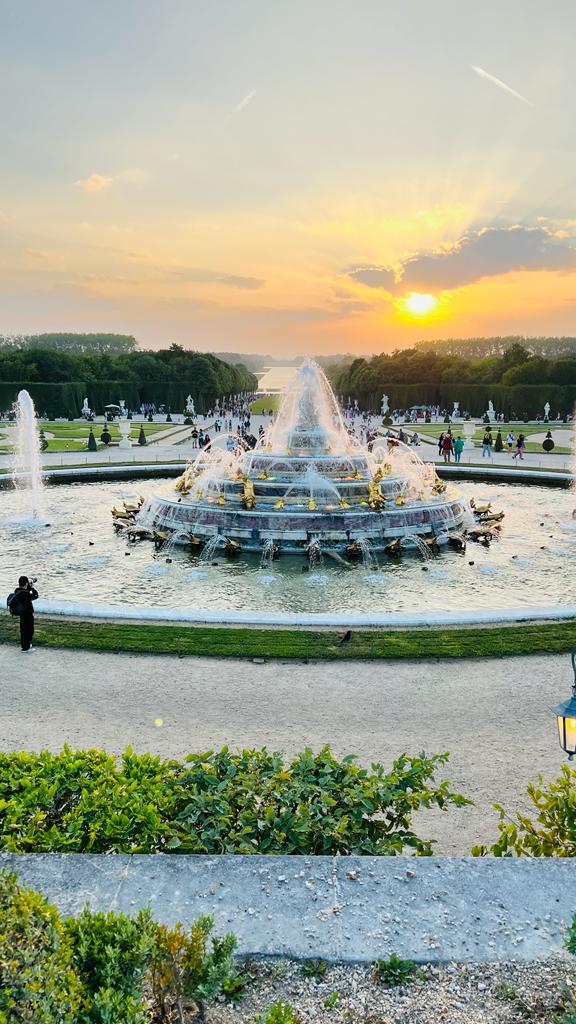
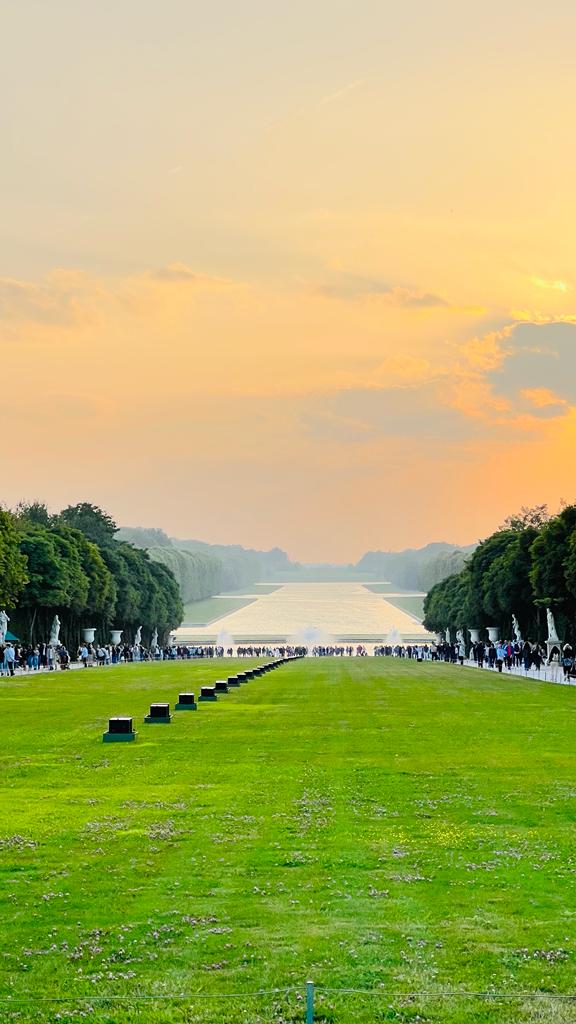
Since the Palace of Versailles is adorned by lush, beautiful and magnificent gardens, it’s best to visit in summer when the gardens are in full bloom. Another reason for visiting in summer is that the chateau hosts special events and one of the best events that happens in summer is the musical fountain show. The musical fountain show runs from April through October and only happens on certain days of the week. This is when the magnificent fountains in the gardens are turned on for a display and it’s a spectacle to not be missed. The palace also hosts night fountain shows from June through September where the colorful and dramatic lighting effects offer a stunning visual.
An important noteif you have the Paris Museum Pass – This pass covers entry into the palace and access to most parts of the palace, but it doesn’t cover access to the fountain shows. So, you’ll need to buy separate tickets from here if you plan to attend the show. And be sure to check the dates that the show runs on.
Latona Fountain
WHAT IS THE ENTRY TIME?
The Palace is open all days of the week except Monday, from 9 AM to 6 PM. The gardens open at 8 AM whereas the Estate of Trianon opens at 10 AM daily. The Palace is open year round.
Keep in mind, though, that the last entry to the palace is at 5 PM. So, you can hang out in the palace after 6 PM but you need to make sure you get in before 5 PM. On the days when there’s a fountain show, the gardens open at 8 PM for the show and are open until 11:30 PM.
If you’re going to be staying a few days in Paris and plan to do museums, I would advise on getting a Paris Museum Pass from here. This pass covers pretty much all the major attractions in and around Paris (including Palace of Versailles), so its very economical. You could choose between the 2, 4 or 6 day option and also add river cruise as an add on if you’d like to do that.
HOW LONG DOES IT TAKE?
The full tour of the Palace shouldn’t take you more than 3-4 hours. They provide maps of the entire estate at the entry point. The map comes with a few red dots marked on it for important sections to not miss. But if you want to plan ahead and mark the sections you want to hit first, here’s an interactive map on their site that you can refer to.
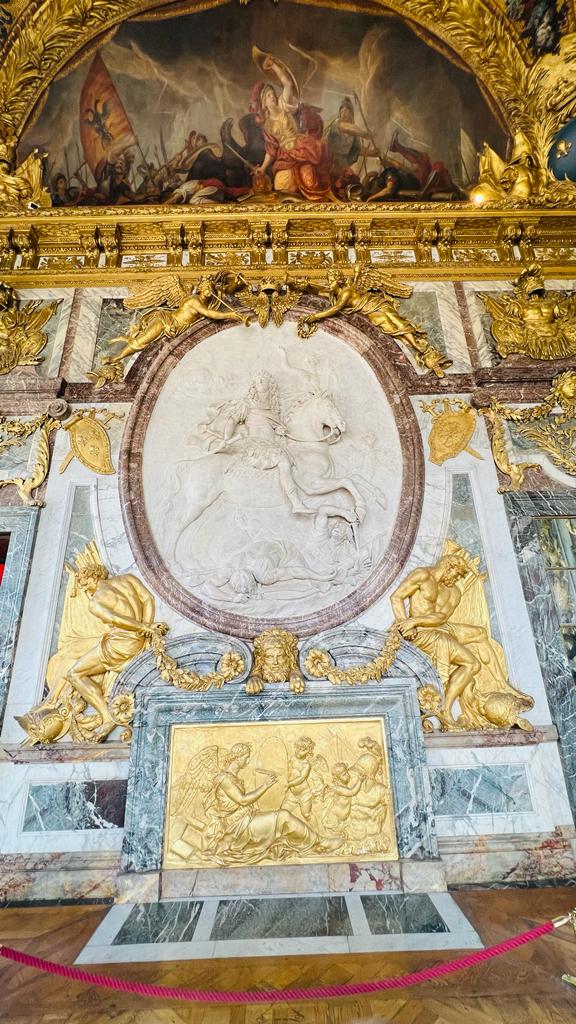
The King’s State Apartment
WHAT TO CARRY?
If you’re planning to go on a summer day, then definitely carry water, a hat and sunglasses with you. The palace is huge and can take a while to tour so pack some snacks if you think you’ll get hungry. Most restaurants inside the palace close by 6 PM so be sure to get your dinner packed before that or make sure to bring something with you if you plan to stay back for the fountain shows in the night. It also gets colder in the evenings, even on summer days, so be sure to bring a jacket.
HOW TO DRESS?
You can wear anything comfortable that you can go around in for a couple of hours. Be sure to check the weather before your trip to dress accordingly. Since there’s a lot of walking involved, be sure to wear comfortable shoes. On some paths in the gardens, you’ll be walking over cobblestones so comfortable shoes or sandals will be important. Read my complete blog here to see what I wore to the Palace of Versailles.
WHAT ARE SOME MUST SEES?
There’s a lot of things to explore in and outside the Palace but if you’re short on time or don’t want to tour the whole estate, below is a list of absolute must sees that you need to cover,
King’s State Apartments
Hall of Mirrors
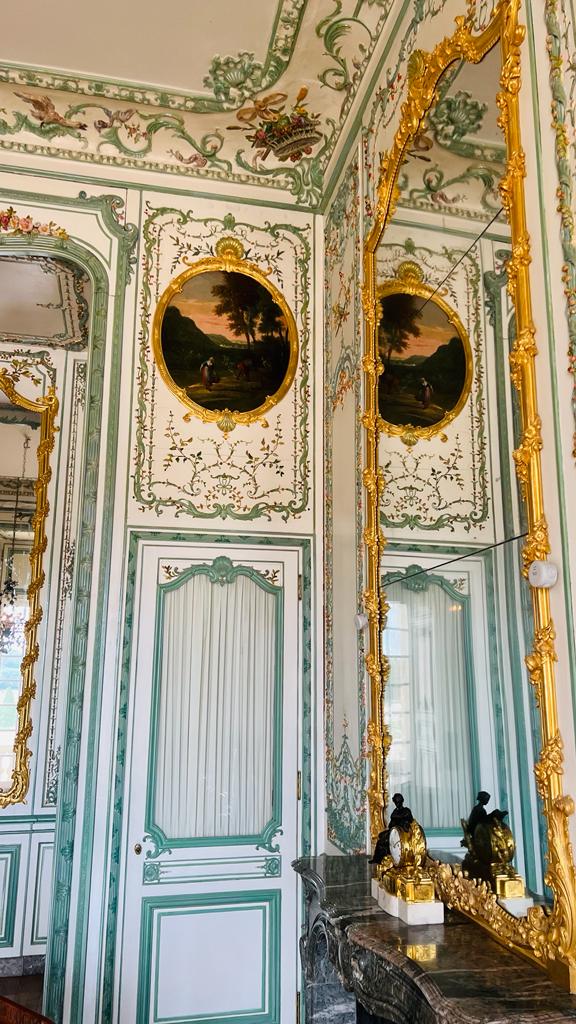
King’s private apartments
Queen’s apartments
Gallery of Great Battles
Royal Serenade show (takes place under the gold of the hall of mirrors)
Fountain shows
WHERE TO EAT?
As I mentioned, most restaurants in the palace close by 6 PM so make sure to go before that. There are a few restaurants on the property and a good place for some nice coffee and snacks is Grand Cafe D’Orleans. However, if you have more time then the old town of Versailles also has a lot of great options and is worth checking out.
Other than all this, just have fun and soak in all the royalty and charm that this Palace has to offer.
If there’s something I missed, feel free to add in the comments below. Hope this guide to The Palace of Versailles was helpful!
Have you watched the series Narcos: Mexico on Netflix? Well, that’s how I got more familiar with this North American country and it certainly tainted my perception. Back then, I used to relate it with everything I saw in this series. Fast forward to the present day, I just can’t stop reminiscing about our recent vacation here.
My husband and I spent 5 days in Mexico in April of this year and just fell in love with this country. It’s enormous and endlessly captivating. If you really wanted to soak in the different things it has to offer, you could go for 1-2 weeks. Even that may not be enough depending on what you want to do. But we could only afford 5 days in Mexico, given our busy work schedules. But those 5 days were just so incredible that we didn’t realize how quickly it all got over.
Anyway, enough about that. Here’s our 5-day itinerary covering all the nitty-gritties to help you plan your travel. We split our trip between Cancun and Tulum and spent the first 3 days in Cancun.
Day 1: Reach Cancun and check in at the resort
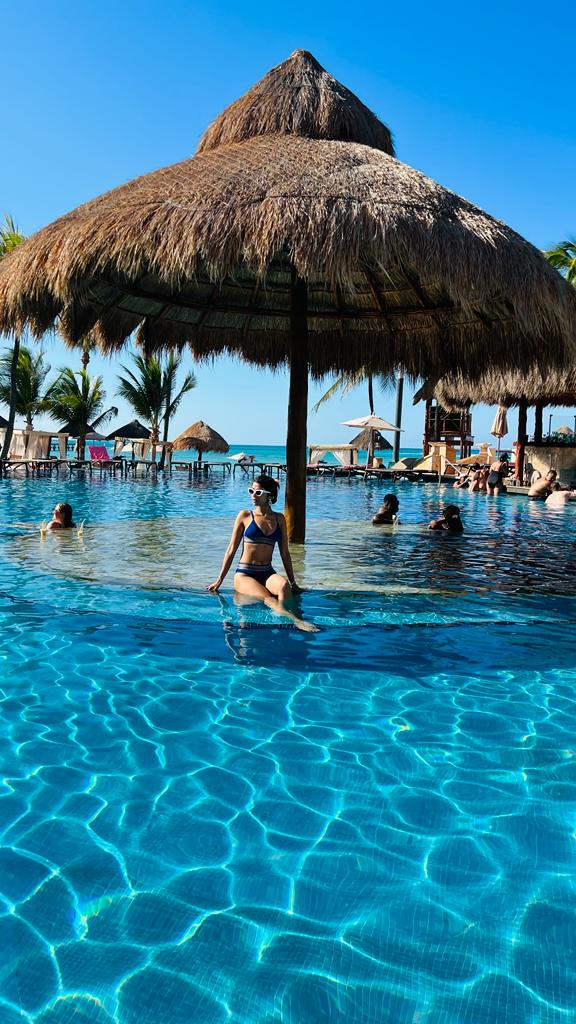
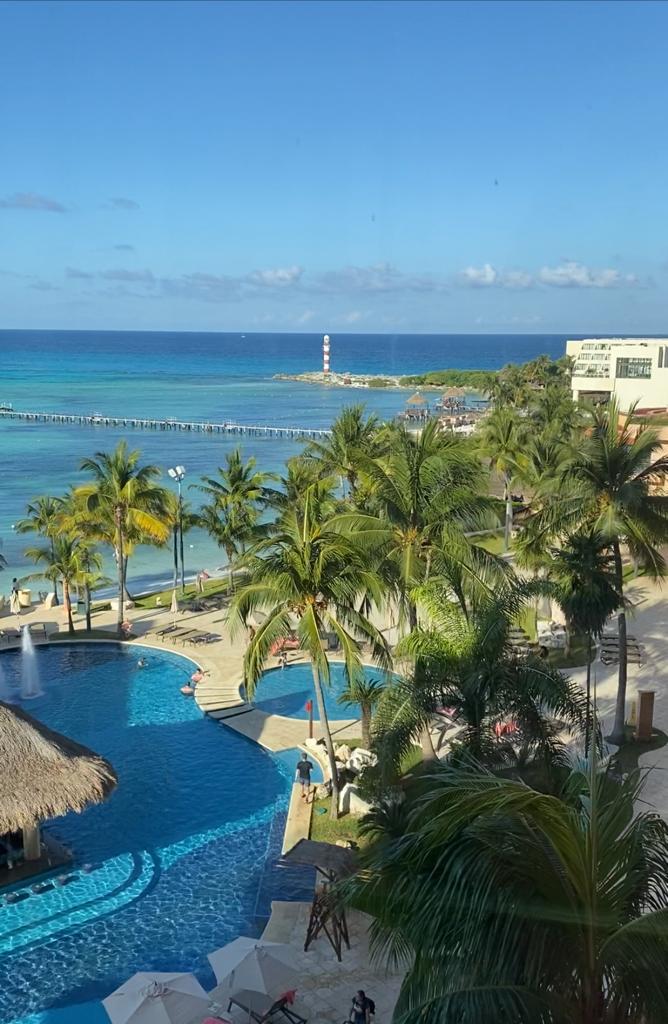
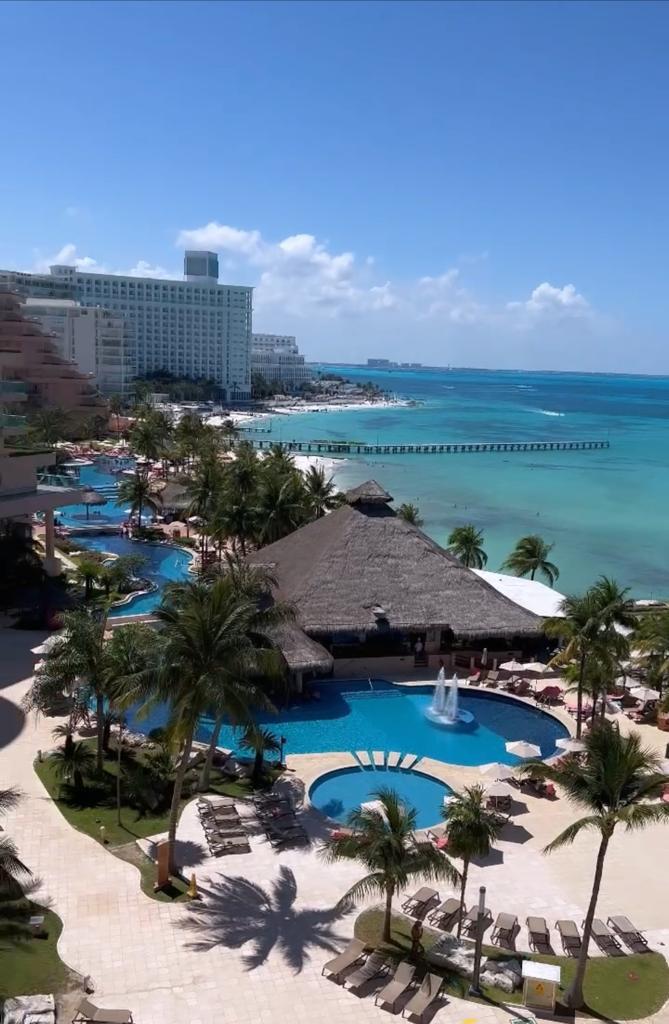
The first question in my mind when planning the trip was where to stay. Having heard our friends’ experiences and read in a few blogs, we decided that staying in the hotel zone would be the safest and most convenient option. This is the safest zone in Cancun for tourists, plus it’s closer to all the nightclubs and flea markets that you’ll most likely end up visiting. So we stayed at the Grand Fiesta Americana Coral Beach Resort and man, oh man, we just loved it. The property is stunning and they have everything you can possibly imagine for a vacation. They have 3 outdoor pools, all big enough. There’s plenty of restaurants and cute cafes for food and alcohol. The beach has private access, and is just a few steps away from the resort. They have events every other evening for the hotel guests.
We stayed in an ocean front room and couldn’t have asked for anything better. Day 1 was all about relaxing in our resort and soaking in the incredible views of the bay. During the day, we indulged ourselves in food and drinks, followed by pool therapy and a nice evening walk around the beach. We hung out at the beach for sunset and it was just so surreal. On our first night in the resort, they had live music so we just stayed back and decided to enjoy the whole vibe.
Day 2: Day trip to Chichen Itza and Valladoid
This was one of the most awaited days of our trip, because who doesn’t want to check out a wonder of the world? There’s many ways of getting to Chichen Itza from Cancun. Easiest is renting a car and driving there on your own. That gives you the freedom and flexibility to follow your own plan. However, since it was our first time in Mexico and we didn’t know our way around, we decided to just go with a guided group tour.
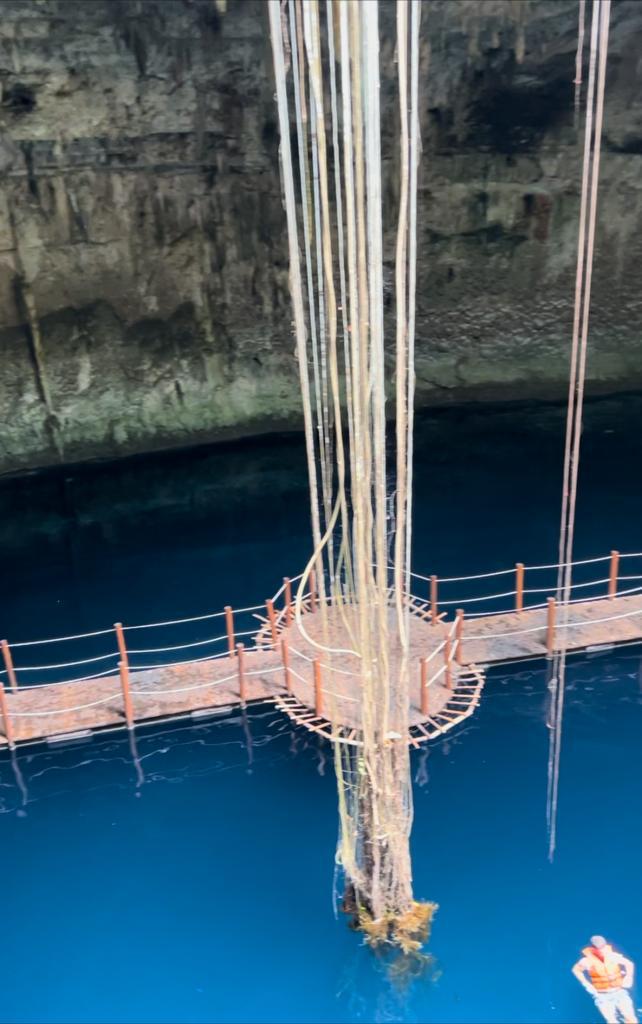
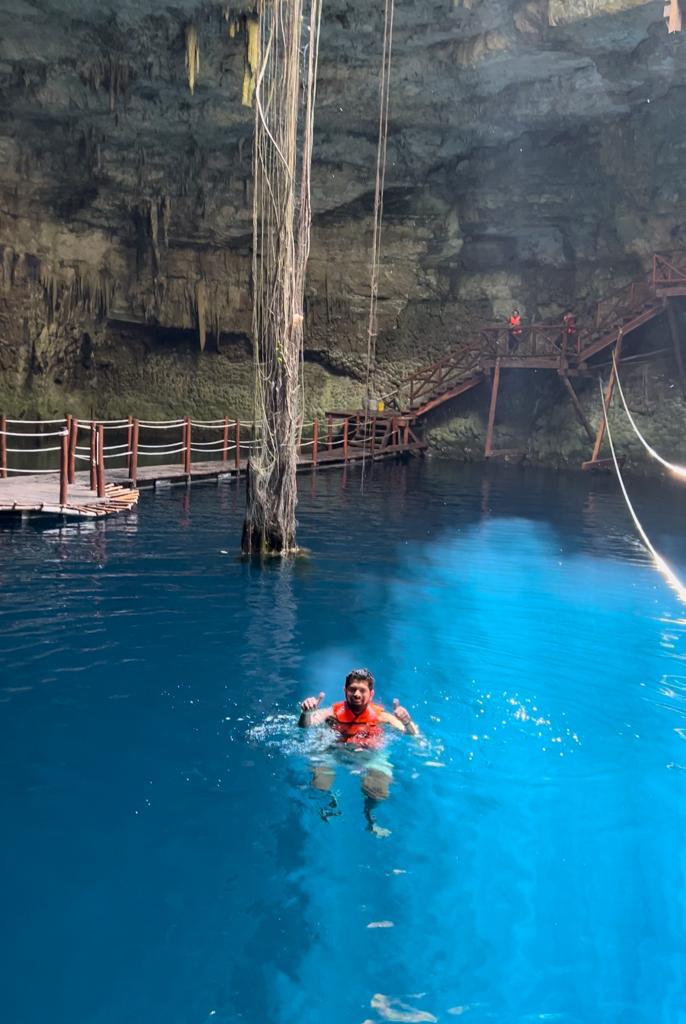
The upside of taking a guided group tour is that you get to have fun with the group while exploring and learning the rich history of the place. Since the group tour also includes stops to other famous places on the route such as the Cenotes and the city of Valladolid, you get to cover a lot in one day. However, the downside is that it takes longer when picking up and dropping off everyone. An important tip – Make sure to check the itinerary and read the reviews. We booked ours through Viator and while there’s a lot of tour companies that you could book through this website, just be sure to check their ratings and go with a good one. We paid $118 for 2 people and our tour covered stops at the Cenote Maya Park and the town of Valladolid.
There’s a separate blog on my website that serves as a helpful guide to Chichen Itza. It includes tips on how to plan, what to carry and what to expect on the day of so be sure to give it a read.
I’d 100% recommend adding this to your itinerary because it’s completely worth it. We later also stopped at the Cenote, which is one of the most popular activities in Mexico. There’s so many Cenotes here and they have a very religious significance to them. We loved the Cenote where we stopped because the water was turquoise and so calm. I would definitely recommend adding this as well to your itinerary.
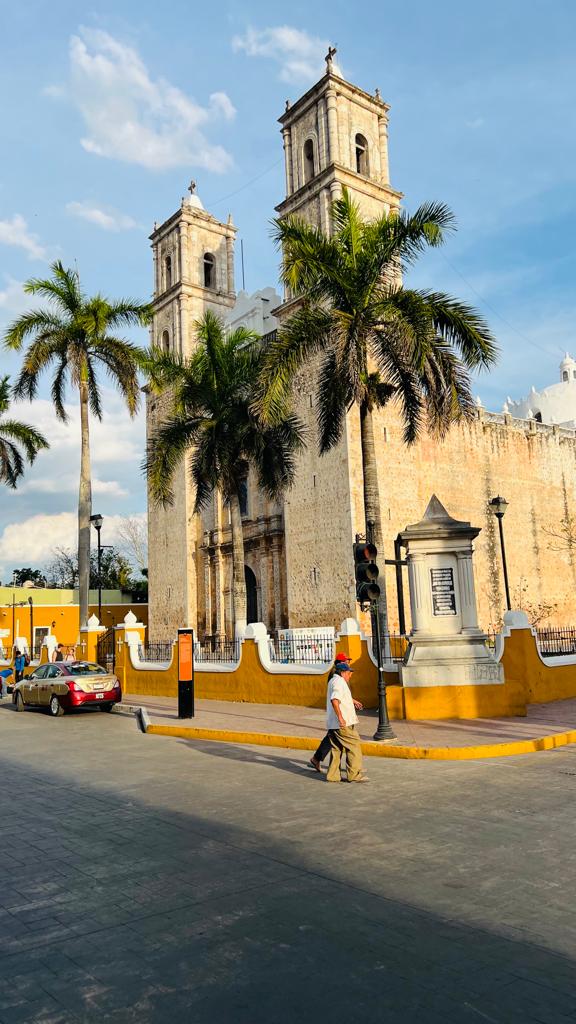
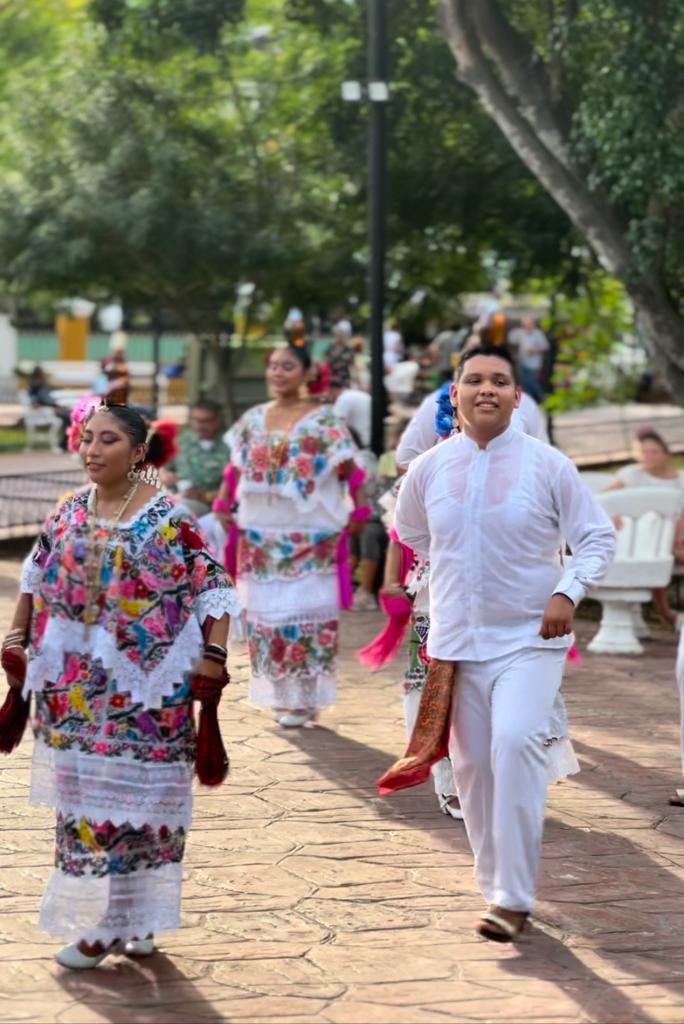
Final stop for the day was the cute town of Valladolid. We walked through the Main Square Parque Francisco Canton and were lucky enough to witness the traditional Mayan dancers showing off Jarana, a traditional dance in the Yucatan.
Church of San Servacio Main Square Parque Francisco CantonTraditional Dance
We then headed back to our resort as we had our reservation for Coco Bongo. This nightclub is, hands down, my best nightclub ever. You can make an online reservation ahead of time or just go in there and buy your tickets. It’s usually best to go between 9-9:30pm because they have shows that keep running between 9pm to 12am so you don’t want to miss them. Even if you’re not a party person, you should definitely make your way to this club because this is one experience you wouldn’t want to miss.
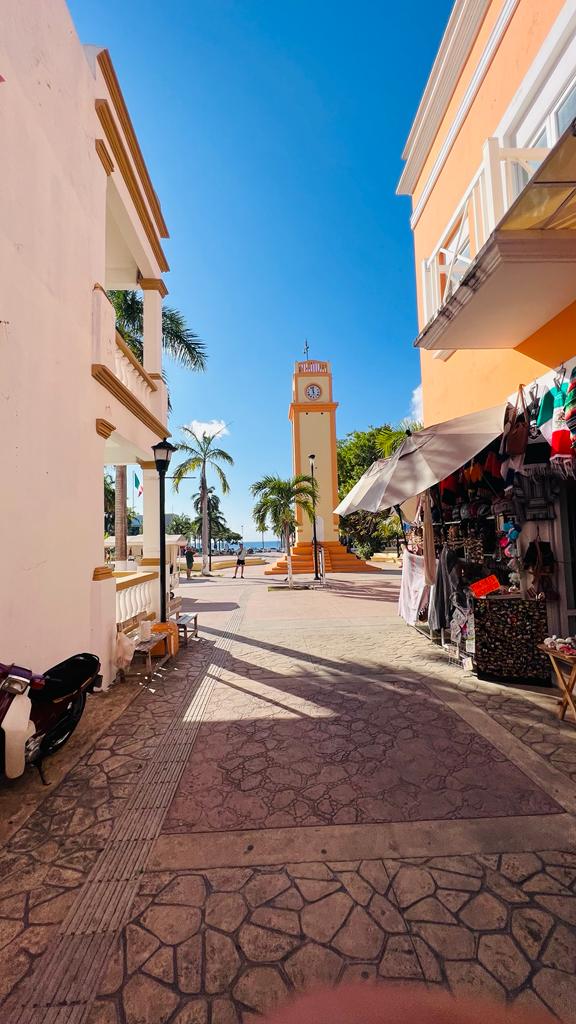
Day 3: Day trip to Cozumel Island and Playa del Carmen
Day 3 started early for us as we had a day trip booked to the beautiful island of Cozumel. There are many ways of getting to this island and we opted to go through the ferry. There’s two ferry companies – Ultramar and Winjet that run daily ferries from Playa del Carmen to this island. These ferries run every two hours so there’s many flexible time options to choose from. We booked through Ultramar and opted for first class seats. We booked the ferry for 10am since we also had to account for the time in getting from Cancun to Playa. We took a taxi from our resort in Cancun and reached Playa in about two hours to take the ferry from the ferry terminal.
It’s roughly a 30 minute ride from Playa terminal to the island, and is pretty smooth for the most part. But if you have sea sickness, then I’d recommend carrying medicine for motion sickness. Getting around the island is easy if you rent a car, bike or a scooter. We booked a scooter from a rental company at the ferry terminal at Playa and then picked it up at the island. They also provided a map so that made our navigation much easier.
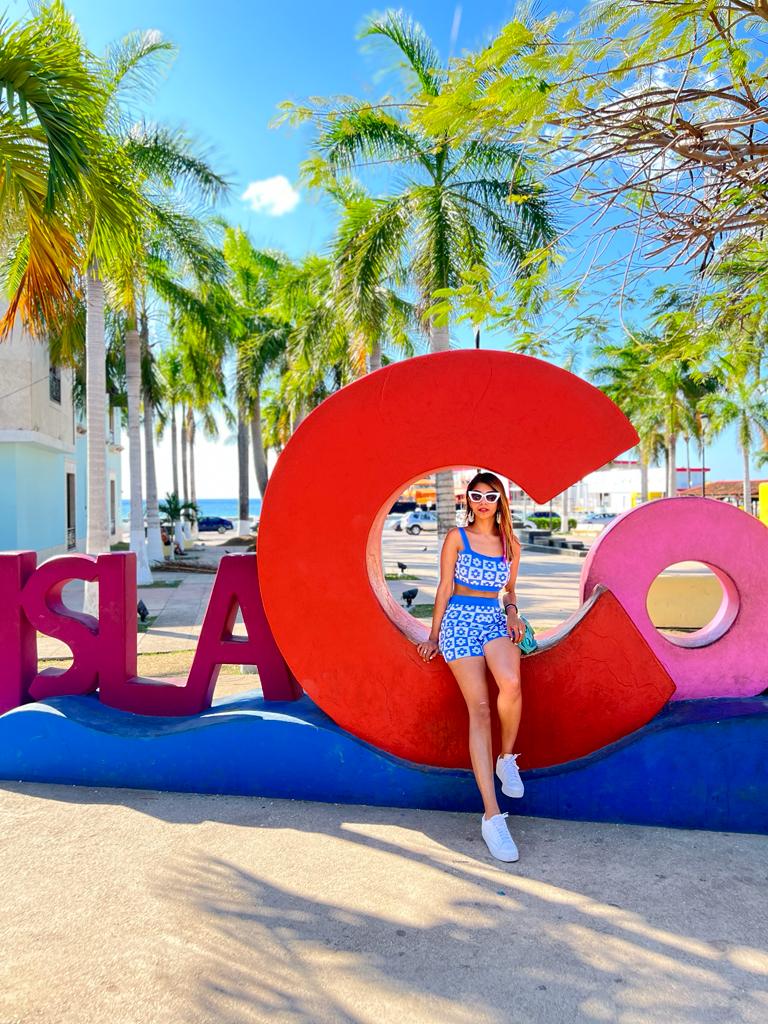
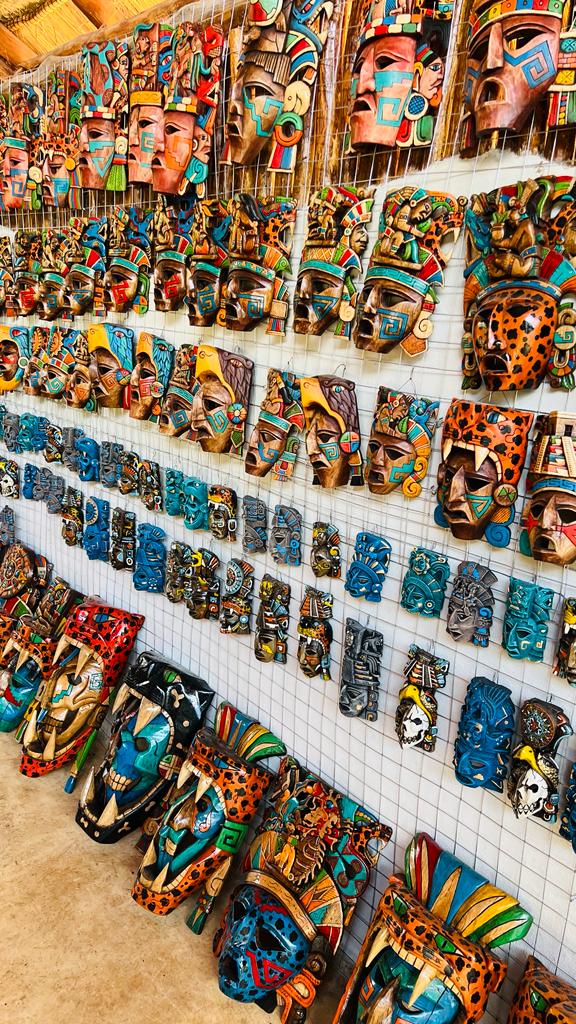
We spent about 4-5 hours on this island and did a lot of driving around the island. There’s a lot of water sports like scuba diving, surfing and snorkeling that you could choose from if you decide to spend good time here. There’s many famous beach clubs here that provide rentals for water sports for an entry fee. We decided to skip the water sports and rather spend time exploring the island, shopping, spending time at the beaches and taking lots of pictures. Read my blog here to learn more about things to do, what to carry and how to plan your day trip to Cozumel.
Cozumel sign
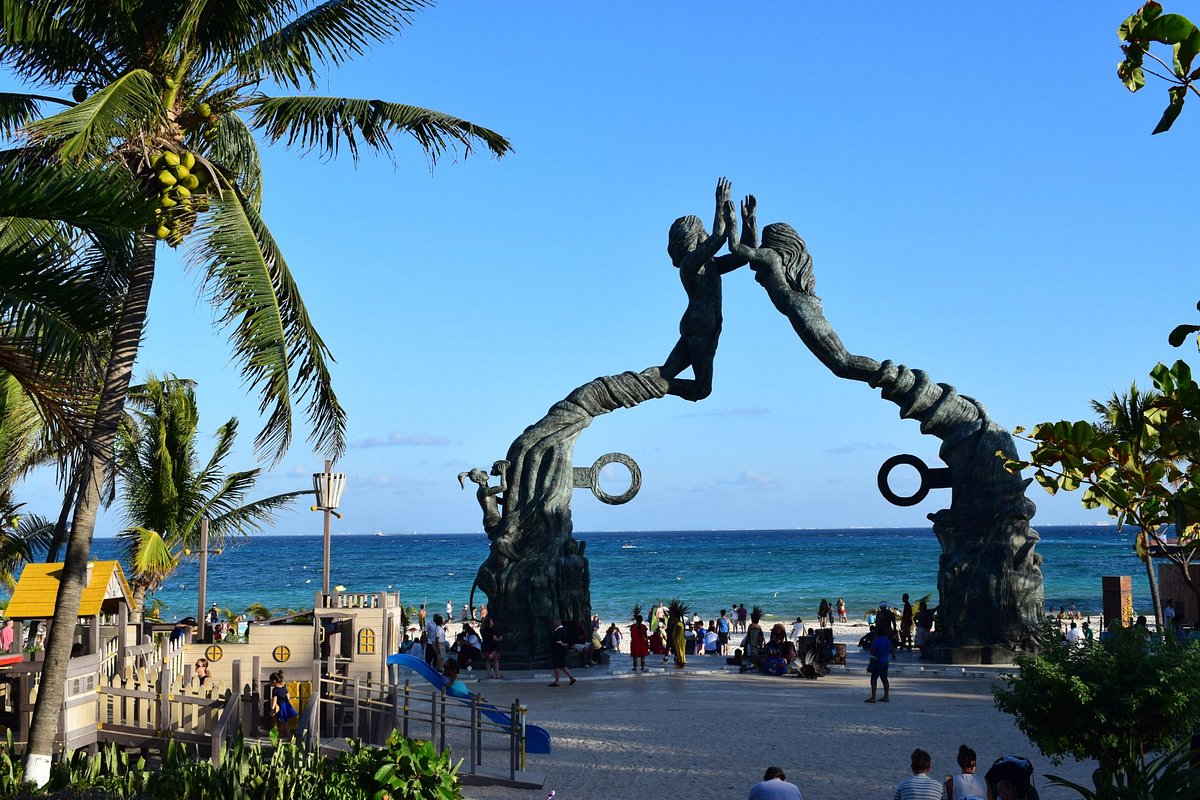
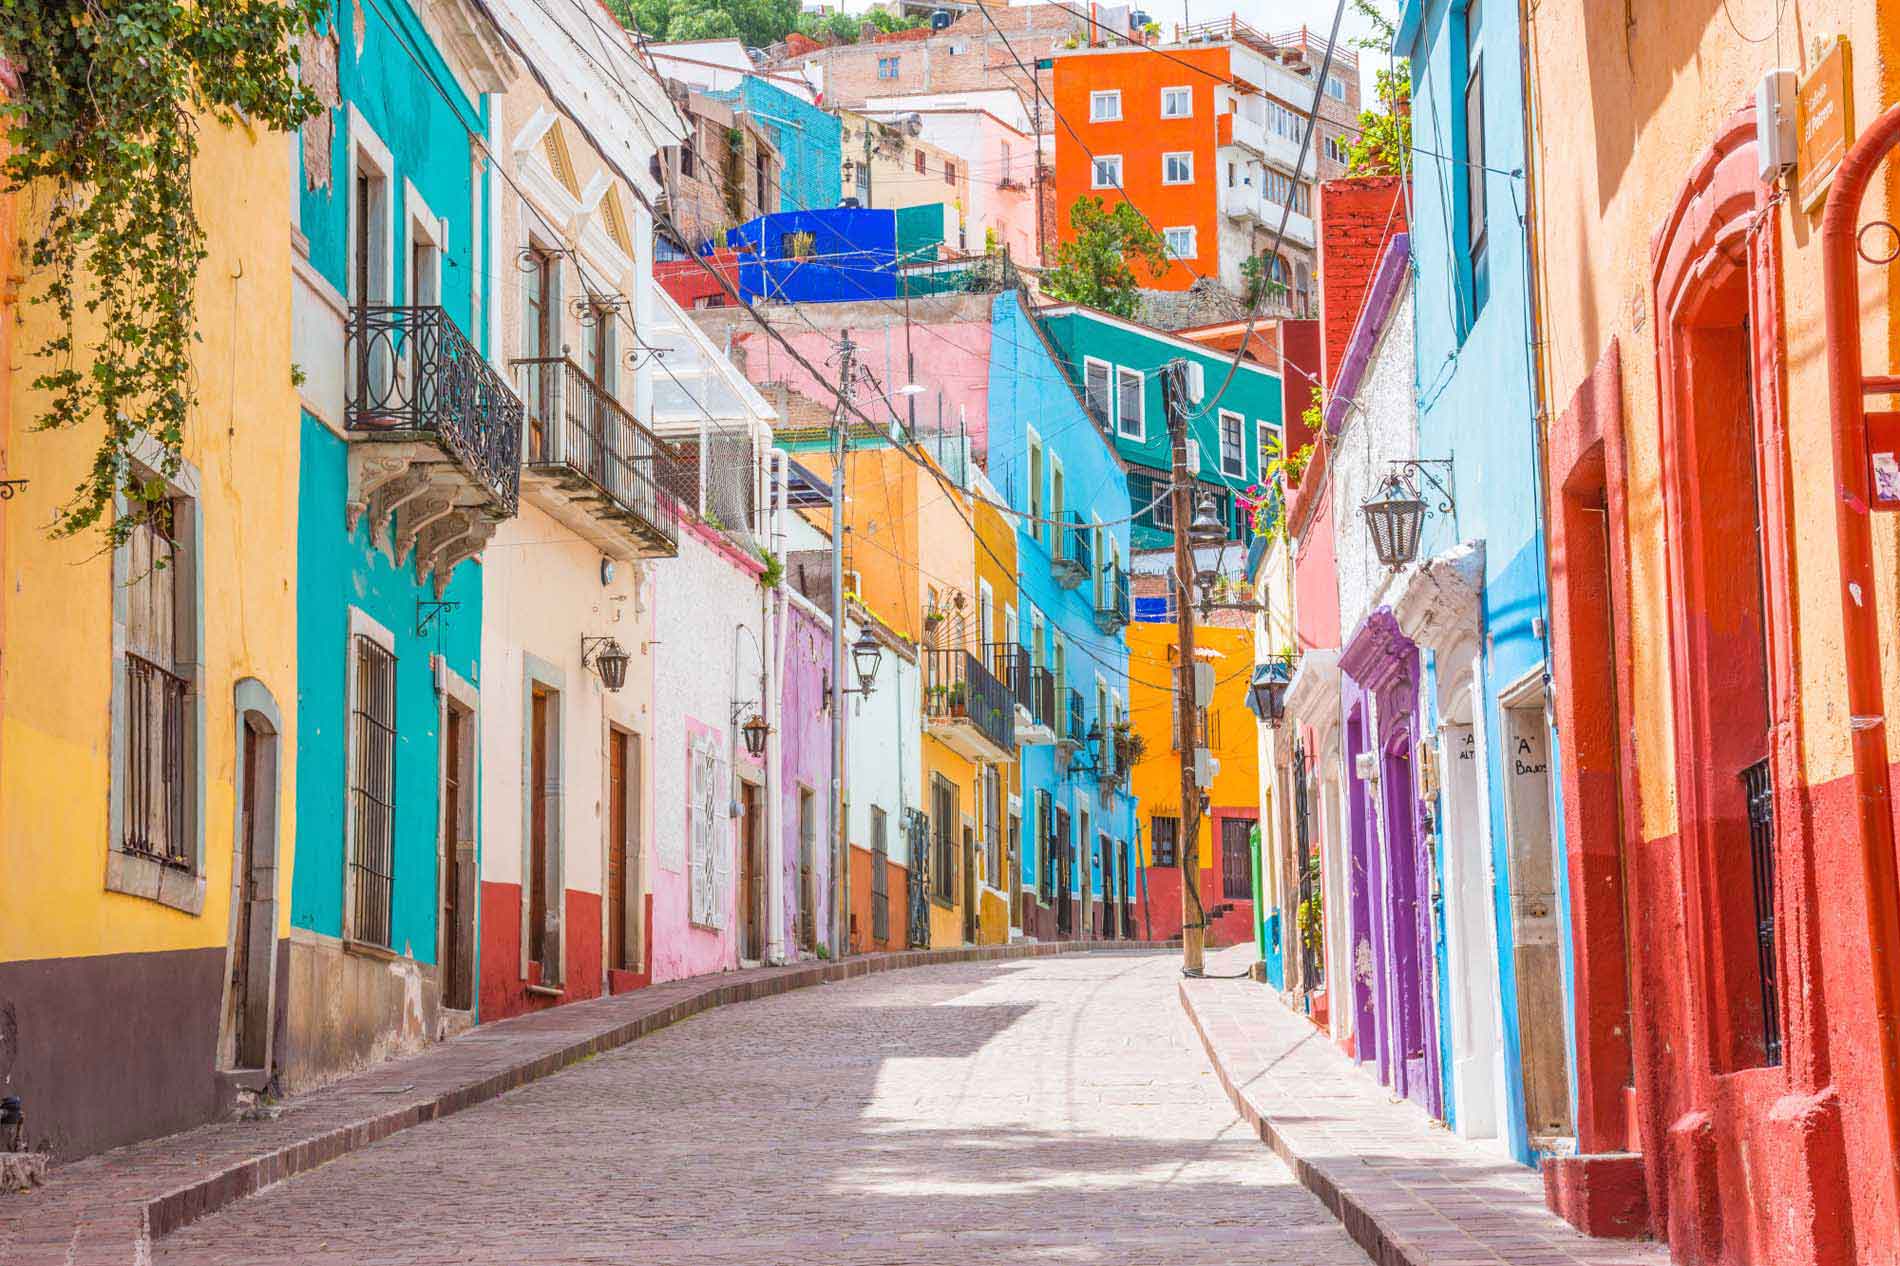
On our way back from Cozumel, we decided to spend some time in Playa del Carmen before making our way back to our resort in Cancun. There’s a very lively area around the ferry terminal that you won’t be able to miss. We were lucky enough to catch a dance performance by some locals just by the famous Parque Fundadores. We then also walked around the area through the beautiful market. Quinta Avenida is also a must-see street in Playa del Carmen. It is a lively and colorful 5 km long pedestrian street, lined with stores, souvenirs, cafes and restaurants.
Playa del Carmen
Day 4: Head to Tulum
After relaxing and enjoying our time in Cancun, we decided to spend the next two days in Tulum. Tulum has been on my list since the longest because of its vibe. It has so much to offer, whether it’s the coastal nature, or the jungle vibe, or the amazing food, or the rich nightlife. Oh, and not to mention, those beautiful boutique resorts that’ll transport you into a completely different world.
We left from Cancun in the morning after breakfast and reached Tulum in about two hours. We checked into our beautiful boutique resort called Naay and settled in. After a short rest, we then got ready and headed out to explore the town.
One important tip – If you’re wondering how to move around Tulum, then you might want to consider renting a bike, scooter or car. We rented a scooter instead of a car because I had read in some of the blogs that the tourist places in Tulum mostly have narrow roads so there’s high chances of being clogged up in traffic or having difficulty finding parking. And since most of the spots on our itinerary were within a 10-15 minute drive, we decided that a scooter would be our best bet.
The first stop we hit was the Mayan ruins. What was great about this place was its location i.e. right next to the beach. So after spending some time exploring the beautiful ruins, we also got to hang out at the beach for a bit. Keep in mind, though, that the weather is warm and there’s not much shade so make sure you’re prepared accordingly. Or try going in the evening, a little before sunset so that you can also catch a good sunset.
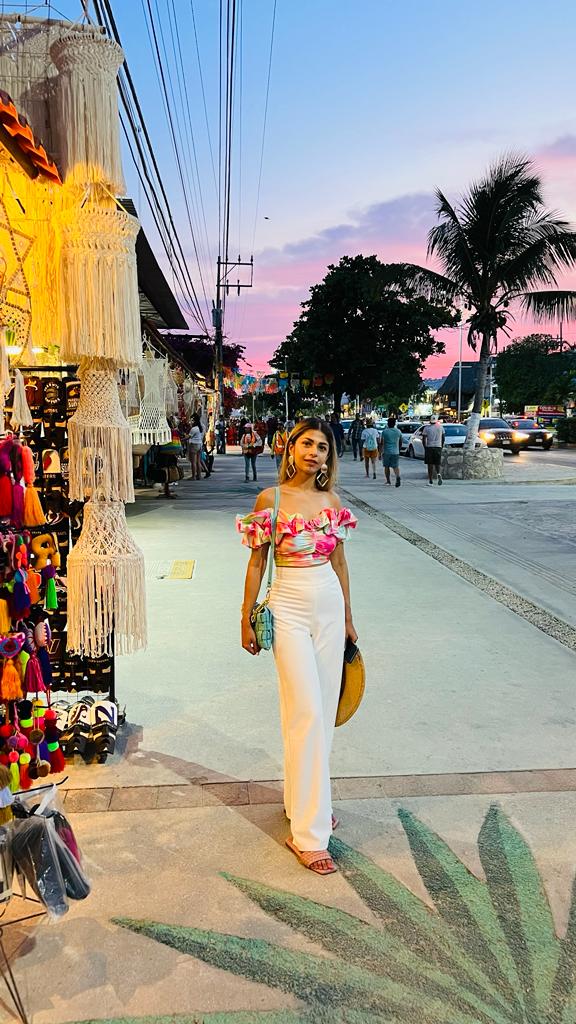
We then ended our day by spending time at the Tulum downtown. We drove through the beautiful street arts. One of the famous streets in Tulum to see street arts is Calle Sol Oriente. You can start from the far end of Sol Ote, where it meets the Coba road and then make your way down this street. After a quick drive through this street and soaking in all the beautiful art, we then made our way downtown. Let me warn you that Tulum downtown is not like the usual downtown, which you’d expect to be a bit more upscale. It’s definitely lively in terms of the crowd and nightlife, but it has a very local feel to it. We parked and explored the downtown on foot. We walked around 1-2 blocks and stopped at some local stores for shopping. We then grabbed a quick bite and made our way back to our resort.
Day 5: Explore Tulum beach strip
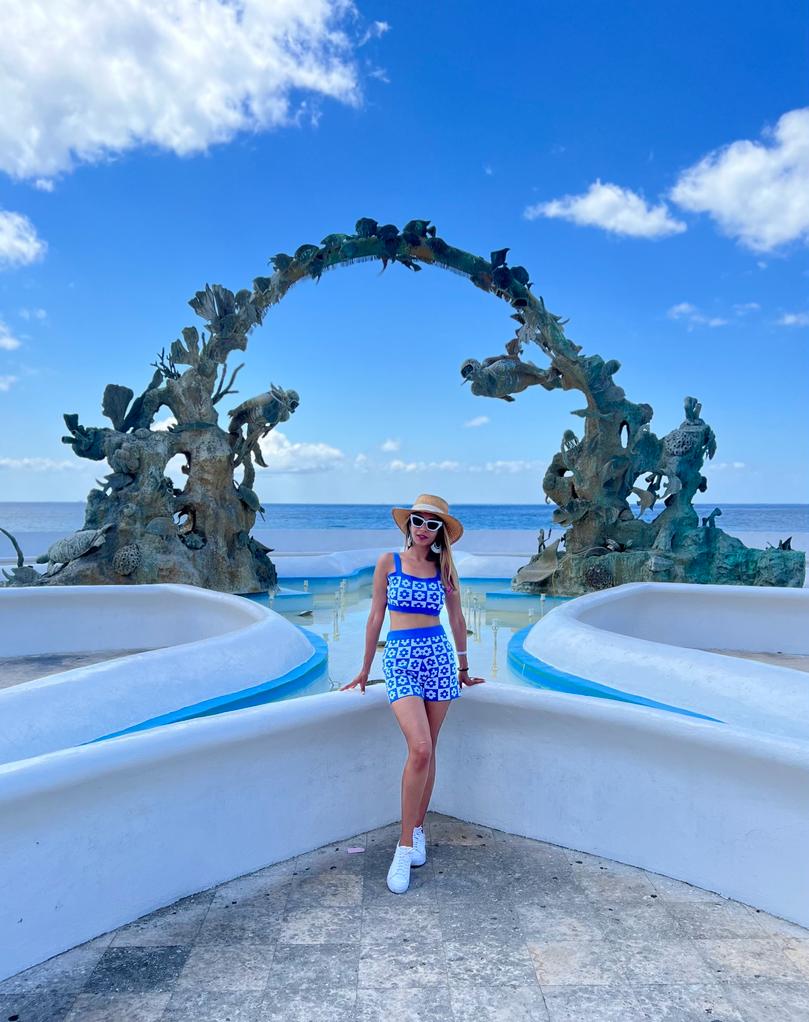
Our last day in Mexico was all about exploring the beach strip. We wanted to start our day with a nice breakfast with a view of the ocean so I made a booking at the Papaya Playa Project Beach Club. There’s many beautiful beach clubs to choose from and all boast incredible views. I chose this one because it had great reviews and I loved the whole vibe of this resort. We sat down here for a scrumptious breakfast and drinks.
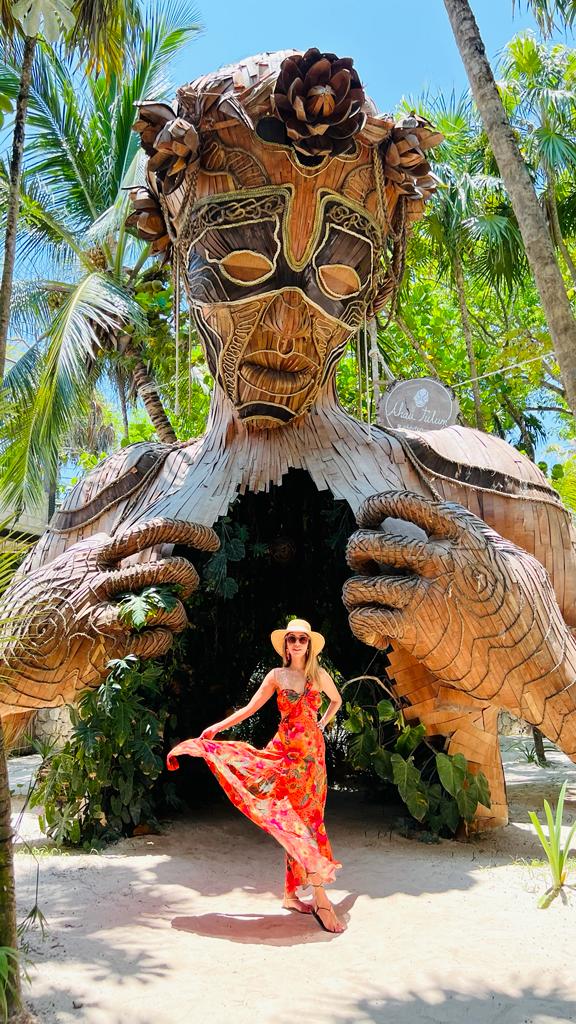
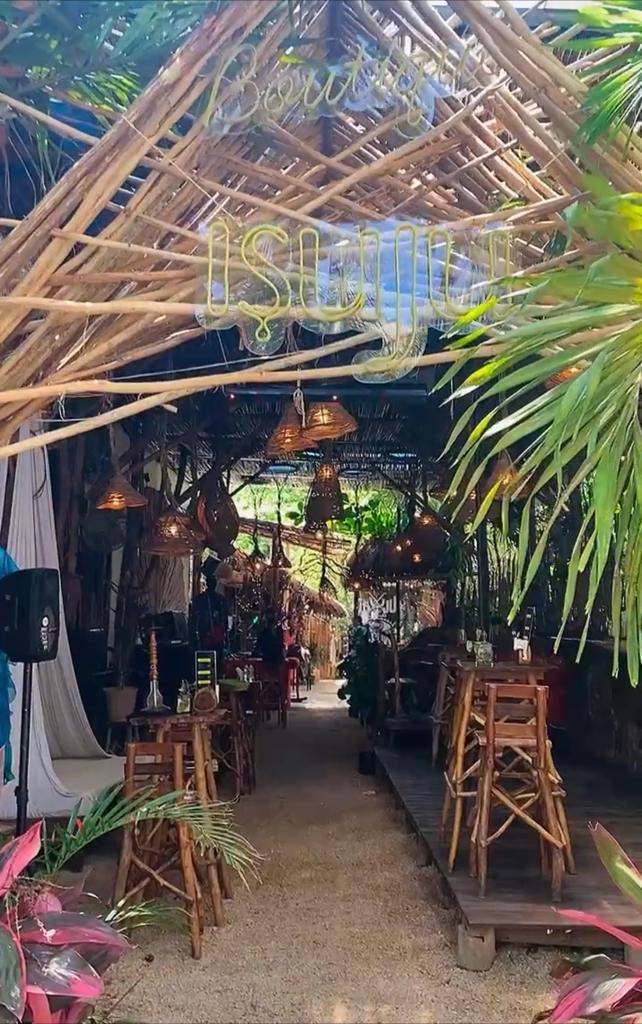
The next part of our trip was more sightseeing and touristy stuff. So we made our way to the famous Ahau Tulum Sculpture Park. There’s a parking lot right across so you can safely park there while you’re here. This park has an entrance fee and that can get you access to one of the most Instagrammable spots here. After spending a while here and taking lots of pictures (yes, lots!!), we decided to take a stroll along the beach strip. On the way, we stopped at a few boutiques for some shopping and stumbled upon this really cute boutique called Isuju. This boutique has amazing collection of clothes and accessories so if you’re a fashion junkie like me, you’ll love it here. Here’s there instagram page to give you a sense of what I mean.
Ahau Tulum SculptureIsuju boutique
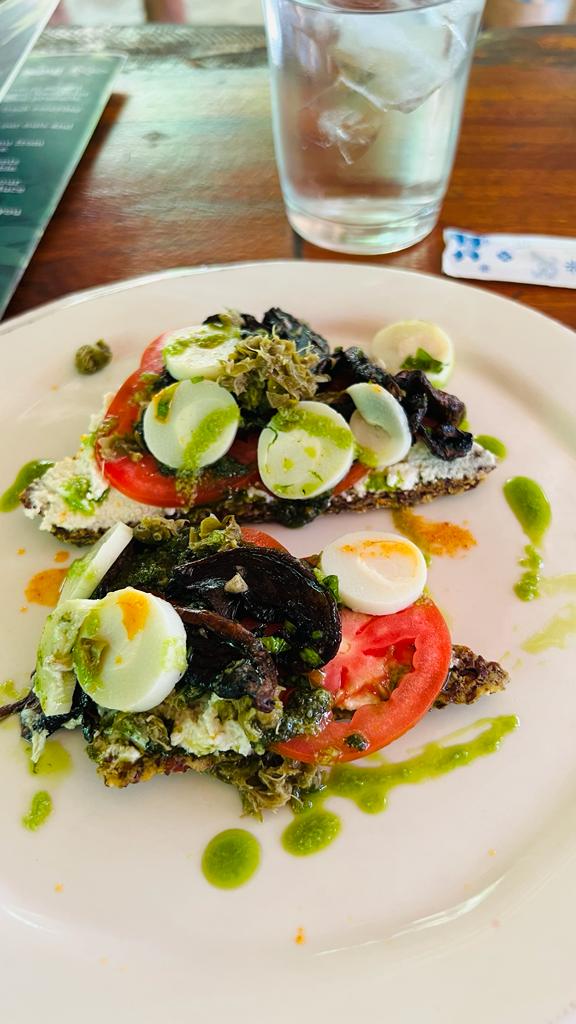
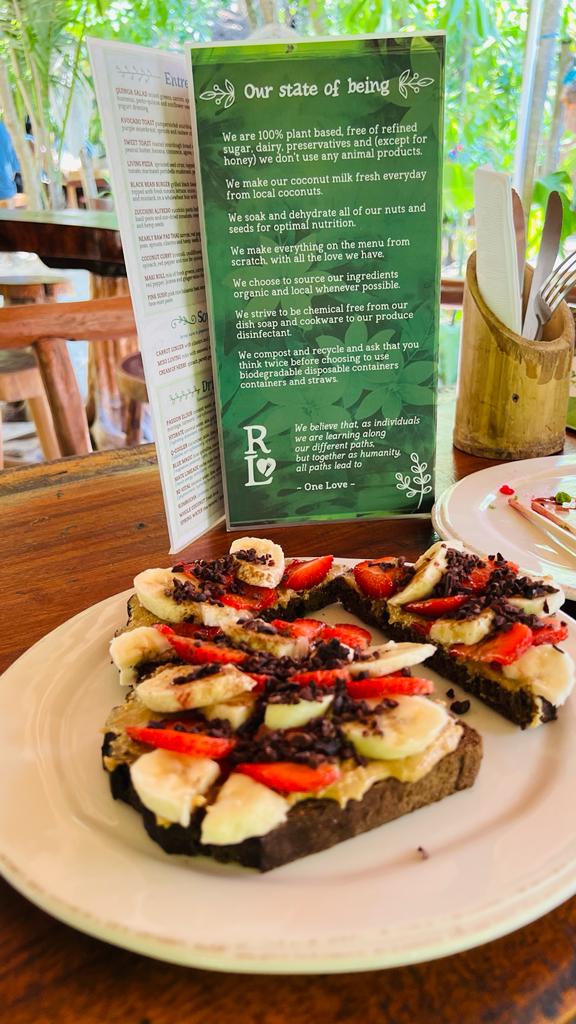
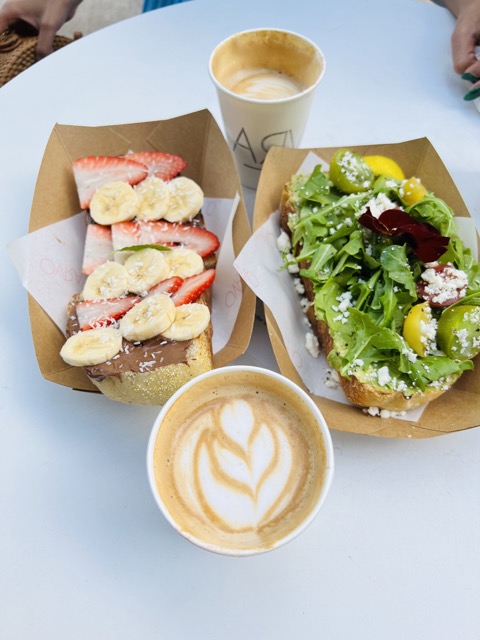
Anyway, after some walking and shopping, we got hungry and decided to stop at the Raw Love Cafe. I’d read so much about this cafe and their extensive plant-based menu that I just couldn’t miss this. And undoubtedly, they lived up to my expectations. Their menu had such unique items to choose from and everything we ordered was so delicious and fresh. I’d highly recommend making a stop here for a meal.
Living PizzaBanana Nutella ToastMaki Roll
We then head back after lunch to get some rest. The warm weather didn’t really help so we wanted to escape the heat and instead spend some time in the pool of our resort. And thats exactly what we did. We headed out again in the evening, a little before the sunset for dinner and to explore the nightlife that I had heard about so much.
If its your first time in Tulum, my top 5 recommendations for restaurants/bars you need to try in Tulum are,
You don’t have to do all of them and you could choose depending on their menu, prices and the whole vibe. We tried Funky Geisha and loved their food and drinks. As I mentioned before, Tulum has a great nightlife scene and every club here is so full of life that you’ll just not want to end the night. So set aside one evening to just soak in the nightlife and have a fun night.
Just writing about all this brings back fond memories from this trip. So you can only imagine what it would have been like saying goodbye. However, I am glad to have ended this trip on such good note and glad to have brought back all the memories and experiences.
Hope you enjoyed this itinerary! Let me know in the comments below.
For some helpful travel guides to the famous tourist spots in Mexico, refer to the below links,
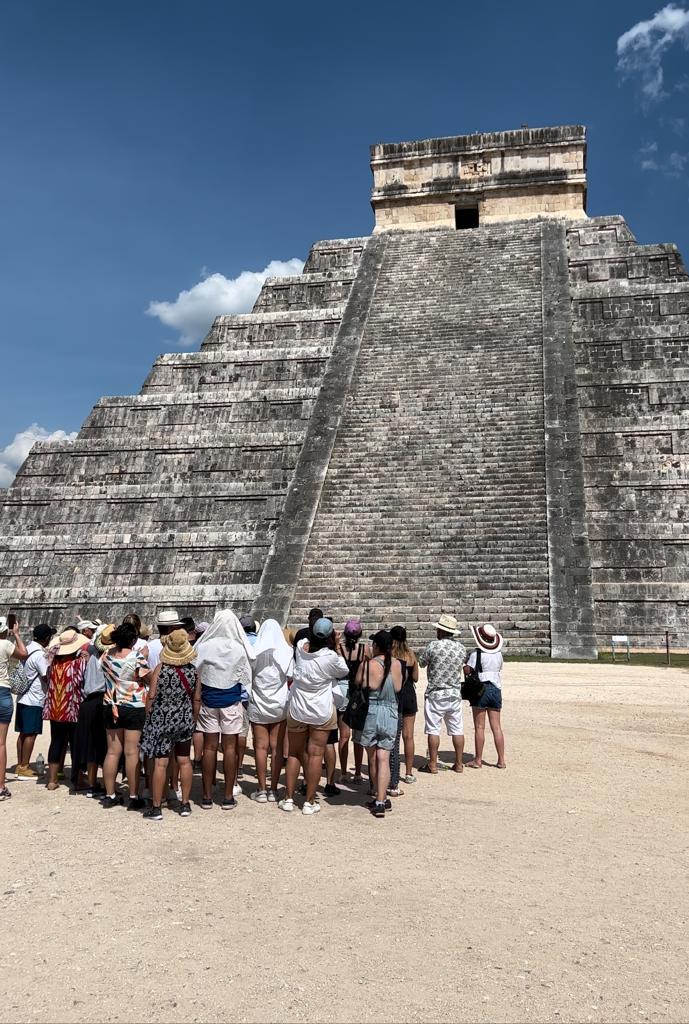
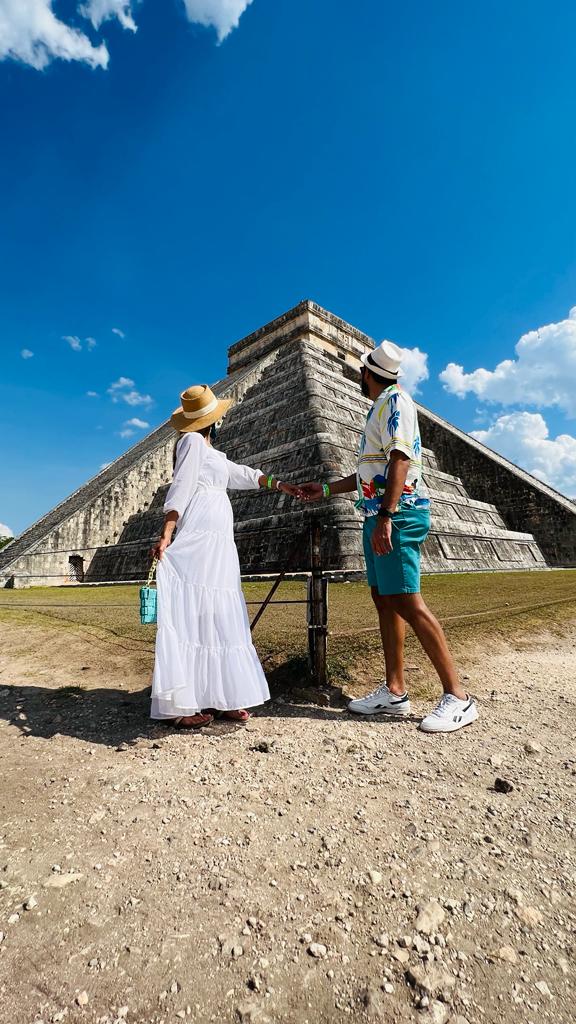
How does it feel to check things off your bucket list? I’ll tell you how I felt when we recently visited one of the seven wonders of the world – Chichen Itza. The feeling was so rewarding and I was completely awestruck. You know how they say that it’s one thing to see something in pictures but it’s a totally different experience seeing it in person. That’s how I felt when I stood in front of this famous Mayan pyramid and tried to absorb its overwhelming beauty. Chichen Itza had been on my bucket list for a while now and earlier this year when my husband and I decided to make a trip to Mexico, we made sure to include this as part of our itinerary.
We dedicated an entire day to make a trip to this wonder. But since this was the most awaited part of our trip, we made sure to research and plan this day as impeccably as possible. I read a couple of blogs online to ensure that we knew what it takes to visit and all the things we should keep in mind before going here. Believe me, this was a worthwhile effort on our part because had we not known all these small details, we might not have made the most of this experience.
So here I am again, sharing all the helpful tips with you so that it can help you make the most out of your trip. Even if you’re not planning to visit Chichen Itza, some of these tips are still general enough for you to know before planning any trip.
Go there early
The gates open at 8AM and they’re open until 5PM local time. Since most of the crowd starts flocking in during the day, its a good idea to get there before noon to make the most of your time here with less crowd. That’ll also help you avoid the deadly heat in the peak summer months. If not early, then try going in the late afternoon, mostly after 2PM which is when we went.
Take a guided tour for Chichen Itza
We booked a guided group tour that picked us up from our hotel in the morning. This tour also covered two more stops i.e. Cenote and Valladolid. And the guide we got was a local Mayan resident so we got a wealth of information and learned so much about the history of this beautiful place. Also, since we went in a group tour, it was fun to explore things as part of the group.
Explore all the spots
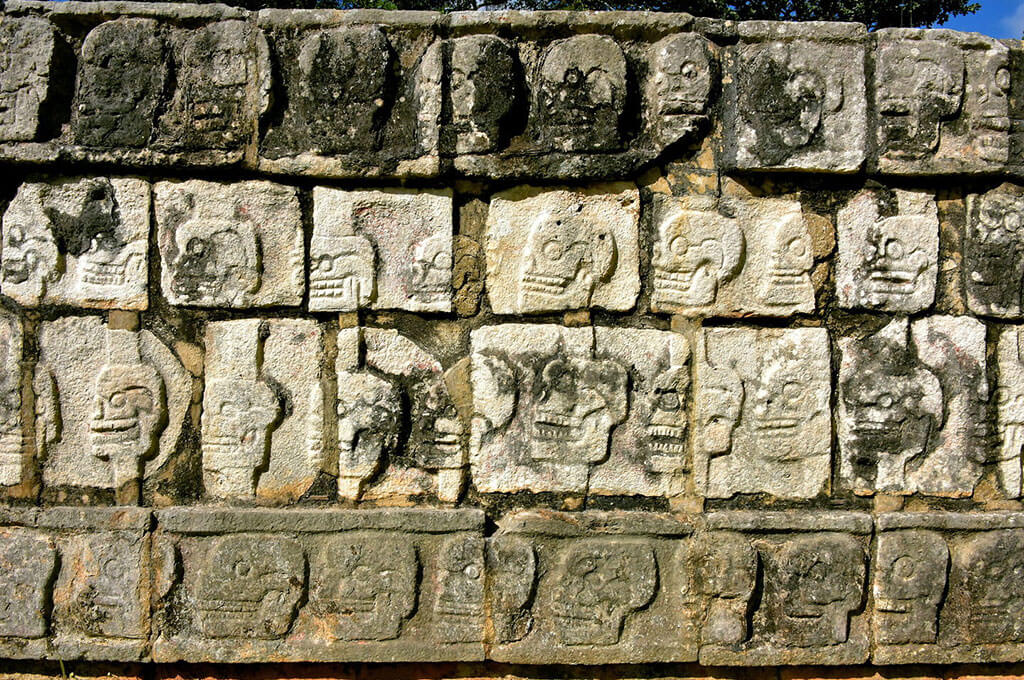
Apart from the Chichen Itza pyramid itself, there’s many other spots here that have a lot of historical significance and stories of their own. Some such spots worth covering are The Great Ball Court, The Skull Platform, The Temple of the Warriors and The Observatory. Our guide took us around all these spots and also narrated to us all the history and significance of these. It was so enlightening and fascinating to learn about the Mayan culture and their way of life.
The Platform of the Skulls
Carry sunglasses, hat and water
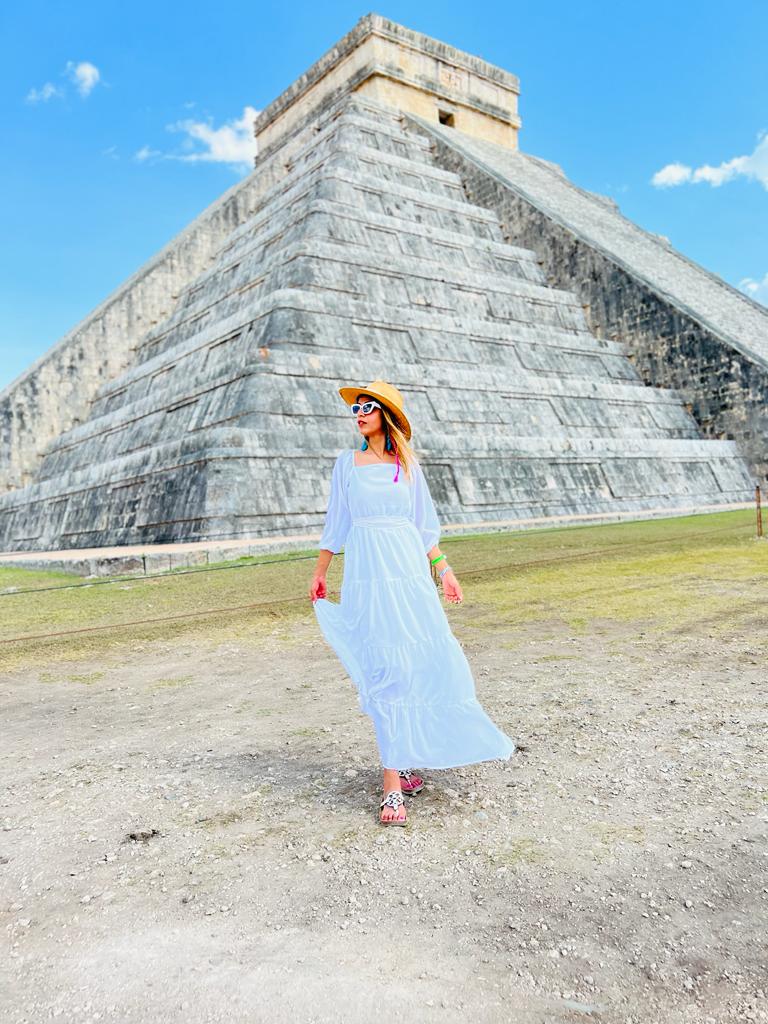
Chichen Itza has very warm weather for most of the year and there’s very little shade. There’s literally just a few trees here and there that will save you from the merciless heat. So be sure to carry sunglasses, sunscreen, a hat and a water bottle. In addition to this, make sure to wear comfortable clothes and sandals as you’ll have to walk around quite a bit. I chose to wear a flowy white maxi as it was very comfortable for me.
Pack a swimsuit
There’s many Cenotes around the Chichen Itza area that you’ll want to check out. The heat will also make you want to take that dip so be sure to pack a swimsuit.
Don’t bring your camera tripods
Camera tripods are not allowed so don’t carry them with you here. Professional photography and drones are also not allowed here.
Carry your passport for a stamp
Did you know that you can get a Chichen Itza stamp on your passport? Pretty cool, right? Sadly, we didn’t take our passports with us because none of the blogs I read mentioned this important tip so I am giving you a heads up that do not forget to take your passport with you. You wouldn’t want to miss this chance to collect a stamp for life.
Carry pesos
It’s easier to use pesos here and that’s what’s easily accepted here. Try to avoid using credit cards and have pesos handy with you. You’ll also need them to tip your guide if you hired one.
Carry snacks and drinks
There’s a few shops at the entrance that sell light refreshments, ice creams and snacks. But once you’re inside and touring around, there’s no place to buy all this stuff from. So make sure to carry whatever you think you’ll need for food and drinks. Its going to take you at least 2 hours to finish the tour so plan accordingly.
That’s it! As long as you follow all this, you’re on to a great tour. I promise that a visit to Chichen Itza will be worth all your time and worth all that heat in your face that’ll make you want to leave. So be sure to have lots of fun and take lots of pictures!
For other places to explore in Mexico, refer to the below links,
When I think of Mexico, I imagine myself chilling by the pool and sipping Margarita in a dreamy resort. In fact, that’s one of the reasons why my husband and I planned our trip to Mexico in the first place. We wanted a relaxing and luxurious getaway and given that Mexico has so much of that to offer, we decided to give it a try. Having said that, we didn’t really spend our entire trip just chilling in our resort. We did plan a few day trips here and there so we did our best to read up and be prepared on all the important things to keep in mind before our trip. So, here I’ll share an important travel guide for Mexico.
Whether you’re going to be spending most of your time in your resort or you plan to take the off beaten paths, there’s a few things you always need to keep in mind when in this country. While google has a lot of helpful tips and you’ll find many blogs around this topic, I want to weigh in on all of that based on my personal experience. So let’s dive right in!
Is it safe to travel to Mexico?
A big question on my mind when I was planning this trip was if it’s safe to travel to Mexico. And now that I have been there, I can tell you confidently that it’s a completely safe place for tourists. Also, we were mostly in the hotel zone in Cancun which is the safest spot to be in. But we did do a few day trips around the city and felt absolutely safe for the most part. However, we did get a few tips from the locals on always being aware of our surroundings, not flashing our credit cards or cash in public, not engaging in any conversations with strangers until spoken to and not going off the beaten paths in the night. As long as you follow these tips, you should be totally safe.
Where to stay?
When in Cancun, prefer to book your resort in the hotel zone because like I said, that’s the safest place to be in. It is also closest to the nightclubs that I am sure you will plan on checking out. Also, plan on booking an all-inclusive resort to make the most of your experience. Believe me, it was a true retreat! Here’s the one we stayed in and I would totally recommend it.
How to travel around?
For your transit from airport to hotel and back, most resorts provide shuttles for free. However, we booked a private taxi because our resort was charging us an additional fee for an airport shuttle. And since the fare was similar for the shuttle and a private taxi, we chose to go with the private taxi option. Private taxis are a big mode of transport in and around Cancun so as long as you book with a company that has good ratings and reviews, you should be fine. But be sure to confirm the rates in advance to avoid being overcharged later.
What currency to use?
In terms of most accepted currencies, both USD and Pesos are widely accepted so you should be fine using USD. However, we did take Pesos with us as we had a few excursions planned where it was better to pay in cash, like Chichen Itza. Also, we didn’t want to use our credit card everywhere so we limited its use to only within our resort and good restaurants. For all local activities, we carried Pesos.
Should you book group tours or private tours?
One big mistake we made when booking our day trip to Chichen Itza was signing up for a big group tour. We thought it would be fun to travel in a group and would also be safer. However, since our group was around 15-20 people, it took longer than normal tours in picking up and dropping off everyone to their hotels. So, I would highly recommend you doing a private tour for all your day trips or going with a smaller group. But I’d definitely say that make sure you do a guided tour to get all the rich history of this country.
What to pack for Mexico?
We went in April so weather wise, it was super hot. The heat was scorching which made it harder for us to do outdoor activities. Having said that, Mexico is always hot from what I have heard so based on my experience, I would highly recommend you carrying your sunscreen, hat, sunglasses and water bottle. Especially, when you know that you’re going to be out in the sun a lot. For more information on how to dress, what to pack, what not to pack etc., read my blog here.
Do you need a travel visa?
In terms of travel visa, you do not need to pre-apply for a visa as long as you have a valid passport that doesn’t expire within 6 months of your arrival date in Mexico. My husband and I are on H-1B visas and we currently reside in the United States. So for us, the process was fairly simple. We didn’t have to apply for the visa in advance and we just got it on arrival. The immigration process was also fairly smooth. Just make sure to keep your passport safe at all times because that’s going to be your key to in and out of the country.
Do you need a travel insurance?
I had read several articles about it when planning the trip and I found mixed reviews. So it’s not mandatory to have travel insurance when traveling to Mexico. But if you’re planning a longer trip and you think you’ll feel safer having insurance, then you can always get one. We were there for only 5 days so we didn’t feel the need for it.
Here’s a few more blogs to read through if you’re planning a trip to Mexico,
Ahh – Hawaii!!! A place I fell in love with instantly and how could I not? It just mesmerized me with its beauty and brought a sense of serenity that no other place has offered so far.
Oahu is truly a paradise for all those that love adventure and nature. It is known for its beautiful landscapes, pristine beaches, hip streets and pineapples. I have visited three Hawaiian islands so far (Maui, Kauai and Oahu) and I have to say that Oahu is my favorite because it has so much to offer. This island is also home to Hawaii’s capital city, Honolulu.
Although we were here for 5 days, you could plan for longer because there’s just so much to do that I promise you won’t get bored. So here’s a curated Oahu itinerary for all those planning a getaway to this paradise soon. Also, you don’t have to follow this itinerary to the tee and you can always change around any of the days as you see fit. I will also try to do my best to link the costs associated with all these experiences to help you plan better.
An important question before we get into the itinerary is – How to get around the island? Because we had a lot planned and we wanted to cover all the key spots on the island in our 5-day trip, we rented a car for the entire length of our trip and driving around the island was fairly easy. The island is pretty spread out so I am sure you’d want an easy way to get around so having a rental car will be a lifesaver.
Now, here goes the itinerary and I hope you find it useful as you plan your trip.
Day 1: Pearl Harbor, Ho’omaluhia Botanical Garden and Byodo-in temple
9:00 AM – Breakfast at Arvo Cafe || $40 for two people
We started our day with a yummy and fulfilling breakfast at the Arvo cafe. Their loaded avocado toast and Nutella toast are something you cannot miss and their coffees are delicious.
11:00 AM – Pearl Harbor || Free entrance
We then made our way to Pearl Harbor, which is a symbolic tourist attraction on this island. There is no entrance fee to tour the garden and the museum but if you want to visit the Ford island then you need one. We did not book a tour guide and did a self guided tour but if you really want an organized and educational experience, then booking a tour is a good idea.
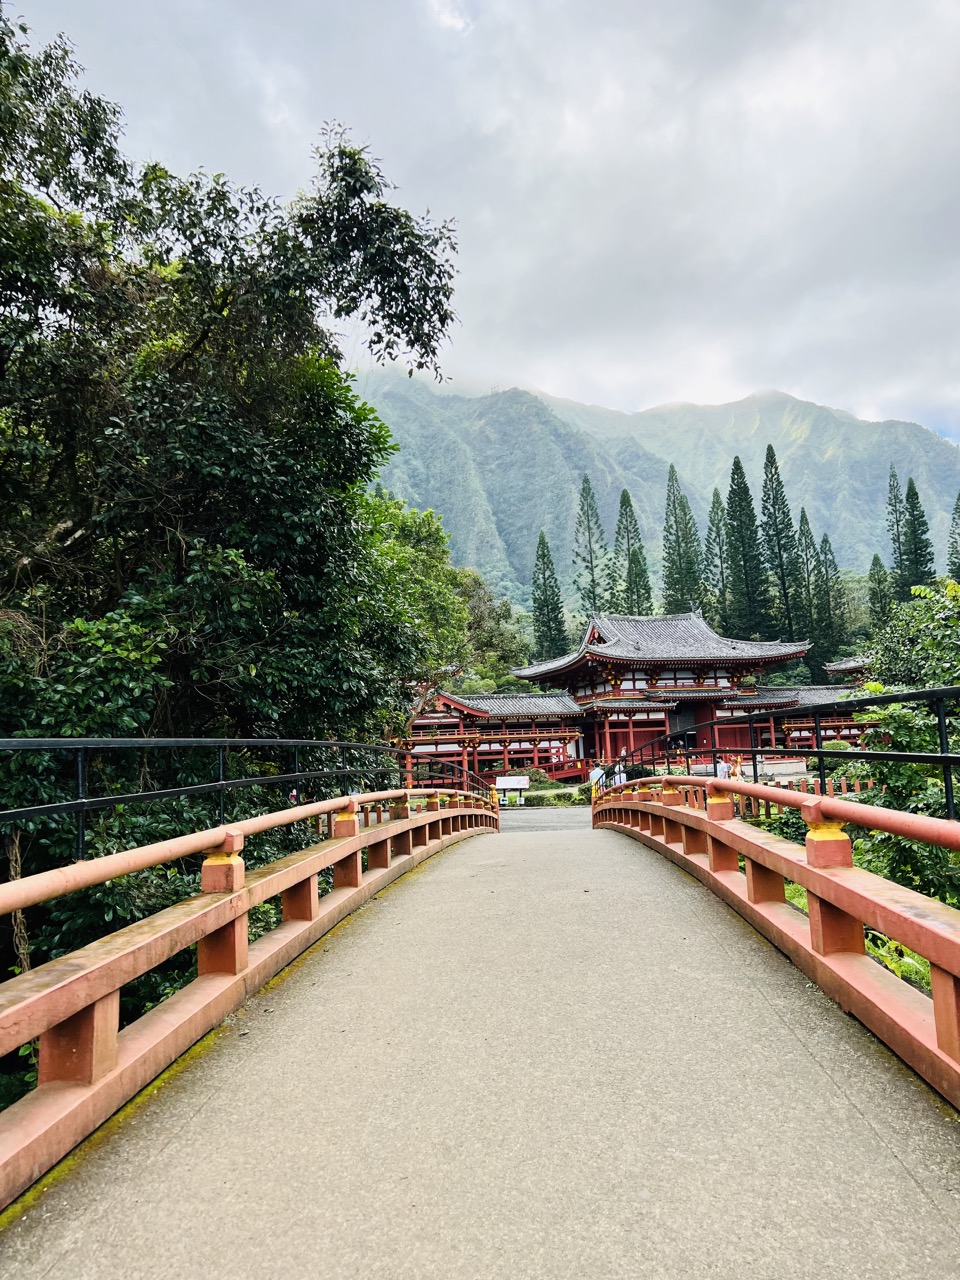
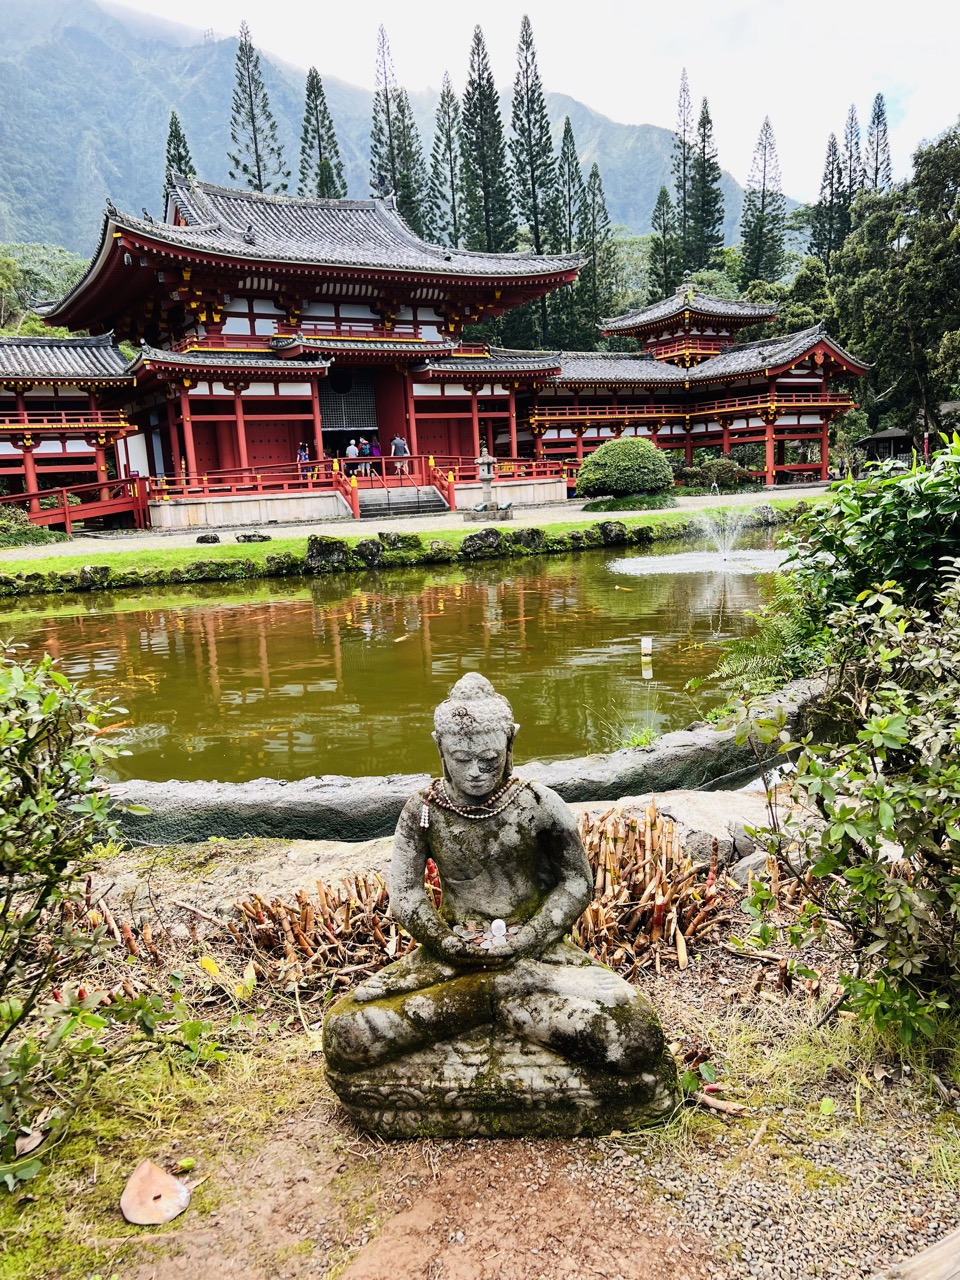
3:00 PM – Byodo-In Temple || $5 per person
We then stopped for lunch at Build Your Ramen and headed to The Byodo-In Temple. I have always been fascinated by Buddhist temples as I find a different sense of peace and calmness here. And since it was on our way to the Ho’omaluhia Botanical Garden, we decided to stop here first because this temple closes at 4:30 pm on weekdays. So be sure to plan accordingly. As you enter this temple, you’ll see beautiful manicured gardens and a lovely pond in the center. The entry fee is only $5 per person so it’s worth a try.
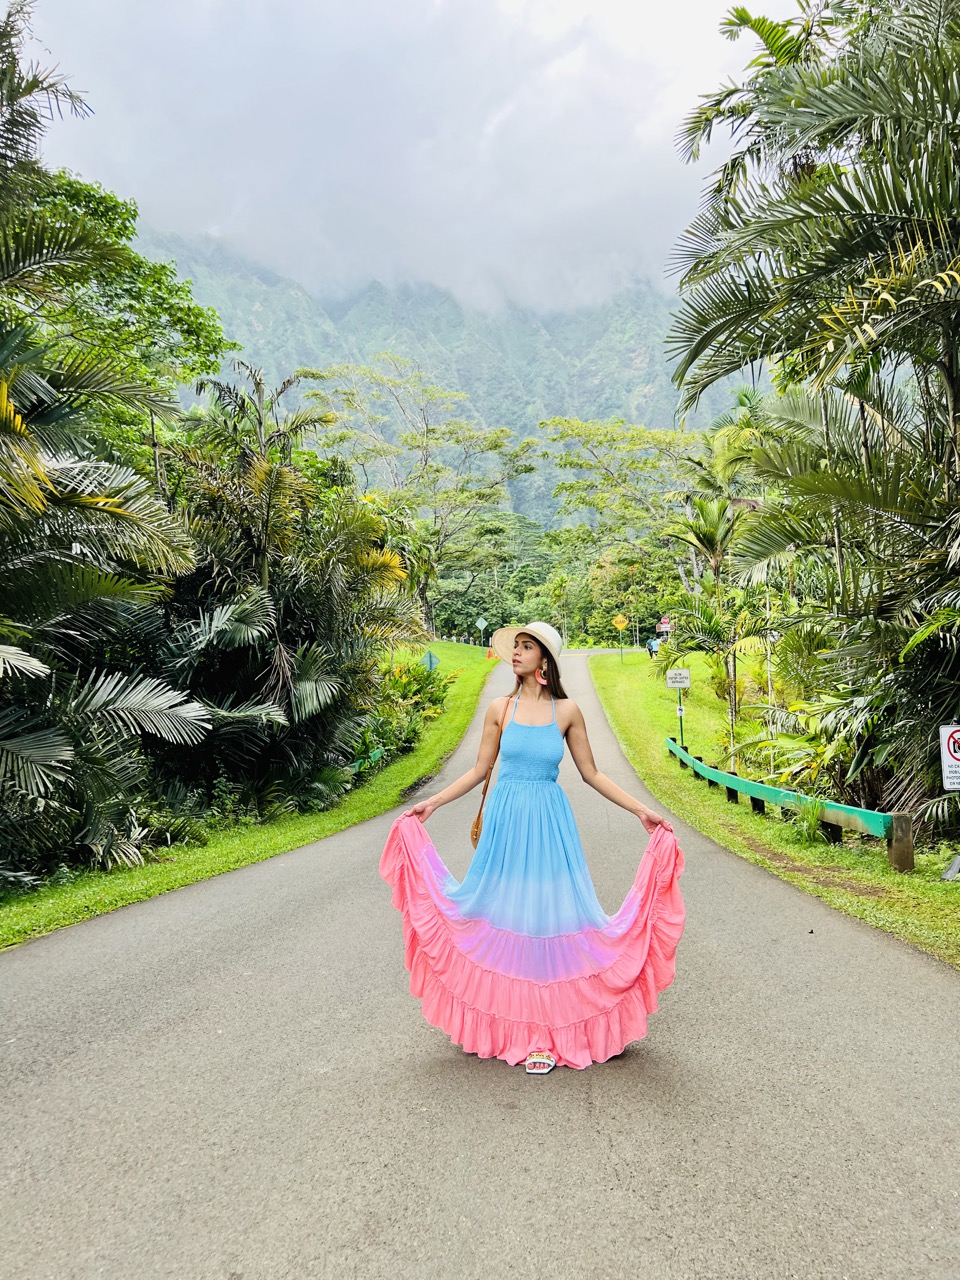
Our final stop for the day was the famous Ho’omaluhia Botanical Garden. Our drive into the garden was magical, as we passed through lots of flora and fauna. It’s lush and huge. Also, makes a perfect spot for your Instagram pictures. There’s also a beautiful lake and a few lookout points to not miss.
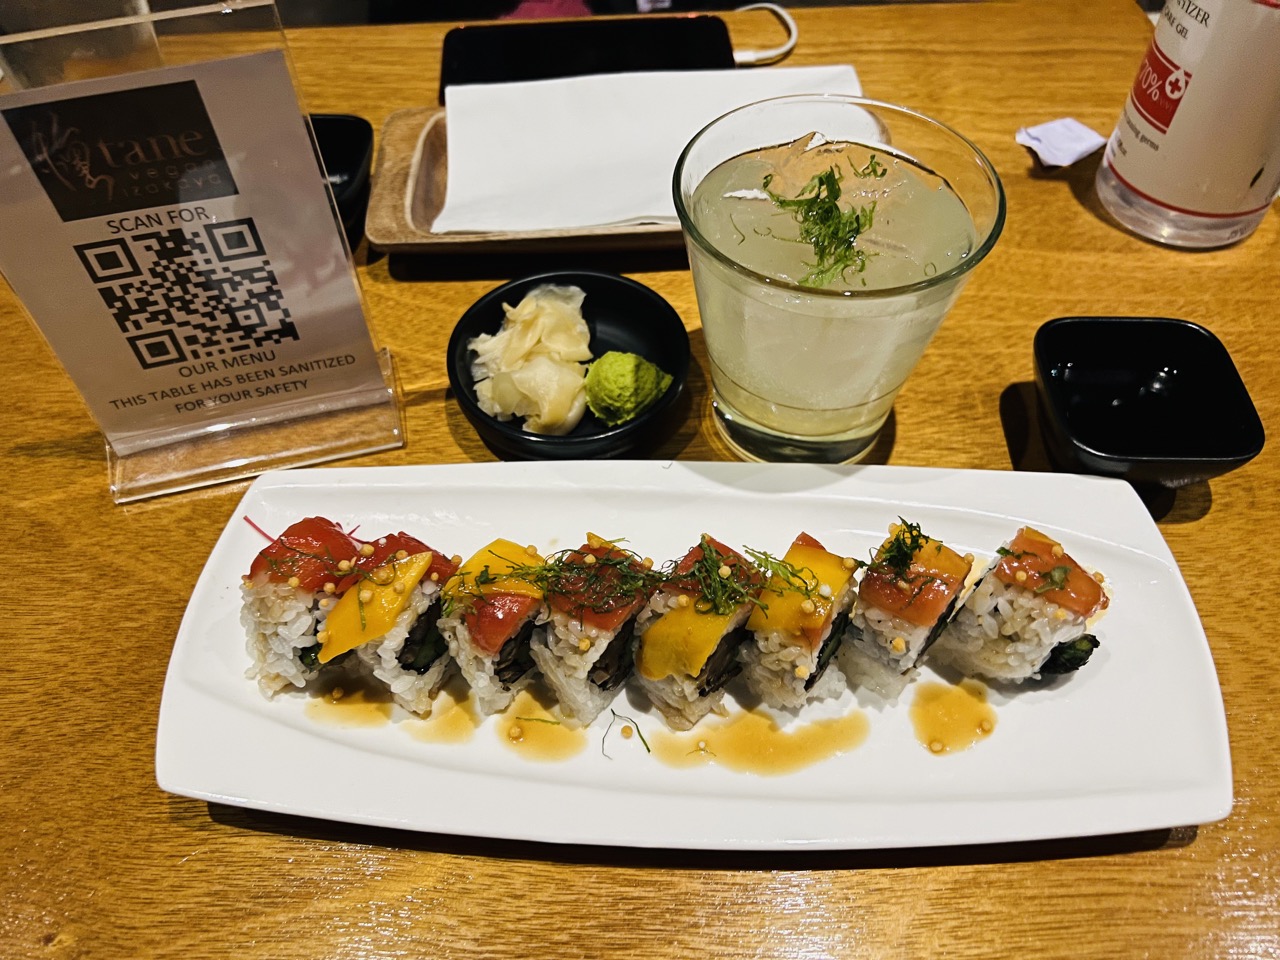
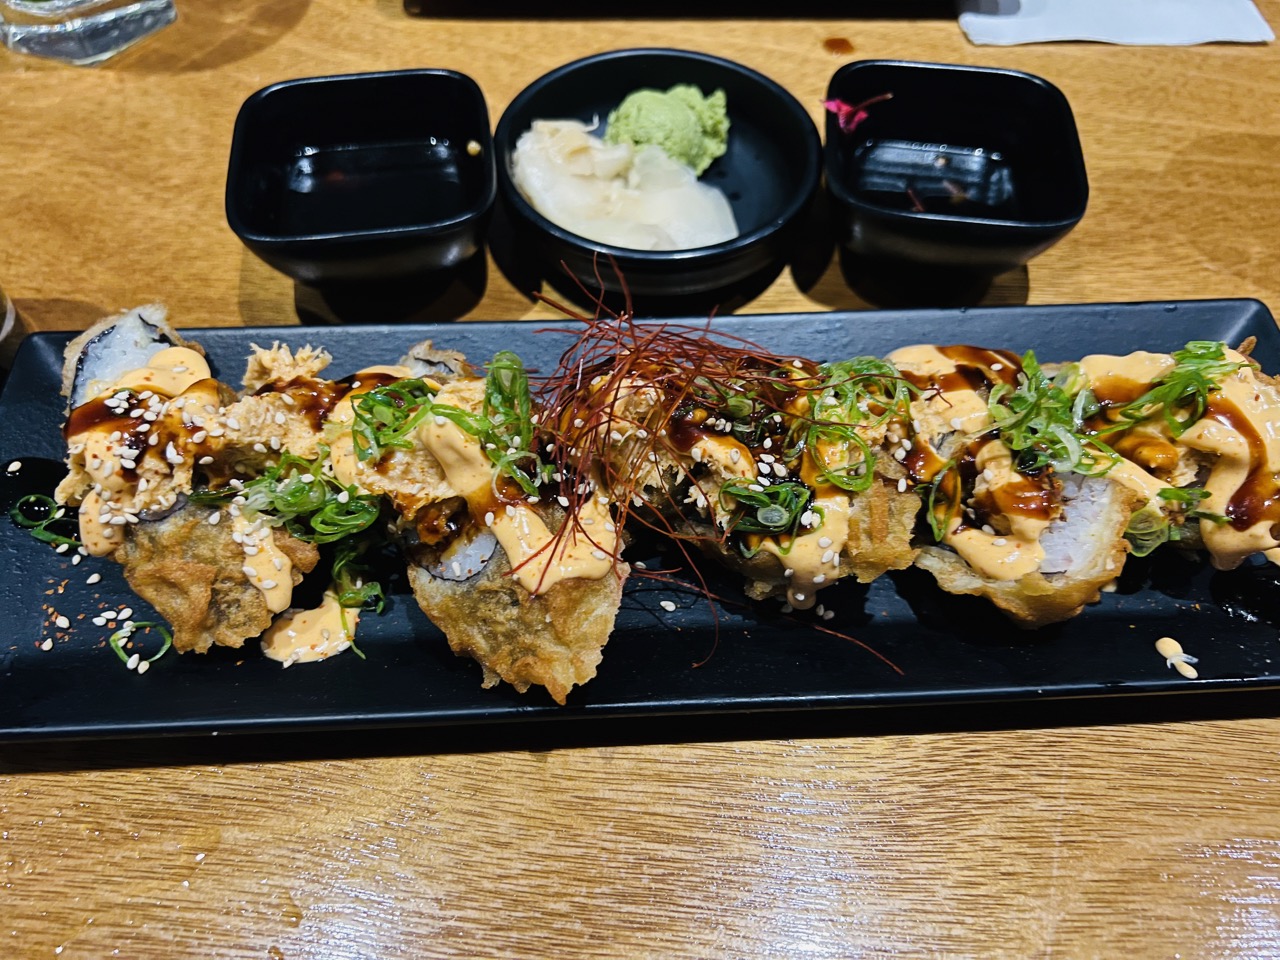
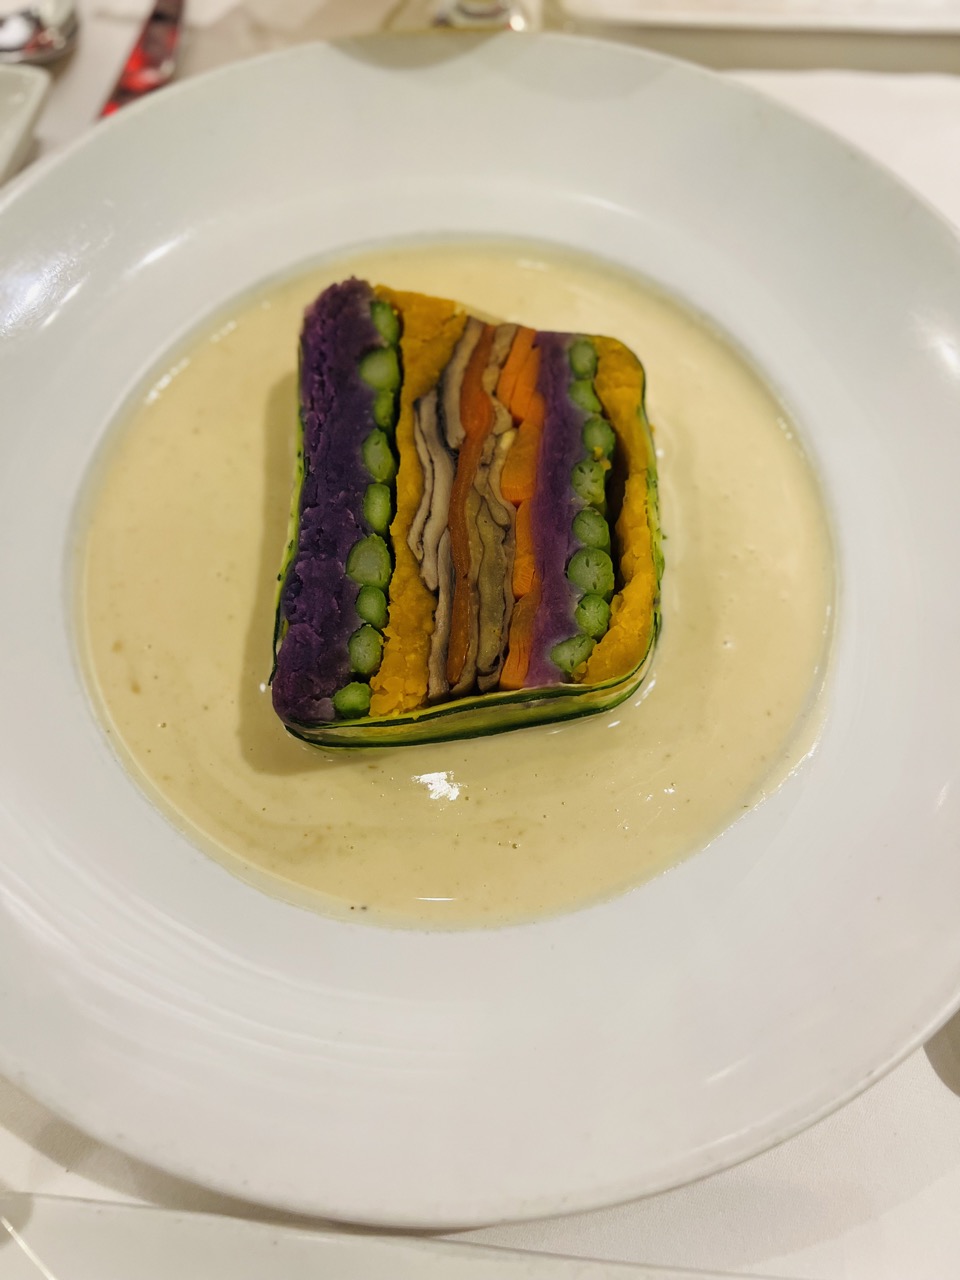
8:00 PM – Dinner at Tane Vegan Izakaya || $50 for two people
We then headed back into the town and our dinner reservation was at Tane Vegan Izakaya. We chose this place not just because we’re vegetarian, but also because they have an extensive and a very unique vegan menu that you will absolutely not regret trying. I know, I know! You’re going to say who eats vegetarian food on a vacation when you have all the fresh and amazing seafood to try? Well, trust me and go here. You will thank me later!
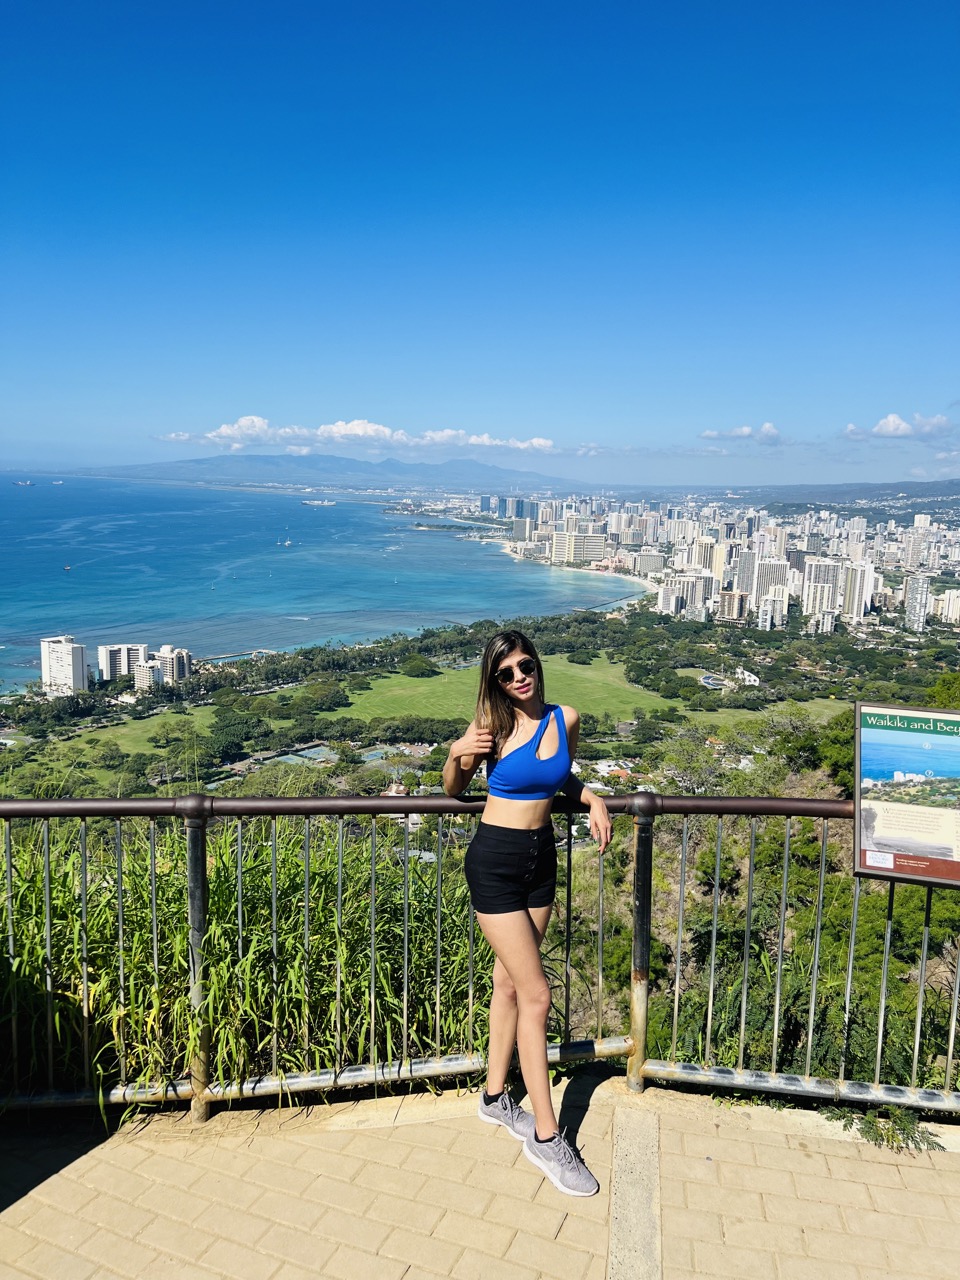
Day 2: Diamond Head Hike and Waikiki Beach
If you ask me the best way to explore the natural landscape of a place, I’d say it’s hiking. And if the idea of climbing a Hawaiian volcanic crater sounds exciting to you, then you have to hike the Diamond Head Trail. Nothing will be able to beat the panoramic view of the island that you’ll get once you reach the summit so do me a favor and add this to your itinerary.
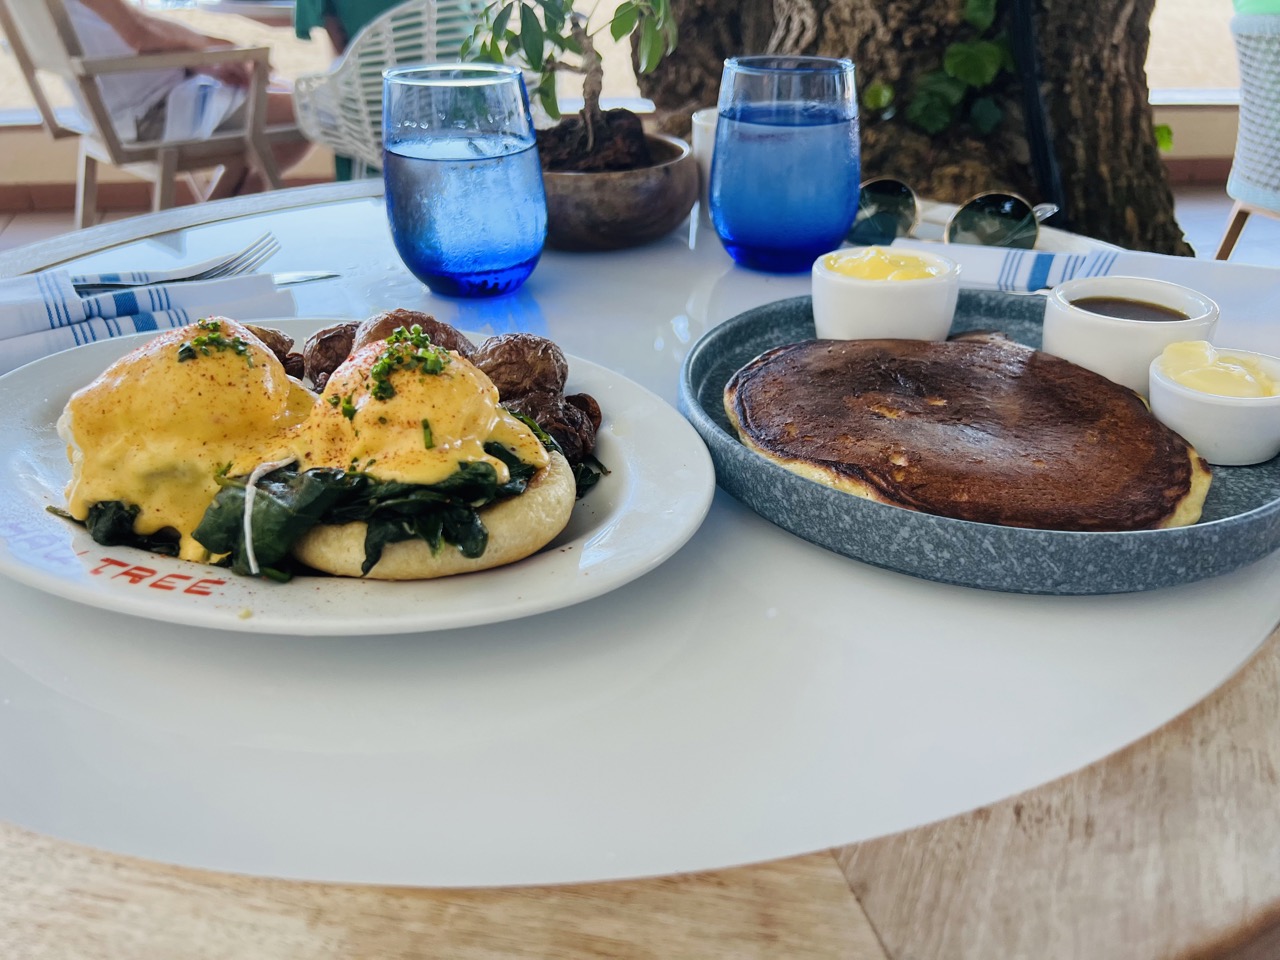
9:00 AM – Breakfast at Hau Tree || $60-$70 for two people
We started our day with breakfast at the Hau Tree restaurant. The reason I chose this place was because it was very close to the Diamond Head Trailhead and had amazing views of the ocean. The food was delicious and their service was fast. We tried the Spinach Benedict and Lemon Ricotta Pancakes and both were great.
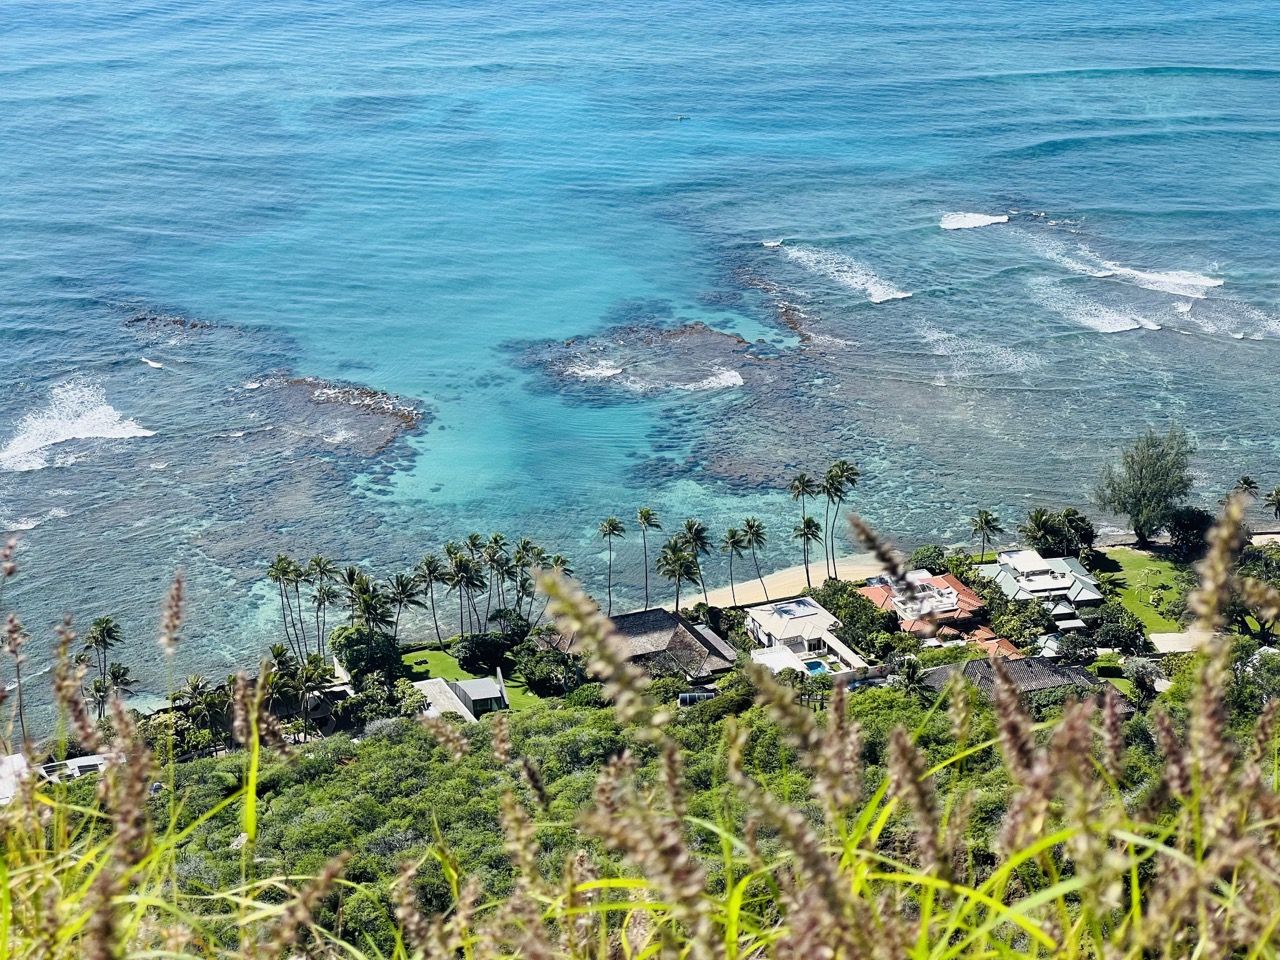
11:00 AM – Diamond Head Trail || $10 for parking inside the crater
We then went straight to the Diamond Head Trailhead and started our hike. The hike is a combination of rocky and uneven paths, narrow trails and tunnels. It can easily take up 2-3 hours but once you get to the top, the panoramic views of the island are breathtaking. Once we got back to the start of the trailhead after finishing our hike, we grabbed coconut water from a street vendor which was much needed after all that heat and sweat.
3:00 PM – Lunch at Da Cove Health Bar and Cafe || $30-$40 for two people
Post lunch, we headed to the Waikiki beach to catch the sunset.
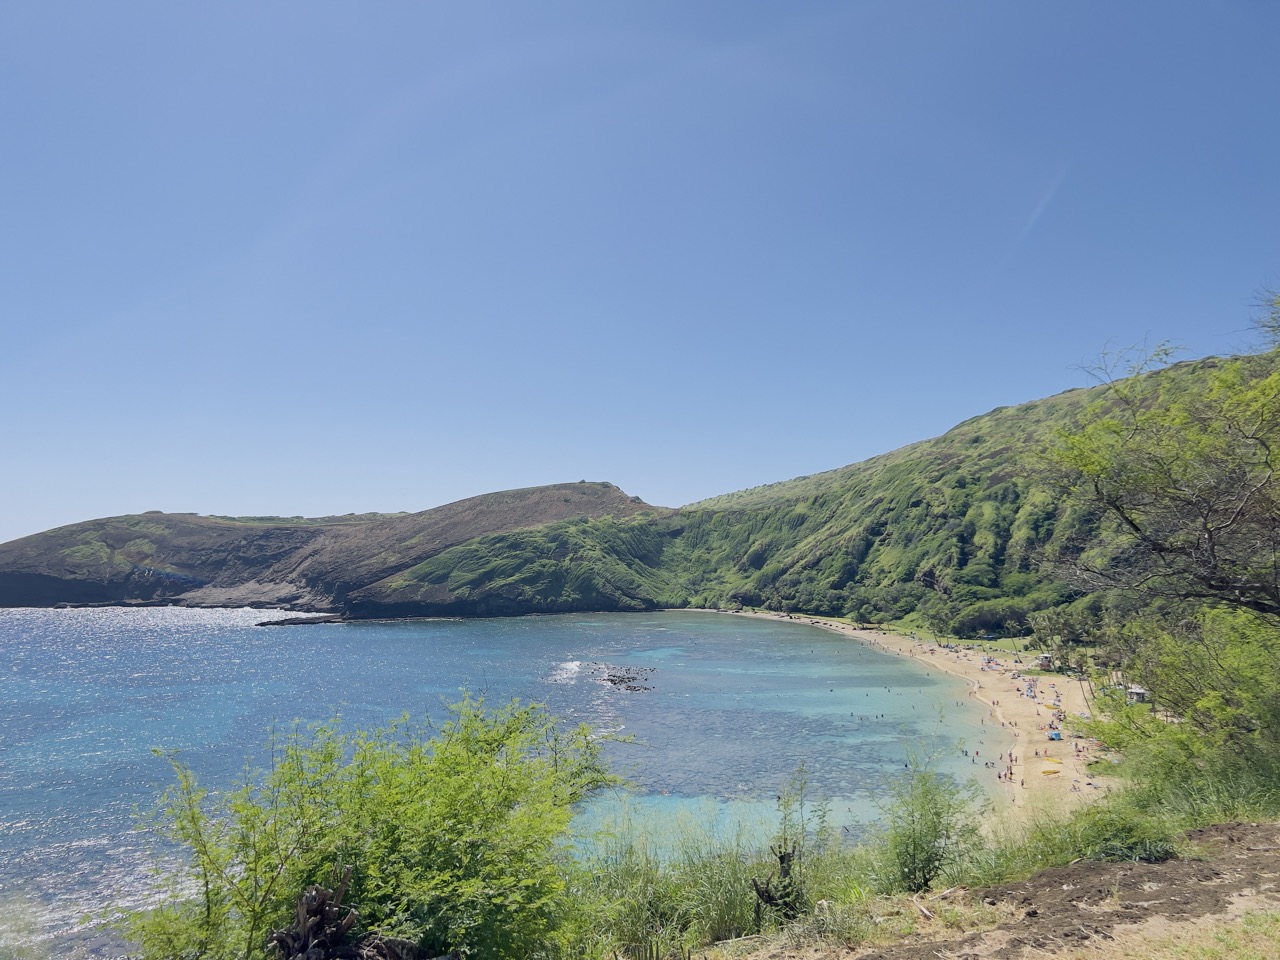
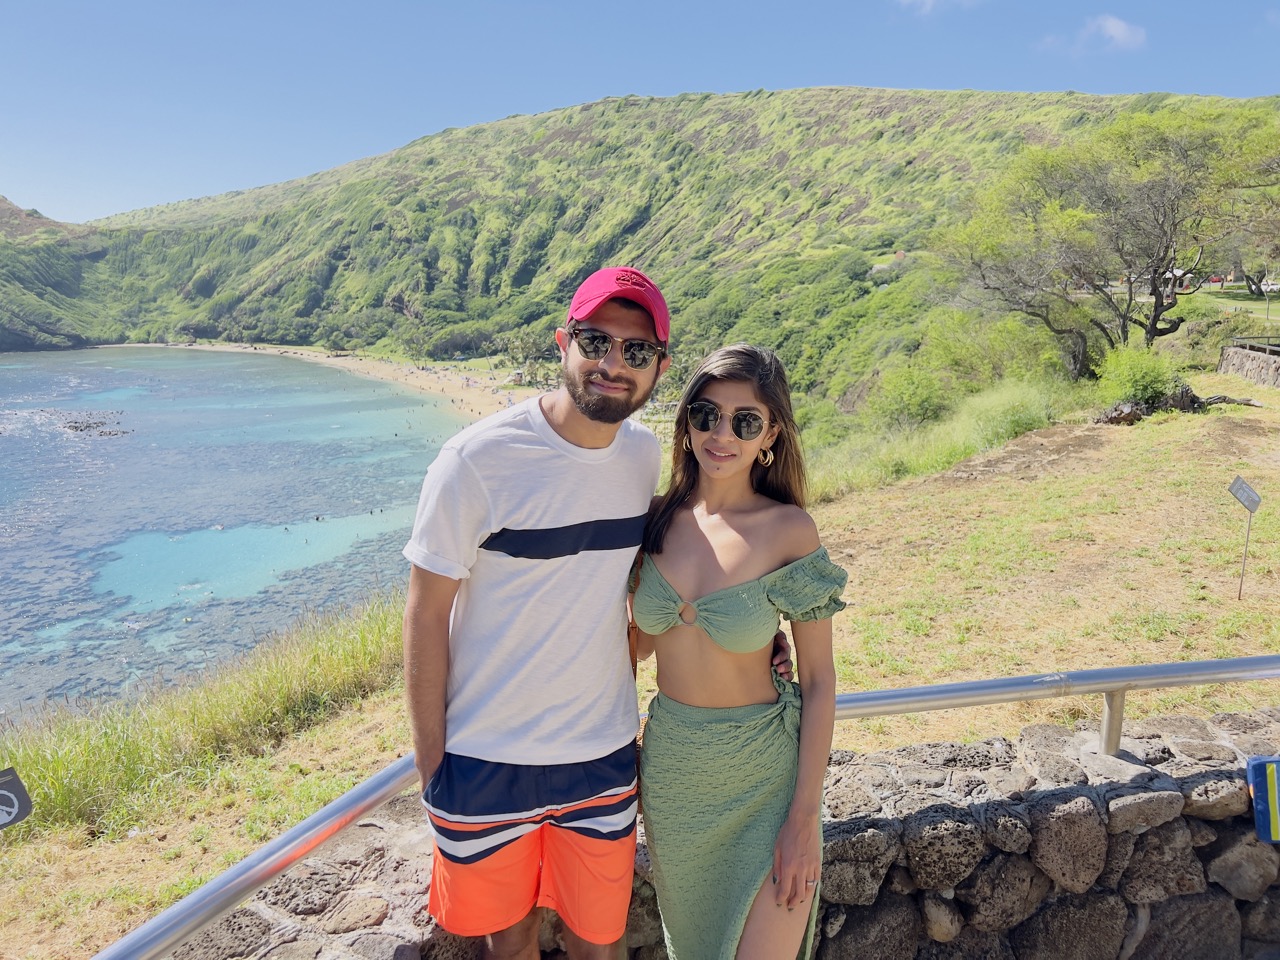
Day 3: Hanauma Bay, Makapu’u Tide Pools & Blowhole, Lanai Lookout and China Wall
8:00 AM – Breakfast at Eggs ‘n Things || $30-$40 for two people
Day 3 started with breakfast at Eggs ‘n Things where we tried the Acai Fresh Fruit Waffle and Veggie Omelet.
9:30 AM – Hanauma Bay || $25 per person
Our first stop from there was Hanauma Bay. An important tip for visiting Hanauma Bay is that you need to reserve your spot here as soon as the reservation opens for the day you’re planning to visit. This is because this place is a very famous tourist attraction so it gets booked pretty fast. One blog I read when I was planning this visit said that the tickets usually get sold out within the first 10-15 minutes of opening. The reservation slots open at 7AM local time so mark it on your calendar and set a reminder to not miss it. We booked it through here.
We snorkeled in the beautiful waters at the Bay and the experience was so surreal. Although we have experienced better marine life and coral reefs at other islands, this one was definitely worth an experience. An important thing to note if you’re planning to snorkel is that this place does not rent equipment so make sure you carry all your gear.
After spending around 3-4 hours here, we made our way to the Makapu’u Tide Pools & Blowhole. While we had a few spots marked on the way that we wanted to stop at, we didn’t restrict ourselves to just those few. There were many lookout points along the drive so we stopped at pretty much every point as we didn’t want to miss the stunning views that each point offered.
We also visited the Makapu‘u Point Lighthouse, Halona Blowhole lookout and beach cove, Lanai lookout and China walls. If you don’t have that much time, you can just visit the Makapu’u Tide Pools & Blowhole and skip the Halona blowout as you will pretty much get the same experience.
7:00 PM – Dinner at Chef Chai || $80-$100 for two people
Finally, our day came to an end with a delicious meal at Chef Chai. One thing my husband and I loved about Oahu is that there’s plenty of great restaurants with extensive and unique menus for vegan and vegetarian food. So we mostly tried the vegan places every day for dinner and we loved them all.
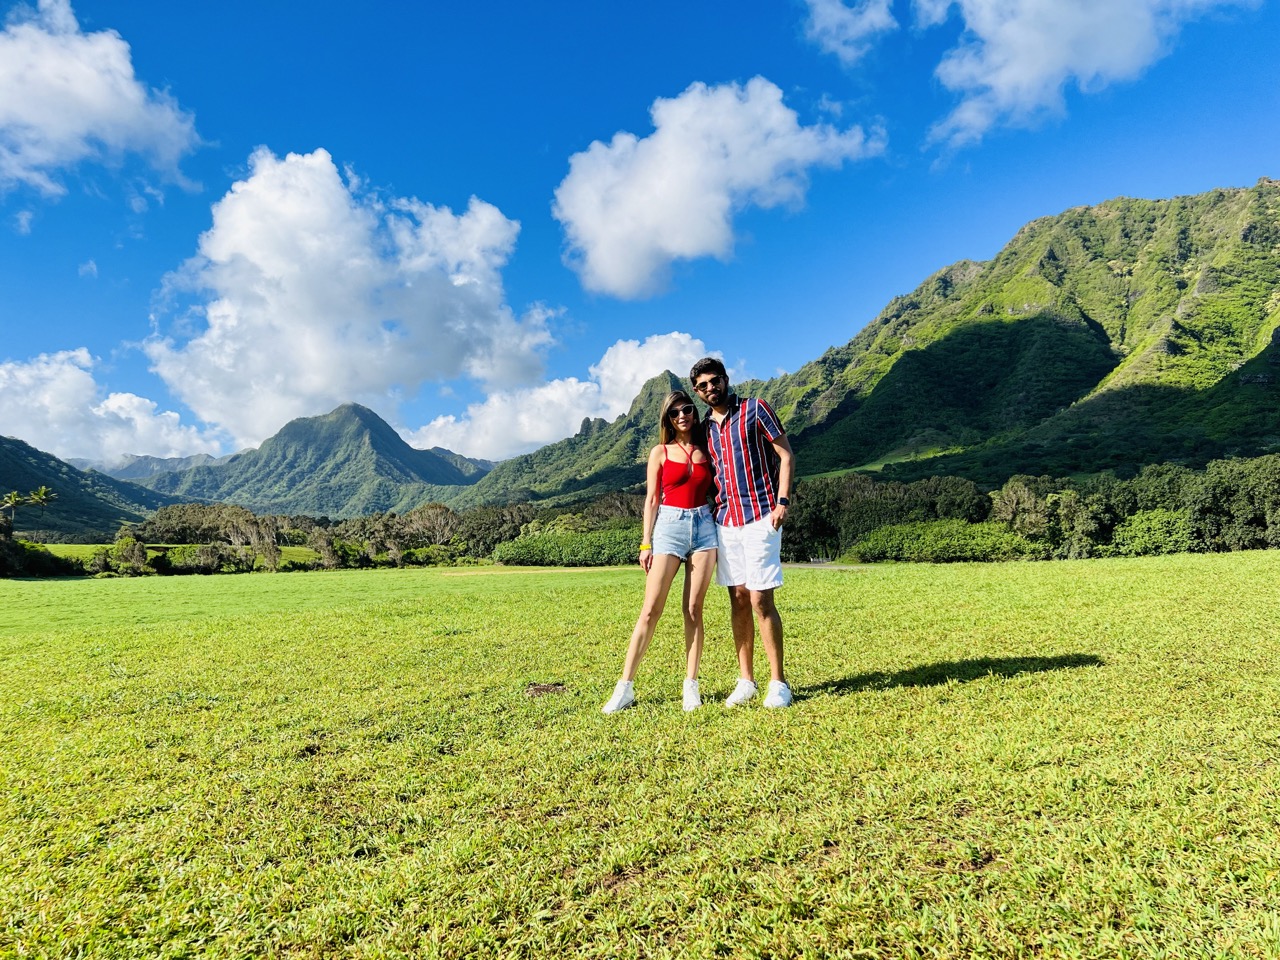
Day 4: Kualoa Ranch, Kahuku Point, Shark’s cove and Old Town Haleiwa
9:00 AM – Kualoa Ranch ATV Tour || $150 per person
During our entire trip, this was the day I was looking forward to the most. Being a die-hard Jurassic fan, I was quite excited to witness the real location where this iconic movie series was filmed. We did what most tourists do, that is drive an ATV through the ranch. Ours was a 2-hour ATV Raptor experience and it took us through the scenic valleys. The ranch is vast and we drove through trails, mud and streams. We also stopped to see the bunkers and the cages that were used in the movie. I simply cannot explain in words how incredible the whole experience was. If you’re planning to visit this ranch, I would recommend driving an ATV as that’s the best experience you can get.
And an important tip when you plan this – Carry headscarves and sunglasses or you will end up getting dust all over your face and in your eyes. Read my blog on Hawaii outfit ideas to get some outfit inspiration.
2:00 PM – Kahuku Point and Shark’s Cove || Free entrance
By the time we got back, it was lunch time so we stopped at the nearby Kahuku farms and they had some decent lunch options. We then made our way to Kahuku point and Shark’s cove.
4:00 PM – Old Town of Haleiwa
Our last stop for the day was the beautiful and quaint Old Town of Haleiwa. This town had a very historic and laid back vibe, and the ambience was very country style. This town is pretty small and there’s just one street that you can actually check out. We leisurely strolled through the street and stopped at the Nalu health barand café for some beet juice which was quite refreshing given the heat during the day.
8:00 PM – Dinner at TBD by Vikram Garg || $60-$80 for two people
Our final destination was dinner at TBD by Vikram Garg. This place has a fancy ambience and that makes it a perfect spot for a romantic dinner date. I was also amazed at their extensive menu. Their craft cocktails were so good and just the right level of alcohol. And the food menu was so intricate and everything was quite fresh. It was just the right way to end our exhausting and fun filled day.
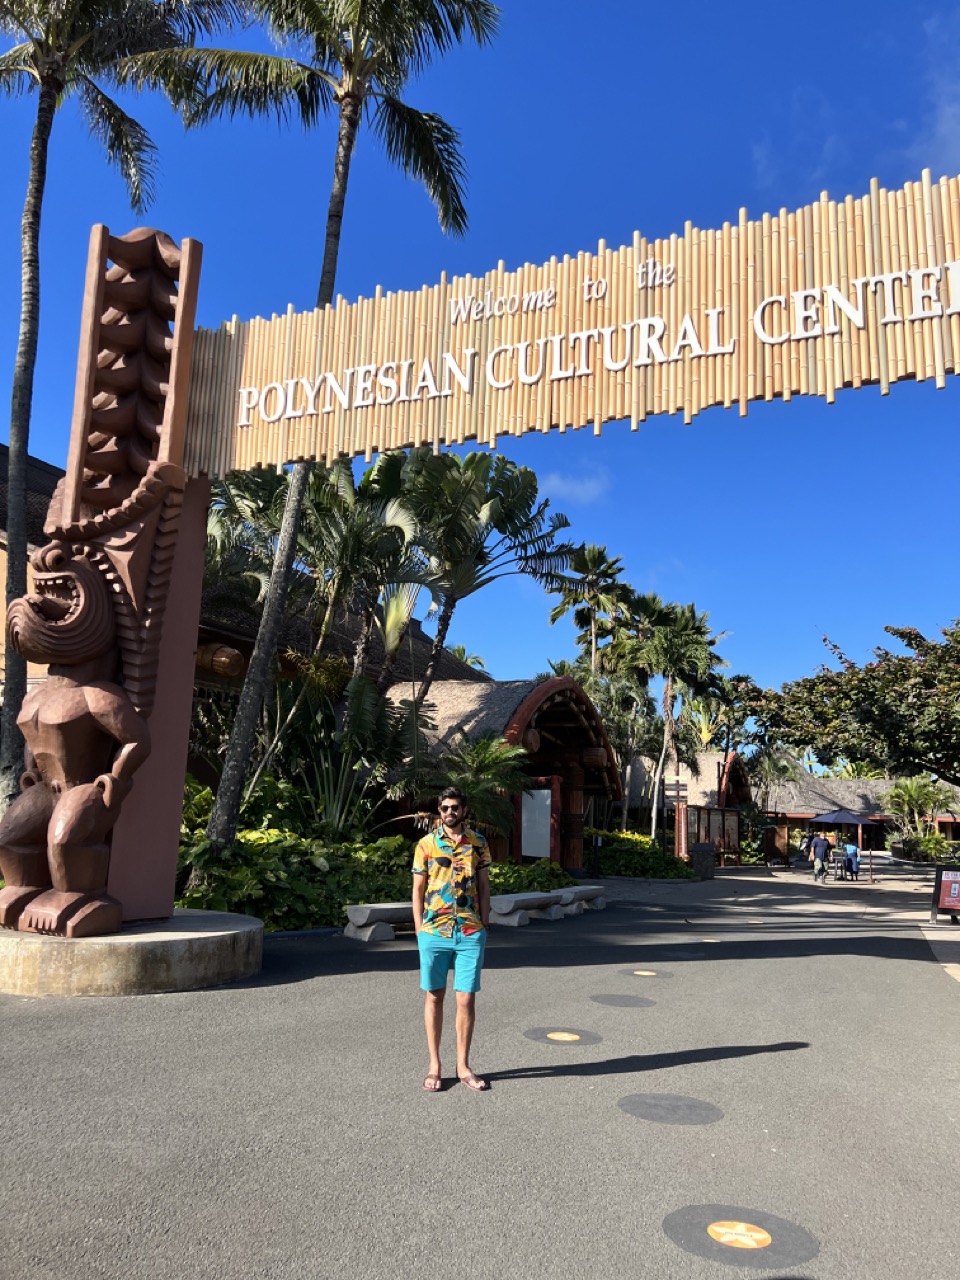
Day 5: Polynesian Cultural Center
9:00 AM – Kualoa Ranch ATV Tour || $120 per person for islands access and Ha:Breath of Life show
We didn’t plan a whole lot for our last day on this island since we wanted to keep it light and not tire ourselves before the trip back home. So we started our day with the amazing Kona coffee because we loved it so much. We then made our way to the Polynesian Cultural Center to learn more about the history of the island and the culture. This place absolutely has to be on your Oahu itinerary. One important tip when planning a visit here is that try to go as early as you can. This cultural center is massive and it features 6 villages to explore so you will need plenty of time here.
I don’t think I can pick the best village because all of them were so unique in their own ways and had a lot of great cultural experiences to offer. Each village also hosts some of their cultural activities that you can take part in. So we spent a great deal of time exploring each village and interacting with the locals. We ended our day here with the incredible “Ha: Breath of Life” show. It’s one of the most popular shows and we had a great experience.
I hope this helped you plan your Oahu itinerary and gave you some more clarity on what you want to do. Let me know your thoughts in the comments below!